
How To
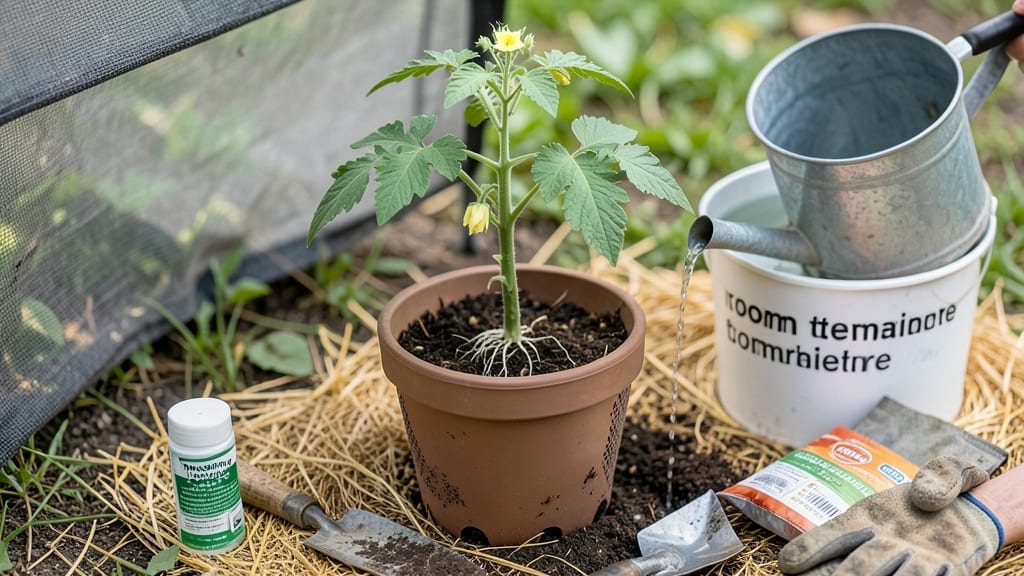
Avoid transplant shock by preparing plants properly—this is where most gardeners fail. 🌱 The key lies in gradual adjustments and careful handling before, during, and after moving plants to their new home. Skipping these steps often results in wilted, struggling plants that never fully recover.
Start by hardening off seedlings for 7-10 days before transplanting, gradually exposing them to outdoor conditions. Dig up plants with care, keeping roots intact and moist, and plant them at the same depth as before.
Water thoroughly after transplanting, and provide shade for the first few days to reduce stress on the roots.
📚 In This Guide
- What you need
- Instructions
- Tips and common mistakes
- Wrapping up and next steps
What you need
- ● Transplanting container or pot: Choose a container with drainage holes, sized 1-2 inches larger in diameter than the plant’s current root ball.
- ● High-quality potting mix: Use a well-draining, sterile mix (e.g., 60% peat moss, 30% perlite, 10% compost). Avoid garden soil—it compacts and suffocates roots!
- ● Root stimulator or fungicide: A liquid rooting hormone (e.g., Clonex or SeaGrow) or a fungicide (e.g., Mycorrhizal inoculant) to prevent disease and boost recovery.
- ● Watering can or spray bottle: With a fine rose nozzle for gentle hydration (avoid heavy streams that disrupt roots).
- ● Pruning shears or sharp knife: Sterilized with rubbing alcohol to trim damaged roots or stems if needed.
- ○ Mulch (optional but helpful): Lightweight options like coco coir or straw to retain moisture and protect roots.
- ● Stake or support (for top-heavy plants): A bamboo stake or spiral tie to stabilize plants during recovery.
- ● Slow-release fertilizer: A balanced 10-10-10 or organic option (e.g., worm castings) to nourish roots post-transplant.
- ● Shade cloth (30-50% coverage): To protect delicate plants from direct sunlight for the first 1-2 weeks.
- ● Humidity dome or plastic bag: For tender plants like succulents or seedlings to retain moisture.
- ● pH testing kit: To ensure your potting mix is in the ideal range (5.8–6.5) for most plants.
Step-by-Step instructions for gentle transplant recovery
Master this technique and your transplants will establish roots faster and thrive longer.
🌱 Step 1: Prepare the New Location Before Moving Plants
Choose a site with similar light and soil conditions to the original container. Dig holes twice as wide as the root ball but only 1-2 inches deeper—deeper planting buries the stem and risks rot. Amend the native soil with compost or aged manure mixed into the bottom of each hole to improve drainage and nutrient availability.
Water the area thoroughly 24 hours before transplanting so the soil is moist but not saturated. This prevents roots from drying out immediately after removal. I like to use a soaker hose for even moisture distribution—it eliminates surface compaction that can restrict root spread.
⏰ Step 2: Time the Transplant for Optimal Conditions
Transplant on an overcast day or late afternoon when temperatures are below 85°F. Avoid midday sun, which causes rapid moisture loss and leaf scorch. If you must transplant during peak sun, provide immediate shade cloth coverage for the first 48 hours.
Check the weather forecast for 3 days prior—avoid transplanting if rain is predicted within 48 hours. Roots need time to establish before heavy watering, which can dislodge them. I schedule my transplant days around my local forecast and adjust based on soil moisture levels.
💧 Step 3: Handle Roots with Maximum Care During Removal
Water the original container 2-3 hours before transplanting to reduce root damage. Gently squeeze the sides of the pot to loosen the root ball, then invert and support the base while tapping lightly. If roots are tightly bound, run a knife around the edges to separate them from the container walls.
Never pull plants by the stems—this tears roots and increases shock. Inspect the root ball for circling roots or matted growth. If present, make 2-3 vertical cuts through the center to encourage outward root expansion. This simple step prevents future girdling and improves nutrient uptake.
🌿 Step 4: Replant Using the Root Ball Technique
Place the plant in the hole at the same depth it was growing in the container. The top of the root ball should sit ½ inch below soil level—this ensures stability without burying stems. Fill around the sides with native soil, pressing gently to eliminate air pockets but avoiding compaction.
Create a 1-inch deep basin around the base to direct water straight to roots. Water immediately with a slow, deep soak until moisture reaches 6 inches below the surface. This initial watering settles the soil and eliminates stress from dehydration. I use a hose with a gentle spray nozzle to avoid disturbing the root ball.
☀️ Step 5: Provide Recovery Support for the First 2 Weeks
Apply a mulch layer (2-3 inches) around the base, keeping it 2 inches away from stems to prevent rot. Use organic materials like straw or shredded leaves, which improve soil moisture retention and temperature regulation. This mulch barrier reduces temperature fluctuations that stress newly established roots.
Monitor daily for wilting or yellowing leaves, which indicate either overwatering or insufficient moisture. Adjust your watering schedule based on soil dryness—stick your finger 2 inches deep; if dry, water again. Avoid fertilizing during this period; roots need energy to establish, not to process nutrients.
Tips & tricks for gentle transplanting success
Precision in each step transforms transplanting from a risky process into a reliable technique for thriving plants. Here's how to elevate your approach beyond basic instructions.
Soil Preparation: The 1-2 inches of compost in Step 1 isn't just about nutrients—it creates an ideal moisture-retention environment. For heavy clay soils, mix in 1 part perlite to the 6 inches of amended soil to improve aeration. This prevents root suffocation while maintaining the moisture balance critical for recovery. I've seen plants in compacted clay fail despite perfect timing simply because their roots couldn't breathe.
Root Handling Technique: When teasing apart circling roots in Step 2, think of them like delicate fishing line. Use a chopstick to gently pry between roots rather than pulling—this minimizes breakage while encouraging outward growth. A quick soak of the root ball in room-temperature water for 5 minutes before planting further reduces shock by preventing dehydration during handling.
Post-Planting Watering: The slow, steady stream in Step 3 deserves emphasis: this isn't just about water volume but pressure control. A forceful stream displaces freshly placed soil and can even uproot the plant. Use your thumb to regulate the flow from a watering can or adjust your hose nozzle to a gentle mist setting. The goal is to saturate without disturbing—the roots need stability to begin their establishment process.
Seasonal Adjustments: The 60°F soil temperature threshold in Step 5 is non-negotiable, but don't rely solely on a thermometer. Press your hand into the soil—if it feels cool to the touch (like a chilled drink), wait. In hot climates, I've found that transplanting during the coolest hour of the day (often just after sunrise) gives roots their best chance, even if you're working outside the traditional spring/fall windows.
Pro Tips for Avoid Transplant Shock
- Precision in each step transforms transplanting from a risky process into a reliable technique for thriving plants. H...
- Soil Preparation: The 1-2 inches of compost in Step 1 isn't just about nutrients—it creates an ideal moisture-retenti...
- Root Handling Technique: When teasing apart circling roots in Step 2, think of them like delicate fishing line. Use a...
Frequently asked questions
What’s the best time of day to transplant my plants to minimize shock?
Transplant during the coolest part of the day—early morning or late afternoon—when temperatures are mild. Avoid midday heat or freezing nights, as extreme temps stress roots. Overcast days are ideal! If you must transplant in peak sun, provide shade for 24–48 hours afterward.
How long does transplant shock typically last, and how can I tell if my plant is recovering?
Mild shock lasts 1–3 weeks, while severe cases may take up to a month. Signs of recovery include new growth (leaves, stems, or flowers), perky foliage, and roots visibly gripping the soil. Wilted leaves or yellowing? Stay patient—hydrate gently and avoid fertilizing until you see green shoots!
Can I use root stimulants or fertilizers right after transplanting to speed up recovery?
No!
Wait 2–4 weeks before adding fertilizers or root boosters. Freshly transplanted plants need time to establish roots without extra stress. Instead, focus on consistent watering and mulching to retain moisture. Once roots stabilize, a diluted seaweed or fish emulsion fertilizer can help.
What should I do if my plant’s leaves turn yellow or wilt immediately after transplanting?
Yellowing or wilting is normal for a few days, but act fast if it persists:
- Check soil moisture—overwatering is a common culprit.
- Trim any mushy or blackened roots (sterilize scissors with rubbing alcohol).
- Move to a shadier spot and avoid direct wind.
- Mist leaves lightly to boost humidity.
Are there any plants that are more prone to transplant shock than others?
Yes! Tropical plants (like ferns, calatheas, or orchids), delicate perennials (e.g., hostas, asters), and deep-rooted trees (such as oaks or fruit trees) are especially sensitive. Succulents and cacti, however, handle transplanting better if you let soil dry between waterings. Research your plant’s native conditions to mimic its comfort zone post-move.
Pro Tip:
For extra resilience, prune 10–20% of the plant’s foliage before transplanting. This reduces water loss and helps the plant focus energy on root regrowth. Think of it as a “reset button” for your green buddy!
Wrapping up and next steps
Avoiding transplant shock is all about preparation, patience, and care—your plants will thank you with vibrant growth! By choosing the right timing, using the Gentle Roots Revival Technique, and providing optimal aftercare, you’re setting them up for a smooth transition.
Remember, even the most delicate roots can bounce back with the right love and attention.
Now that you’re armed with these tips, roll up your sleeves and give your plants the fresh start they deserve! 🌱 Start with just one transplant today—you’ve got this! For more gardening wisdom, explore our plant care guides or share your progress with the community. Happy growing! 🌿