
How To
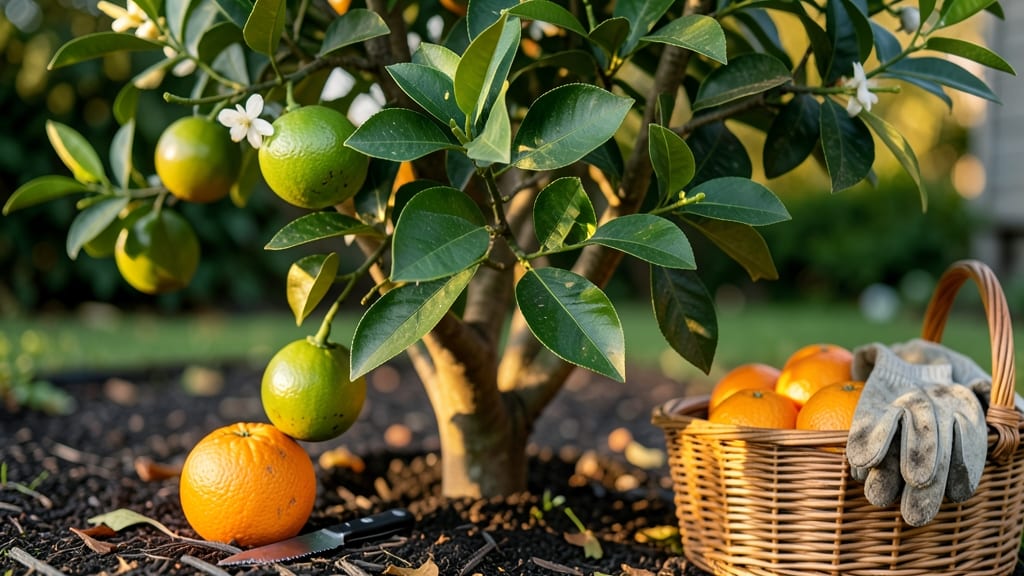
How to know when to pick oranges is the secret to unlocking their sweetest, juiciest potential—and getting it wrong could leave you with bland, mealy fruit. Whether you're a home gardener in Zone 9b or just curious about your grocery store haul, these simple cues will transform your orange-picking game.
The right moment isn't just about color—it's about a perfect blend of visuals, touch, and even scent. I'll walk you through three foolproof tests that reveal when your 🍊 is ready to harvest, so you never miss peak ripeness again. No guesswork, just delicious results.
From the deepening hues of a Navel orange to the slight give of a Valencia, each variety has its own signals. We'll cover what to look for, common mistakes that ruin flavor, and how to store your harvest for maximum freshness.
Ready to turn your citrus tree into a sweet success?
Let's dive into the science behind ripe oranges—because the best fruit doesn't just look good, it tastes like sunshine. You'll be picking oranges at the perfect moment in no time.
3 Color-Stage tests to determine orange ripeness
Oranges ripen gradually, and their skin color is your first clue to sweetness. Unlike some fruits, oranges don't ripen further after picking, so timing is everything. The green-to-orange transition signals maturity, but not all varieties follow the same pattern—Navel oranges turn deep orange, while Valencia oranges may stay slightly greenish-yellow.
Start by examining the fruit's base near the stem. This area often changes color first. For Navel oranges, look for a vibrant, even orange hue.
Valencia oranges may develop a yellow-orange blush before full ripeness. If the fruit still shows green patches, it needs more time on the tree.
🌱
🍊 Orange Ripeness Color Guide
Fruit is firm but not yet ripe. Wait 1-2 weeks for full color.
Fruit is nearing ripeness. Check firmness and scent next.
Perfect ripeness! Fruit should yield slightly to gentle pressure.
Pay attention to the uniformity of color. Uneven shading or lingering green spots can indicate the fruit wasn't exposed to enough sunlight or needs more time. In Mediterranean climates, oranges often ripen faster due to intense sunlight, while cooler regions may require additional weeks.
For container-grown oranges, color changes may be slower because of limited sunlight. Rotate your pot regularly to ensure even exposure. If your tree is in a shadier spot, the fruit might never achieve its full color potential, even if ripe.
🌿
Some gardeners make the mistake of picking oranges based solely on color, but variety matters. For example, Meyer lemons (a citrus cousin) stay green even when ripe, while Blood oranges develop a deep red blush. Always cross-reference color with other ripeness tests, like firmness and scent, for accuracy.
Pro tip: Use a digital colorimeter (or even your phone's camera) to compare oranges against a ripe reference fruit. This helps standardize your judgment, especially if you're harvesting multiple trees with different varieties.
🪴
If you're in a frost-prone zone (like Zone 8), time your harvest carefully. Oranges can tolerate light frosts but will spoil if left on the tree too long.
Prioritize picking fully colored fruit first to avoid losses. In tropical climates, oranges may ripen year-round, but late fall still delivers the sweetest flavor.
Finally, remember that overripe oranges lose their sweetness and become mealy. The moment your fruit reaches its peak color—and passes the firmness test—it's time to harvest. Don't wait too long, or you'll miss the window for that perfect, juicy bite.
3 Color-Stage tests to determine orange ripeness
Oranges don’t ripen like apples—they reach peak sweetness on the tree. The color transition is your first clue. Start by observing the skin hue against the tree’s natural shade.
Early-season oranges may start green or yellow-green, but true ripeness shows a uniform bright orange (for Navel varieties) or deep amber-yellow (for Valencia types).
Avoid picking fruit with patchy coloring—this often means uneven ripening. For example, a Navel orange should be consistently orange all over, while a Valencia might develop a golden blush. Check the underside of the fruit, too—it should match the top’s color, not stay green.
- 🟢 Stage 1: Green/Yellow-Green – Not ready; wait for deeper color.
- 🟡 Stage 2: Patchy Orange/Yellow – Ripening but not fully sweet.
- 🟠 Stage 3: Uniform Bright Orange/Gold – Perfect ripeness!
Climate plays a role, too. In warmer zones (9b-11), oranges may ripen faster, while cooler microclimates (like coastal areas) can slow color development. If your tree is in a sheltered spot, check for sun exposure differences—fruit on sunnier branches ripens first.
Don’t rely on color alone—combine it with the gentle squeeze test. A ripe orange should yield slightly to pressure (like a ripe peach) but not feel mushy.
Press near the stem end—if the skin gives just a little, it’s ready. Overripe fruit will dent easily, while underripe fruit feels rock-hard.
Finally, sniff the fruit! A ripe orange emits a sweet, citrusy aroma near the stem. If it smells sour or faint, wait a few days.
This scent is your final ripeness confirmation—trust your nose over the calendar. In Mediterranean climates, this test is especially reliable due to consistent warmth.
Now that you’ve mastered color and texture, your oranges are ready to pick—just avoid the 3 biggest mistakes that ruin flavor. Next, we’ll cover how to spot overripe or underripe fruit before it’s too late! 🌱