
Tools
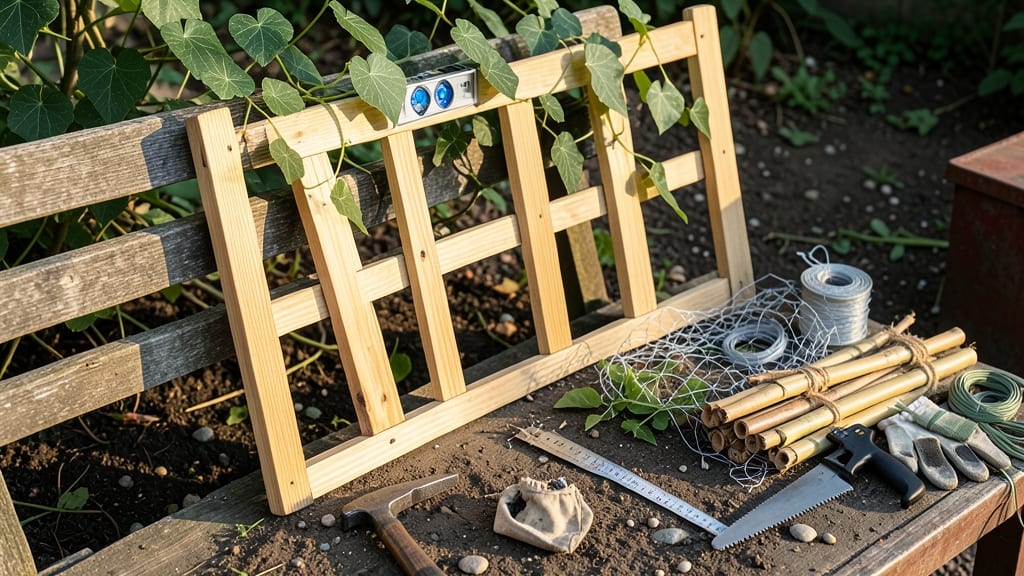
How to build a cheap trellis from scrap wood is the game-changer your struggling morning glories deserve—just $12 and a little creativity can save your plants from flopping. The secret isn’t fancy hardware—it’s matching the right design to your plants and garden space. A simple bamboo frame or repurposed wooden stakes can handle anything from lightweight flowers to vigorous vines, without breaking the bank or the back.
You’ll need just three supplies: 2x4s or bamboo poles, basic screws or zip ties, and a drill or hammer. For vines like cucumbers or beans, go vertical with a 6-foot frame—for flowers like clematis, a 4-foot arch works perfectly.
The key is positioning: place it where your plants will climb naturally, like near a sunny fence or along a garden path.
By the end, you’ll have a sturdy, custom support that looks intentional, not improvised. No more flopping plants or wasted space—just a neat, functional addition that blends into your garden like it was always there. Plus, you’ll have leftover materials for future projects.
Works for small balconies, large backyard beds, or even container gardens. Let’s turn those scraps into something your plants will love—and your neighbors will envy.
📚 In This Guide
- What you need
- Instructions
- Tips and common mistakes
- Wrapping up and next steps
What you need
- ● Scrap wood (2x4s or 4x4s): At least 4 pieces (6–8 ft long) for posts and horizontal supports. Check local construction sites, pallets, or old fences!
- ● Wooden lattice panels or chicken wire: 1–2 panels (4x8 ft) for climbing plants. Lattice is sturdier; wire is cheaper.
- ● Galvanized screws or nails: 1 lb box (1.5–2" long) to secure everything. Rust-proof is key!
- ○ Wood glue (optional but helpful): Small bottle for extra reinforcement at joints.
- ● Drill/driver (with drill bit for wood)
- ● Hammer (if using nails)
- ● Measuring tape and pencil
- ● Saw (hand saw or circular saw) for cutting wood to size
- ● Level (to keep your trellis straight and steady!)
- ● Wood stain or paint (to protect wood and match your garden aesthetic)
- ● Post anchors or concrete mix (if burying posts for extra stability)
- ● Twine or zip ties (to secure lattice panels temporarily during assembly)
Step-by-step instructions for building a sturdy garden trellis
Here’s my go-to method for creating a durable, budget-friendly trellis using scrap wood—no fancy tools required.
Gather and Prepare Materials
Start by collecting four 8-foot-long 2x4 lumber pieces (scrap or new) and two 4-foot-long 1x2 boards for the crossbars. Sand all edges smooth to prevent splinters and rough spots that could damage vines. If using untreated wood, apply a waterproof sealant to extend lifespan, especially if the trellis will sit in damp soil or near sprinklers.
For stability, dig four 12-inch-deep holes at the corners of your planting area, spaced 4 feet apart. Drive T-posts (or sturdy stakes) into the ground until they’re firmly set—tap them with a hammer until only 6 inches remain above soil level. This creates a solid base before assembling the frame.
Assemble the Frame
Attach two 8-foot 2x4s vertically to the T-posts at each corner using 3-inch deck screws (pre-drill holes to prevent splitting). Space the vertical posts 3 feet apart to match the width of your planting bed. Check for square alignment by measuring diagonally—both sides should equal 5 feet. If not, adjust before securing.
Once the vertical posts are plumb (use a level or eyeball for quick checks), add the horizontal 2x4s at the top and bottom, screwing them into the vertical posts. This forms a rectangle. Reinforce corners with extra screws—these are high-stress points where vines will pull hardest. For extra strength, add diagonal 2x4 braces from corner to corner.
Add Crossbars for Vine Support
Cut the 1x2 boards into 12-inch segments for horizontal slats. Space them 4 inches apart vertically along the frame, screwing them into the vertical 2x4s. Angle the slats slightly if growing pole beans or cucumbers—this helps vines grip better. For heavier climbers like grapes or kiwi, add a second layer of slats 6 inches below the first to distribute weight.
Test stability by gently pulling on each crossbar. If any wobble, add extra screws or corner braces. Avoid over-tightening—wood expands and contracts with humidity, so leave a 1/8-inch gap between slats and frame to prevent warping over time.
Secure and Finish
Wrap the base of the trellis with landscape fabric to protect wood from soil moisture. Bury the fabric 2 inches deep around the T-posts to block weeds and pests. If using untreated wood, apply a second coat of sealant after assembly to seal any exposed grain.
For a longer-lasting trellis, paint it with exterior-grade paint—this reflects sunlight, reducing heat damage to the wood. Let it dry 24 hours before planting. Position the trellis 12 inches away from the planting bed to allow easy access for pruning and harvesting.
Your trellis is now ready for beans, peas, cucumbers, or even light vines like morning glories. The key is monitoring tension—if vines sag mid-season, add twine or zip ties to secure them to the slats.
Tips & tricks for building a sturdy garden trellis
A few key strategies will help you avoid common pitfalls and create a trellis that lasts seasons. Here's what I've learned from years of building these structures in my own garden.
Material Selection: Don't underestimate the importance of your wood choice. While scrap wood is perfect for budget-friendly projects, prioritize straight, dry lumber for your posts—warped or green wood will bend over time. I've found that 2x4 lumber works better than 2x2s for posts because it provides more stability without being overly heavy. For lattice panels, look for wood with natural straight grains rather than knots, which can weaken the structure when cut.
Precision in Post Placement: The 6-inch deep holes you dig for your posts are your foundation's secret weapon. Use a level at every stage—when marking the outline, when setting the posts, and after backfilling. I've seen trellises lean dramatically after just one season when posts weren't perfectly vertical. For extra stability on windy days, consider adding diagonal support between opposite posts using scrap wood and screws.
Lattice Design Matters: When cutting your 1-inch thick boards into 12-inch strips, remember that spacing matters more than you might think. The 2-3 inch gaps between strips create the perfect balance—wide enough for air circulation to prevent fungal diseases, but close enough to support climbing plants. For heavy vines like grapes, I recommend reducing the spacing to 1.5 inches between strips in the lower half of the trellis where most of the weight will be.
Sunlight Strategy: The instructions mention positioning your trellis for at least 6 hours of sunlight daily, but here's the real talk: most vigorous climbing plants need 8-10 hours for optimal growth. If your garden gets less sunlight, consider building a slightly taller trellis (7 feet instead of 6) to maximize vertical space for your plants to reach upward toward available light. This simple adjustment can make the difference between thriving vines and struggling plants.
Pro Tips for Build A Cheap Trellis
- A few key strategies will help you avoid common pitfalls and create a trellis that lasts seasons. Here's what I've le...
- Material Selection: Don't underestimate the importance of your wood choice. While scrap wood is perfect for budget-fr...
- Precision in Post Placement: The 6-inch deep holes you dig for your posts are your foundation's secret weapon. Use a ...
Frequently asked questions
Got questions?
Here are answers to the most common ones about building a budget-friendly trellis—so you can get growing without the guesswork!
What’s the cheapest material I can use for a trellis?
Scrap wood, bamboo stakes, or even repurposed fencing (like old pallets or chicken wire) work great! Avoid rot-prone woods like pine unless treated. For ultra-budget options, try tree branches (if sturdy enough) or plastic lattice panels from hardware stores—both cost under $10.
When’s the best time to build a trellis?
Build it before planting—ideally in early spring or late winter. This gives vines (like cucumbers or beans) a head start climbing. If you’re retrofitting, install it as soon as seedlings are 4–6 inches tall to avoid bending stems. Pro tip: Water the soil first to make stakes easier to drive in!
Can I use a trellis for anything other than vegetables?
Trellises support flowers (clematis, morning glories), small fruits (strawberries, grapes), and even ornamental plants like roses. For heavy climbers (e.g., pumpkins), add extra cross-bracing or use metal rebar for reinforcement.
My trellis keeps leaning—how do I fix it?
Check for uneven stakes or loose connections. Drive stakes at least 12 inches deep into the ground and secure horizontal slats with zip ties, screws, or sturdy twine. For wobbly bamboo, tie it to a central post with soft garden twine. If the wood is warping, swap it for pressure-treated lumber next time.
Will a DIY trellis survive rain or wind?
Most scrap-wood trellises handle light rain, but heavy storms can bend them. To prep: Angle stakes outward slightly (like a tepee) for stability, and secure joints with waterproof glue or metal brackets. For windy areas, use 3x3-inch posts buried deeper (18+ inches) or add diagonal supports.
Wrapping up and next steps
Building a sturdy trellis from scrap wood is a budget-friendly and sustainable way to elevate your garden game—no fancy tools or expensive materials required! 🌱 Whether you're training vines, climbing flowers, or creating vertical space, your DIY trellis will give your plants the support they need while adding charm to your outdoor space.
Now that you’ve got the know-how, roll up your sleeves and get creative! Start small with a single trellis, then expand as your gardening confidence grows. Happy building—and may your garden thrive! 🌿✨