
Landscaping
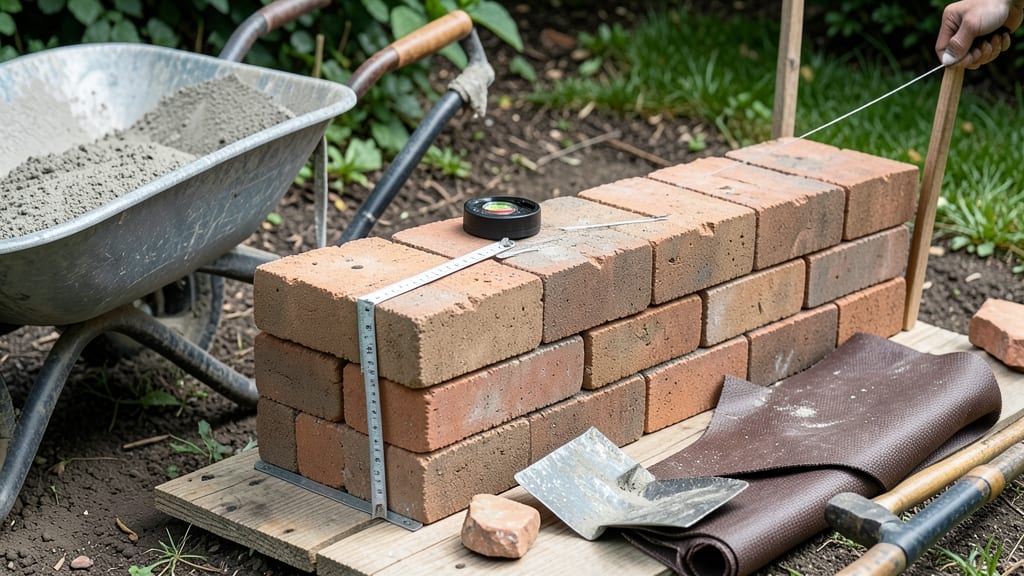
How to build this brick planter—two hours and a stack of bricks later—you’ve got a planter that’ll outlast your garden dreams. 🌱 I’ve built these for herb gardens, tomato towers, and even a pollinator border—each one sturdy enough to handle years of seasonal weight shifts without so much as a wobble. The secret? Mortar-free construction with interlocking bricks and a gravel base that keeps water (and weeds) from turning your planter into a swamp.
You’ll need 100-120 bricks (depending on size), a 4-foot level, landscape fabric, and a shovel for drainage. The tools? Just a rubber mallet, trowel, and gloves—no fancy equipment required.
My first attempt used too little gravel, and the bricks shifted after one rain. Lesson learned: 4-6 inches of crushed stone at the base is non-negotiable for stability.
By the end, you’ll have a raised bed that stays weed-free, drains properly, and blends seamlessly into your garden. The bricks create built-in shelves for trailing plants like nasturtiums, while the elevated edges make harvesting tomatoes or snipping herbs a breeze.
Plus, it’s customizable—add a trellis for vining plants or embed solar lights for evening ambiance.
Works for any yard style, from cottage gardens to modern landscapes. The same technique builds borders, firewood storage, or even a mini greenhouse base. Let’s get those bricks stacked!
📚 In This Guide
- What you need
- Instructions
- Tips and common mistakes
- Wrapping up and next steps
What you need
- ● Brick: 10-15 bricks (use concrete blocks or landscaping bricks for durability; avoid soft clay bricks).
- ● Gravel: 2-3 bags (50 lbs each) (for drainage—crushed stone or pebbles work best).
- ● Landscape fabric: 1 roll (3’ wide) (keeps weeds out and protects soil).
- ● Potting soil: 2-3 bags (40 lbs each) (use well-draining mix for plants).
- ○ Mortar or brick adhesive: 1 tube or 5-gallon bucket (for securing bricks; optional if stacking dry).
- ● Wood screws or galvanized nails: 4-6 pieces (if adding a wooden base frame for extra stability).
- ● Tape measure (to plan dimensions).
- ● Level (ensures your planter stays perfectly straight).
- ● Shovel or spade (for digging and gravel placement).
- ● Wheelbarrow or bucket (for mixing soil/gravel).
- ● Safety gloves (bricks and gravel aren’t gentle!).
- ● Hammer or mallet (if using nails or tapping bricks into place).
- ○ String line (optional, for marking straight edges).
- ● Wooden planks (for a built-in seat or side panels).
- ● Waterproof liner (if building a large or deep planter).
- ● Decorative edging (stone, metal, or copper flashing for a polished look).
- ● Drip irrigation kit (for hassle-free watering).
Step-by-step instructions for building a brick planter
Here’s how to create a sturdy, long-lasting elevated garden that’s ready for planting in just two hours.
🪴 Step 1: Gather and Prepare Materials
Start by collecting 12-15 bricks (standard 4"x8" cinder blocks work best) and a trowel or rubber mallet for leveling. You’ll also need landscape fabric to line the bottom, gravel or crushed stone for drainage, and potting mix for planting. I like to use bricks with holes—this adds extra drainage while keeping the structure lightweight.
Lay out your bricks in a rectangular pattern to visualize the planter’s size. A 2x3 brick layout creates a 16"x24" planter, perfect for herbs or shallow-rooted veggies. If you’re building taller (3+ bricks high), use mortar or brick adhesive for stability. For a simple, removable design, skip adhesive and stack bricks loosely—just ensure they’re level.
💧 Step 2: Build the Base and Add Drainage
Begin by placing a layer of landscape fabric over the ground or deck to prevent weeds and moisture from seeping into the bricks. This is non-negotiable—without it, roots will rot and bricks may shift over time. Next, add a 2-inch layer of gravel or crushed stone to create drainage. This prevents waterlogging, which bricks absorb like sponges.
Arrange the first row of bricks in a straight line, tapping them gently with a rubber mallet to ensure they’re flush and level. Use a leveling tool to check for evenness—uneven bases will cause the planter to wobble. For extra stability, interlock bricks by offsetting their holes or using brick joints in the corners. If your bricks are slippery, place a thin layer of sand between rows to keep them from shifting.
✂️ Step 3: Stack and Secure the Walls
Add the second row of bricks, staggering the joints to distribute weight evenly. For a 3-brick-high planter, the third row should align directly above the first to maintain structural integrity. If your bricks are lightweight, this height works without adhesive. For taller walls, apply brick adhesive to the top of each row before adding the next—this prevents collapse under soil weight.
Check stability by gently pressing on each corner. If the walls feel unstable, add corner braces or metal rebar for reinforcement. I’ve seen planters topple after heavy rain if the base wasn’t wide enough—aim for a base width at least 2 bricks wide to prevent tipping. Once the walls are secure, line the interior with another layer of landscape fabric to keep soil from washing out through the brick holes.
🌱 Step 4: Fill with Soil and Plant
Fill the planter with 6-8 inches of potting mix, leaving 1-2 inches of space at the top to prevent spillage when watering. Mix in a slow-release fertilizer or compost for nutrient-rich soil. Press the soil lightly to remove air pockets, but don’t compact it—roots need room to breathe. For extra drainage, add a 1-inch layer of perlite or coarse sand between the soil and fabric.
Plant your chosen greens, herbs, or shallow-rooted veggies, spacing them according to their mature size. Water deeply until moisture runs out the drainage holes—this settles the soil and ensures roots make contact with the mix. Avoid overwatering at first; bricks absorb moisture slowly, and soggy soil can suffocate new plants. Within a week, you’ll see signs of growth—that’s your cue to adjust watering based on rainfall.
🪴 Step 5: Maintain and Reinforce Over Time
Check the planter’s stability after the first heavy rain. If bricks shift, readjust them and add more gravel or adhesive as needed. To prevent moss or algae from growing on the bricks, wipe them down with a vinegar-water solution (1:3 ratio) every few months. This keeps the structure looking clean and extends its lifespan.
Refill soil as it decomposes or gets displaced by watering. I top-dress with compost annually to replenish nutrients. If your planter starts to sag, reinforce the corners with additional bricks or metal brackets. With proper care, a brick planter can last 10+ years, giving you a low-maintenance, stylish garden bed that’s ready for any season.
Tips & tricks for building a sturdy brick planter
Between us, these little details make the difference between a planter that lasts a decade and one that collapses after the first rain. Here's what nobody tells you—
Brick Selection Matters: Not all bricks are created equal. For maximum drainage and lightweight construction, choose bricks with holes—these create natural drainage paths while keeping your planter from becoming a brick-heavy anchor. If you're using solid bricks, consider drilling drainage holes yourself. I've seen planters built with solid bricks develop waterlogging issues within months, while the perforated ones stay perfectly dry.
The Leveling Secret: You can't overstate the importance of getting your first row perfectly level. Use a leveling tool at every brick placement in Step 2, not just the corners. I once built a planter where the center was slightly higher than the edges—after filling with soil, it developed a noticeable tilt that never fully corrected itself. This is your foundation; treat it like you would a house slab.
Reinforcement Strategy: For planters taller than 3 bricks, don't just rely on adhesive—add corner braces or metal rebar for structural support. I've seen planters that looked perfect during construction topple during the first heavy rain because their corners weren't properly reinforced. When in doubt, add that extra brace. It's better to have it and not need it than to need it and not have it.
Soil Preparation Hack: When filling your planter in Step 4, mix in a 1-inch layer of perlite or coarse sand between the landscape fabric and potting mix. This creates an extra drainage layer that prevents water from pooling at the bottom. I've noticed my plants thrive better with this additional layer because their roots stay consistently moist without becoming waterlogged.
Pro Tips for Build Brick Planter
- Between us, these little details make the difference between a planter that lasts a decade and one that collapses aft...
- Brick Selection Matters: Not all bricks are created equal. For maximum drainage and lightweight construction, choose ...
- The Leveling Secret: You can't overstate the importance of getting your first row perfectly level. Use a leveling too...
Frequently asked questions
Got questions about building your own brick planter? You’re not alone! Here are some of the most common concerns—and their straightforward solutions—to help you tackle your project with confidence.
Can I use any type of bricks for a brick planter?
While standard clay bricks or pavers work great, avoid hollow bricks—they can crack under plant weight. For extra durability, opt for concrete blocks or sand-lime bricks, which hold up better to moisture and pressure. If using salvaged bricks, check for chips or weak spots first!
How long does a brick planter last before needing repairs?
With proper construction (waterproofing + drainage), a well-built brick planter can last 10+ years. Cracks or erosion usually appear in 2–5 years if drainage is poor or bricks aren’t sealed. Inspect annually for mortar gaps or root pressure—patch with fresh mortar or waterproofing sealant as needed.
What’s the best way to water plants in an elevated brick planter?
Elevated planters dry out faster, so self-watering systems (like drip irrigation) or wicking beds (with capillary matting) work best. Water deeply 2–3 times per week (adjust for climate) and use well-draining soil to prevent soggy roots. Mulch the top layer to retain moisture!
Is it cheaper to DIY a brick planter or buy one?
DIY wins for customization and cost savings! A basic 4’x2’ planter costs $50–$150 in materials (bricks, mortar, soil), while pre-made planters start at $200+. Factor in labor: If you’re handy, DIY takes 2–4 hours; hiring a pro could double that cost.
What do I do if my brick planter starts leaning or shifting?
Leaning usually means uneven base prep or soil weight. Stop watering immediately, then:
- Re-level the base: Dig out soil, compact the ground, and add a gravel layer for stability.
- Reinforce corners: Use metal rebar or landscape fabric between brick layers for extra support.
- Avoid overloading: Distribute plants evenly and prune heavy vines.
Wrapping up and next steps
Building a brick planter is a rewarding project that adds charm and functionality to your outdoor space—and you’ve just tackled it in under two hours! 🌱 With the right materials, a little patience, and these step-by-step instructions, you’ve created a sturdy, long-lasting elevated garden perfect for herbs, flowers, or veggies.
The best part? You’ve also gained a handy DIY skill to customize future projects.
Now that your planter is ready, what’s next? 🌿 Start by filling it with soil and your favorite plants, or share your success with fellow gardeners! Need inspiration? Try adding solar lights for evening ambiance or pairing it with a cozy seating area. Happy gardening—your green thumb is growing!