
Propagation
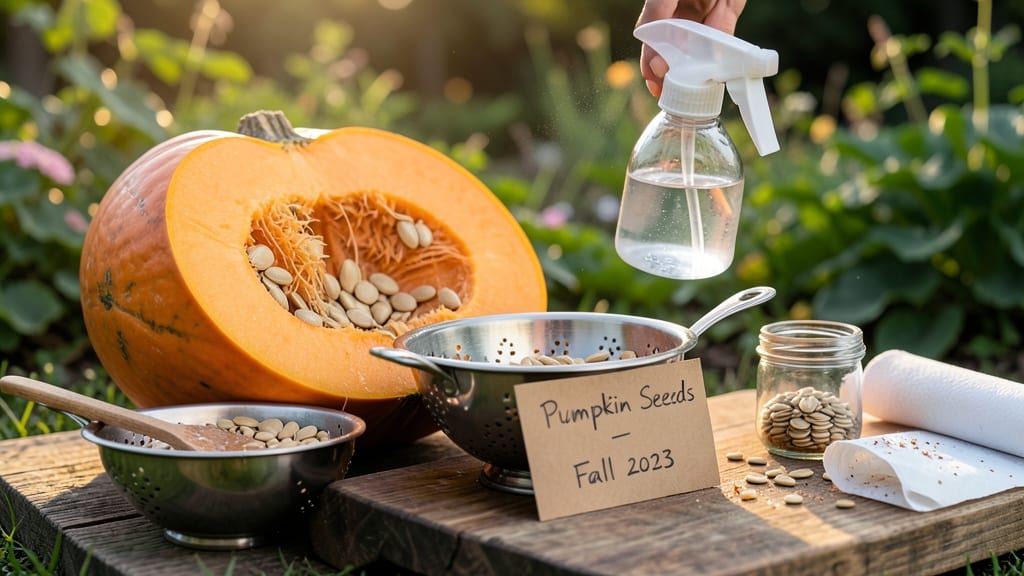
How to clean pumpkin seeds for planting takes just 15 minutes—but skipping this step means weak seedlings or no germination at all. 🌱 I learned the hard way when moldy seeds ruined my first batch of heirloom pumpkins. The key is removing all that stringy pulp without damaging the seeds themselves.
You’ll need three simple tools: a bowl of water, a fine-mesh strainer, and paper towels. The water helps separate viable seeds from debris, while the strainer catches everything except what’s ready to plant. Safety tip: wear gloves if you’re sensitive to pumpkin residue—it can irritate skin.
After soaking for 10 minutes, drain the water and swirl the seeds in the strainer. Good seeds sink; floaters are either damaged or nonviable. Pat them dry with paper towels, then spread them on a screen or tray to air-dry for 24 hours in a warm, dark place.
This prevents mold and ensures they’re ready for storage or direct planting.
Store cleaned seeds in a cool, dry place for up to 5 years, but plant them as soon as possible for the best germination rates. If you notice mold or slimy residue, toss those seeds—they won’t sprout.
This method works for squash, cucumber, and melon seeds too, so bookmark it for next season!
📚 In This Guide
- What you need
- Instructions
- Tips and common mistakes
- Wrapping up and next steps
What you need
- ● Fresh pumpkin seeds: Harvest seeds from a ripe, organic pumpkin (or store-bought seeds if untreated). Aim for at least 10–20 seeds for a small garden plot.
- ● Water: Enough to fill a bowl or container for soaking (about 1–2 cups per batch). Use room-temperature or lukewarm water.
- ● Colander or fine-mesh strainer: A stainless steel or plastic strainer with small holes (to catch seeds while rinsing).
- ● Paper towels or clean kitchen towels: For drying seeds (use 2–3 towels per batch).
- ● Small bowl or container: For soaking seeds (preferably non-reactive, like glass or ceramic).
- ● Knife or spoon: A dull butter knife or wooden spoon to gently scrape seeds from pumpkin flesh.
- ○ Rubbing alcohol (70% isopropyl) and cotton swabs: Optional but highly recommended for sterilizing seeds to prevent mold.
- ● Air-tight container or paper envelope: For storing cleaned seeds (e.g., small mason jar or seed-saving envelope).
- ● Food-safe bleach solution: Mix 1 tsp unscented bleach per 1 cup water for a 1-minute soak to disinfect seeds.
- ● Seed drying tray or screen: For faster, more even drying (e.g., mesh drying rack).
- ● Label and marker: To note the pumpkin variety and cleaning date.
- ● Humidity-controlled environment: A dehumidifier or small fan if drying seeds in a damp climate.
Step-by-Step instructions for cleaning pumpkin seeds for planting
Here’s my foolproof method for extracting viable seeds—no mess, no wasted effort.
🌱 Step 1: Extract Seeds from Ripe Pumpkin Flesh
Cut the pumpkin in half lengthwise and scoop out the stringy pulp and seeds into a large bowl. I like to use a spoon to scrape every last bit from the cavity—those hidden seeds in the crevices are often the healthiest. Rinse the seeds under cool water to remove any remaining pulp clinging to them.
Let the mixture sit for 10-15 minutes while you work. The pulp will sink to the bottom, leaving the seeds floating on top. Use your fingers to separate the seeds, discarding any that feel soft or shriveled—those won’t sprout. This is where patience pays off; rushing leads to missed seeds or damaged ones.
💧 Step 2: Ferment the Seeds for Viability Testing
Transfer the cleaned seeds to a clean jar and cover them with water by about an inch. Let them soak for 24-48 hours at room temperature. This fermentation process helps separate viable seeds from non-viable ones—good seeds sink, while bad ones float. Check daily; if mold appears, dump the water and rinse the seeds immediately.
After fermentation, drain the water and spread the seeds on a paper towel to dry for 1-2 hours. This step is critical: it removes the fermentation residue that could inhibit germination. I like to lay them out in a single layer under indirect light—direct sun can overheat and crack the seeds.
☀️ Step 3: Dry and Store Seeds Properly
Once the seeds are completely dry to the touch, transfer them to a paper envelope or breathable cloth bag. Store them in a cool, dark place like a pantry or seed drawer. Properly stored pumpkin seeds remain viable for 3-5 years, though germination rates drop after the first year. Label the bag with the variety and date—trust me, you’ll forget!
For immediate planting, you can skip the long-term storage and sow the seeds directly after drying. Just ensure they’re bone-dry before planting; any moisture left will cause rot. I’ve found that seeds dried in a well-ventilated area at 65-75°F work best for next-season planting.
✂️ Step 4: Test Germination Before Planting
Before committing to a full planting, test a few seeds for germination. Place 5-10 seeds between damp paper towels in a sealed plastic bag. Keep them in a warm spot (around 75°F) and check daily. Viable seeds should sprout within 5-7 days. If fewer than 50% sprout, the rest of your batch may need longer storage or re-testing.
This step saves heartache later. I’ve had batches where only 20% of seeds germinated—testing first means I know whether to replant or troubleshoot. If germination is poor, try soaking the seeds again for 12 hours before re-testing.
🪴 Step 5: Prepare Seeds for Planting
Once you’ve confirmed viability, your seeds are ready for planting. For direct sowing, plant 1 inch deep in well-draining soil, spacing seeds 2-3 feet apart. If starting indoors, use small pots filled with seed-starting mix and plant 2 seeds per pot. Thin to the strongest seedling once true leaves appear.
Pumpkin seeds germinate best in soil temperatures of 70-90°F. If your climate is cooler, use a seedling heat mat to keep the soil warm. Water gently after planting—avoid soaking the soil, as pumpkin seeds rot easily in saturated conditions. You’ll see sprouts in 7-14 days, depending on temperature and variety.
Tips & tricks for perfect pumpkin seed preparation
These simple yet game-changing tricks will help you maximize seed viability and avoid common pitfalls in every step.
Patience in Step 1: The 10-15 minute settling time in Step 1 is where most people rush and miss viable seeds. I've learned to set a timer and resist the urge to stir or skim - the pulp needs this time to fully separate. For extra efficiency, use a fine-mesh strainer to capture any seeds that might slip through when rinsing, especially if your pumpkin had particularly stringy flesh.
Fermentation Watch: During the 24-48 hour fermentation in Step 2, I recommend checking the seeds every 12 hours rather than waiting for the full window. This lets you intervene immediately if mold appears - which can happen faster than expected in warm kitchens. The water should smell slightly tangy but not putrid; that's your cue to rinse immediately and restart the process with fresh water.
Drying Strategy: For the critical 1-2 hour drying period in Step 2, I've found that a wire cooling rack placed over a baking sheet works better than paper towels. The elevated airflow prevents moisture buildup that could lead to mold. If you're in a humid climate, consider using a small fan on low to circulate air - just keep it indirect to avoid cracking the seeds with direct airflow.
Germination Test Hack: When testing germination in Step 4, I've discovered a simple trick to speed up the process: place the damp paper towel with seeds in a clear plastic bag, then set it on top of your refrigerator (not inside) for the first 24 hours. The consistent warmth from the fridge's condenser coil creates an ideal 75°F environment without needing a heat mat. This often brings sprouts in 3-5 days instead of 5-7.
Pro Tips for Clean Pumpkin Seeds For Planting
- These simple yet game-changing tricks will help you maximize seed viability and avoid common pitfalls in every step.
- Patience in Step 1: The 10-15 minute settling time in Step 1 is where most people rush and miss viable seeds. I've le...
- Fermentation Watch: During the 24-48 hour fermentation in Step 2, I recommend checking the seeds every 12 hours rathe...
Frequently asked questions
Got questions about cleaning pumpkin seeds for planting? You’re not alone! Here are some of the most common concerns—and their straightforward answers—to help you grow like a pro.
How long can I store cleaned pumpkin seeds before planting?
Cleaned pumpkin seeds stay viable for 3–5 months if stored in a cool, dry place (like a sealed container in the fridge). For longer storage, dry them thoroughly and refrigerate or freeze them—this can extend viability to 1–2 years. Just avoid humidity, or they’ll sprout too early!
Can I plant pumpkin seeds straight from a store-bought pumpkin?
Store-bought pumpkins are fine for planting, but avoid seeds from decorative or hybrid varieties (like Jack-o’-Lanterns)—they may not produce true-to-type fruit. Focus on heirloom or pie pumpkins for best results. Rinse, dry, and store them as usual before planting in spring.
What do I do if my seeds mold or smell bad after cleaning?
Mold or a foul odor means moisture got trapped during drying. Toss those seeds! To prevent this, ensure seeds are fully dry (no dampness) before storing, and use a fan or mesh bag for airflow. If you’re unsure, do a float test: Drop seeds in water—sinkers are good; floaters are bad.
How do I know if my cleaned seeds are still good for planting?
Test viability with the paper towel method: Moisten a paper towel, place seeds between two, and fold it up. Keep in a warm spot for 3–5 days. If 50%+ sprout, your seeds are ready to plant! If not, try a fresh batch or source new seeds.
Can I reuse the pulp or scraps after cleaning seeds?
Yes! Pumpkin pulp is nutrient-rich—compost it for your garden or blend it into homemade seed-starting soil. Just avoid using it fresh (it can mold). For a quick win, dry the pulp into fertilizer pellets by baking at 200°F (93°C) for 1–2 hours. Zero waste, all gain!
Wrapping up and next steps
Cleaning pumpkin seeds for planting is a simple yet rewarding process that unlocks the potential of growing your own pumpkins—without soil! 🌱 By following these five easy steps, you’ll ensure healthy, viable seeds ready for propagation.
Whether you’re a gardening newbie or a seasoned pro, this method makes it effortless to start fresh with every harvest.
Now that your seeds are sparkling clean and ready to go, the next step is to test their viability or prep them for germination. Ready to grow something amazing? Dive into our guide on seed germination and watch your green thumb flourish!