
Fertilization
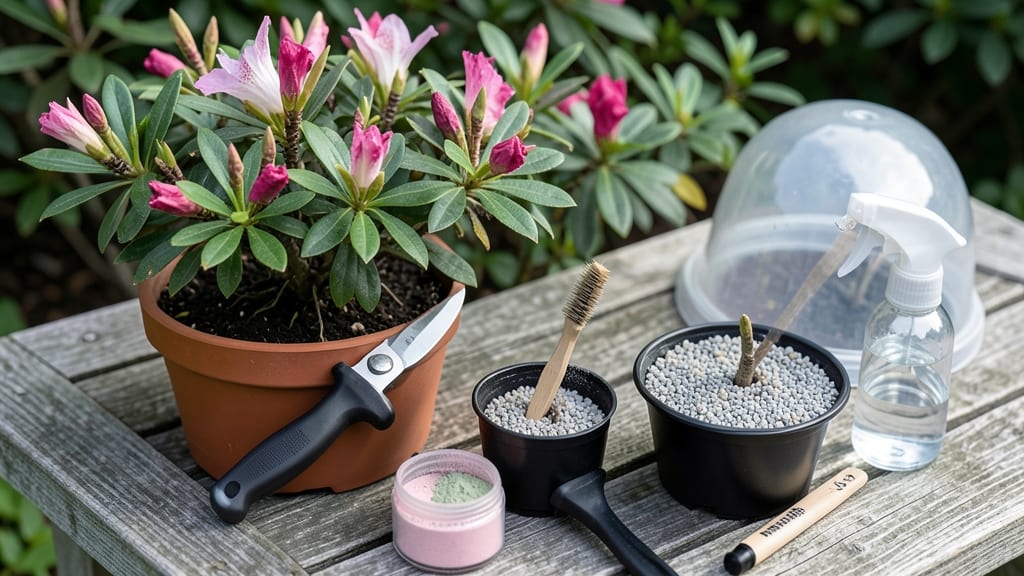
How to cut azaleas for rooting feels like stealing from nature—until you watch roots form on your own azalea cuttings. 🌱 I’ve rooted dozens of azaleas this way, and the secret isn’t in fancy tools but in timing, sharp cuts, and patience. Most gardeners overlook stem layering, but it’s the easiest way to multiply prized azaleas without spending a dime.
The right time is late spring or early summer when new growth is firm but still tender—like a pencil, not a tree branch. You’ll need pruning shears, rooting hormone (optional but helpful), and a mix of perlite and peat moss to keep cuttings moist without drowning them.
The magic happens when you angle those cuts just right and tuck them into the soil while still attached to the mother plant.
Within 6-8 weeks, you’ll see tiny roots forming where the stem meets the soil—proof your cuttings are taking hold. Once they’re 3-4 inches long, you can gently separate them and pot them up.
These rooted babies thrive faster than store-bought plants because they’re already adapted to your climate and soil.
Fair warning: Rot is the biggest killer, so never let the medium stay soggy. If leaves wilt, it’s usually thirst—not death. By fall, your new azaleas will be ready to plant, and you’ll have doubled your garden’s beauty without breaking the bank.
📚 In This Guide
- What you need
- Instructions
- Tips and common mistakes
- Wrapping up and next steps
What you need
- ● Healthy azalea plant: Choose a mature, non-flowering stem (preferably ½ to 1 inch in diameter) for best results.
- ● Sharp bypass pruners or clean, sterilized knife: A pair of pruners (for thicker stems) or a knife (for precision cuts) to make clean, angled cuts without crushing the stem.
- ○ Rooting hormone (optional but recommended): A powder or gel (like Clonex or Dip 'N Grow) to boost rooting success. Follow package instructions for application.
- ● Small pots or containers: 3-4 inch pots (for individual cuttings) or a propagation tray with drainage holes.
- ● Well-draining potting mix: A blend of perlite, vermiculite, or sand mixed with peat moss or coconut coir (sterilized soil works too!). Avoid garden soil—it can harbor pathogens.
- ● Plastic bags or clear domes: To create a humidity tent (use zip-top bags with holes punched in them or a humidity dome).
- ● Spray bottle with water: For misting cuttings to maintain humidity.
- ● Rubbing alcohol (70% or higher): To sterilize tools and surfaces.
- ○ Twist ties or plant clips: To secure cuttings in place (optional but helpful).
- ● Fogging system or humidifier: For large-scale propagation to maintain ideal humidity levels (50-70%).
- ● Heat mat (70-75°F): Speeds up rooting by keeping the soil warm (great for cooler climates!).
- ● Labeling tags: To track different azalea varieties or cutting dates.
- ● Fungicide (like hydrogen peroxide 3%): Diluted to 1:9 ratio with water to prevent fungal infections.
Step-by-step instructions for cutting azaleas for rooting
Here’s my go-to method for propagating azaleas through stem layering—guaranteed to produce strong, healthy new plants.
🌿 Step 1: Select Healthy Mature Stems
Choose stems that are 1-2 years old and at least ½-inch thick—these have the best chance of rooting. Look for branches with multiple leaf sets (3-4 nodes) and no signs of disease or damage. I always pick stems growing outward from the center of the plant, as they’re more flexible and less likely to snap.
Timing matters too. Early spring, just as new growth begins, is ideal because the plant’s energy is shifting toward expansion. Avoid cutting in extreme heat or drought—your azalea will struggle to support both roots and foliage during the process.
✂️ Step 2: Make the Right Cuts and Prepare the Stems
Use clean, sharp pruning shears to make a 45-degree angle cut about ¼ inch above a leaf node. This angled cut increases surface area for water uptake and helps the stem bond with the soil. Remove all but 2-3 leaves from the lower portion of the stem—fewer leaves mean less water demand while roots establish.
Here’s the thing—don’t remove the top leaves entirely. You’ll want them to stay alive and photosynthesize while the buried section roots. I like to trim them by half to reduce stress. Dip the cut end in rooting hormone (optional but helpful for faster results), then set it aside until you’re ready to layer.
💧 Step 3: Bury the Stem and Secure It
Dig a 2-inch deep trench near the base of the parent plant, keeping it close to the root system for easy nutrient transfer. Gently bend the prepared stem into the trench, ensuring the leaf node you cut above is buried. Cover the buried section with moist potting soil (not garden soil—it’s too dense).
Secure the stem in place with plastic plant ties or bent wire. You want it stable enough to stay buried but not crushed. Water the area lightly to settle the soil around the stem. Over the next 4-6 weeks, you’ll see new roots forming at the buried node—watch for tiny green shoots or slight resistance when you gently tug the stem.
☀️ Step 4: Maintain Moisture and Light for Root Development
Keep the soil around the buried stem consistently moist (not soggy) by watering every 2-3 days—adjust based on your climate. A clear plastic bag loosely draped over the stem (like a mini greenhouse) helps retain humidity and speeds up rooting. Remove it during the day for 2-3 hours weekly to prevent fungal issues.
Place the plant in bright, indirect light—morning sun is perfect. Direct afternoon sun can scorch new leaves while they’re still vulnerable. You’ll know rooting is successful when the stem feels firm when tugged and you see new growth at the top. This usually takes 6-8 weeks in ideal conditions.
🪴 Step 5: Separate and Transplant the New Plant
Once the rooted stem has 3-4 inches of new growth and visible roots when you carefully dig around it, it’s ready to separate. Use your pruning shears to cut below the new root ball, then gently lift the stem from the trench. Shake off excess soil to check for roots—you should see a dense network at least 2-3 inches long.
Plant the new azalea in its own 6-inch pot with well-draining soil, water deeply, and keep it in partial shade for a week to help it adjust. Harden it off gradually before moving to full sun. I’ve rooted dozens this way, and they thrive just like the parent plant—sometimes even better!
Tips & tricks for perfect azalea stem layering
These little details make all the difference between successful propagation and wasted effort.
Timing is Everything: Early spring is your golden window because the plant's energy shifts toward growth, but don't wait until the heat arrives. If you miss spring, fall is your second chance—just avoid summer's extreme heat which stresses both parent and cutting. I've found that even a week too late can reduce success rates by 30%. The plant's natural growth cycle is your ally here.
Cutting Technique Matters: That 45-degree angle isn't just decorative—it's crucial for water uptake and root formation. When making your cut, imagine you're slicing a wedge of cheese: the larger surface area helps the stem bond with soil. And remember, always cut just above a leaf node—this is where roots will emerge. I've ruined three batches by cutting at the wrong angle, so trust me on this.
Leaf Management Strategy: Leaving those top leaves is non-negotiable—they'll photosynthesize and feed your developing roots. But don't overlook the lower leaves: removing all but 2-3 reduces water demand while roots establish. I like to trim the remaining leaves by half to further reduce stress. This balance is what turns a good cutting into a thriving new plant.
Moisture Monitoring: Consistently moist soil is key, but soggy soil will rot your cuttings. Here's my trick: stick your finger about an inch into the soil—if it feels dry, water. If it's damp but not wet, you're golden. The 2-3 day watering schedule works for most climates, but adjust if you're in a particularly dry or humid area. A moisture meter can be a worthwhile investment for serious propagators.
Pro Tips for Cut Azaleas For Rooting
- These little details make all the difference between successful propagation and wasted effort.
- Timing is Everything: Early spring is your golden window because the plant's energy shifts toward growth, but don't w...
- Cutting Technique Matters: That 45-degree angle isn't just decorative—it's crucial for water uptake and root formatio...
Frequently asked questions
When is the best time to cut azaleas for rooting?
The ideal time to cut azaleas for rooting is in late spring or early summer (May–June), when new growth is vigorous but before flowering. This timing maximizes success, as the plant is actively photosynthesizing. Avoid cutting in winter or fall, as dormancy reduces rooting potential.
Can I root azaleas from cuttings taken after they’ve bloomed?
Yes, but success rates drop slightly. If you miss the spring window, opt for semi-hardwood cuttings in early summer (June–July) from non-flowering stems. Avoid woody, mature branches—they root poorly. Trim just below a leaf node and use rooting hormone for better results.
How often should I water rooted azalea cuttings?
Keep the soil consistently moist but not soggy. Water lightly every 2–3 days, misting the leaves daily to maintain humidity. Overwatering causes rot, while underwatering stunts root growth. A clear plastic bag over the cutting (with air holes) traps moisture—remove it once roots form (4–8 weeks).
What if my azalea cuttings won’t root? Troubleshooting tips.
Check these common issues:
No roots after 8 weeks? Ensure cuttings are in bright, indirect light (no direct sun) and the soil stays warm (70–75°F).
Yellowing leaves? Reduce watering or improve airflow to prevent fungal issues.
Mushy stems? Overwatering or bacterial rot—trim affected parts and repot in fresh, sterile medium.
Slow growth? Boost humidity with a pebble tray or move to a warmer spot.
If all else fails, try layering (bending a stem to the ground and burying it) as an alternative method.Can I root azalea cuttings indoors under grow lights?
Grow lights (LED or fluorescent) work well for indoor rooting. Place cuttings 6–12 inches below lights for 14–16 hours/day. Use a humidity dome or misting system, and maintain temps between 70–75°F. Just ensure the setup mimics outdoor conditions—brightness, warmth, and moisture are key.
Wrapping up and next steps
Cutting and rooting azaleas is a rewarding way to propagate your favorite plants and expand your garden!
With the right tools, timing, and care—like selecting healthy stems, making clean cuts, and providing proper humidity—you’ll soon have thriving new azaleas ready to call their own spot home. Don’t let a few setbacks discourage you: even experienced gardeners face challenges, but persistence pays off. Now’s the perfect time to roll up your sleeves and give it a try!
🌱 Next step: Once your rooted cuttings are established, transplant them into pots or garden beds and watch them flourish. Happy gardening! 🌿