
Tools
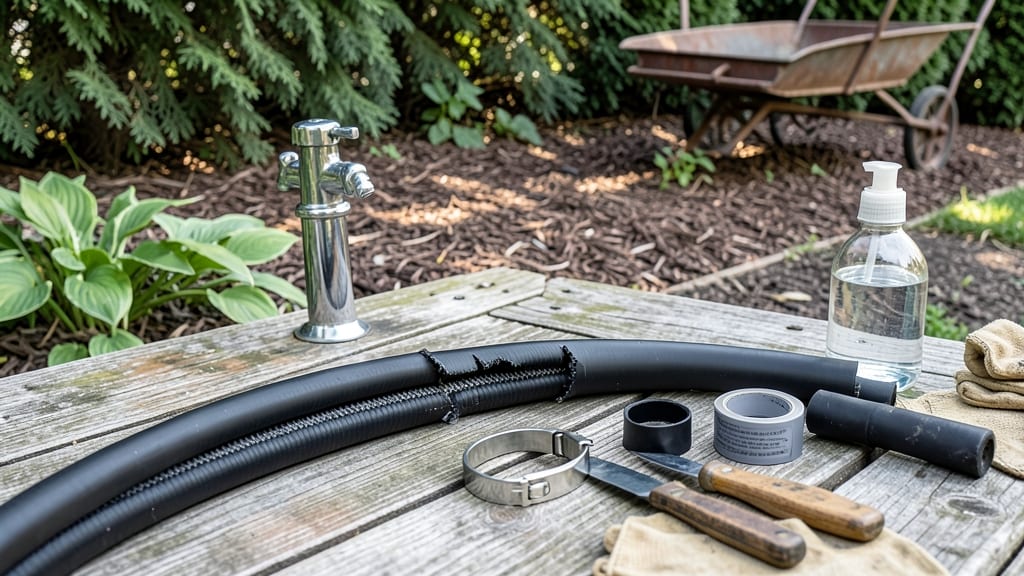
A cut garden hose can turn a peaceful watering session into a chaotic mess. 💦 I've fixed more of these than I can count, and the right repair keeps water flowing without wasting a drop or ruining your plants.
The key is clean cuts and the right tools—no need for fancy equipment. Grab a hose repair clamp, slip coupling, or even heavy-duty hose tape, and you'll have a leak-proof fix in 5 minutes. The trick is prepping the cut ends properly so the repair holds under pressure.
Once you've got it sealed, test it with a quick spray to make sure no water escapes. A well-done repair lasts all season, saving you time and frustration. No more scrambling for duct tape mid-watering! Prevent future cuts by storing hoses properly—coiled loosely, away from sharp edges.
A little care now means fewer repairs later, and your garden stays happy with consistent water flow.
📚 In This Guide
- What you need
- Instructions
- Tips and common mistakes
- Wrapping up and next steps
What you need
- ○ Replacement hose (if the cut is too severe or the hose is old) – Optional but recommended for long-term use.
- ● Garden hose repair clamp (1–2) – Look for rubber or neoprene clamps with stainless steel screws (1/4"–3/8" size).
- ● Hose repair tape (1 roll) – Self-fusing, rubberized tape (e.g., blank">Gorilla Hose Repair Tape) for quick fixes.
- ● Hose repair sleeve (1) – Slip-on rubber sleeve with a clamp (great for larger cuts).
- ● Hose connector or coupling (1) – If you’re replacing a section entirely (e.g., blank">quick-connect fittings).
- ● Scissors or a utility knife – For trimming tape or cleaning the cut edges.
- ● Sandpaper or an emery cloth – Grit #120–#220 to rough up the hose surface for better adhesion.
- ● Rubbing alcohol or acetone – To clean the hose and remove oils/grease.
- ● Ruler or measuring tape – For precise cuts if replacing a section.
- ● Hose epoxy or rubber cement – For extra-secure bonds (e.g., blank">J-B Weld MarineWeld).
- ● Heat gun or hairdryer – To soften the hose material for a snug fit with clamps.
- ● Duct tape (temporary fix) – In a pinch—though it won’t last long outdoors.
- ● New hose (5/16"–3/8" diameter) – If the cut is jagged or the hose is brittle.
Step-by-Step instructions for fixing a cut garden hose
Here's the quick, leak-proof method I use whenever a hose gets chewed or snagged.
🪴 Step 1: Turn Off Water and Locate the Damage
Shut off the water supply immediately to prevent pressure from spraying everywhere. I always check the hose end first for leaks, then run my fingers along the entire length to find cuts or punctures. Look for small holes, jagged tears, or crushed sections—these are the usual culprits.
If the cut is near a fitting or connection, you might need to replace that section entirely. For small tears, a simple patch will work. I mark the damaged area with a piece of tape so I know exactly where to focus my repair efforts.
✂️ Step 2: Clean and Dry the Damaged Area
Use a clean rag or paper towel to wipe away any dirt, moisture, or debris from the cut edges. This ensures the patch material will stick properly. If the hose is still damp, let it dry completely—even a little moisture can weaken the repair.
For stubborn grime, I sometimes use a bit of rubbing alcohol on a cotton swab to disinfect the area. This extra step prevents mold or mildew from forming under the patch later. Once clean, the edges should look smooth and free of debris.
💧 Step 3: Apply a Waterproof Patch
Cut a small piece of vinyl hose repair tape or a rubber patch kit to cover the damaged area with at least ½ inch of overlap on all sides. Press firmly around the edges first, then smooth the center to remove any air bubbles.
For larger cuts, I use a hose repair clamp instead. Slide the clamp over the damaged section, then tighten it evenly. Test the repair by turning the water back on slowly—watch for any leaks or drips. If water seeps through, you’ll need to reinforce the patch or try a different method.
☀️ Step 4: Test the Repair Under Pressure
Turn the water back on and let it run for 1-2 minutes while keeping an eye on the patched area. If the repair holds without leaks, you’re good to go. I usually run the hose for a few extra minutes to make sure no hidden weak spots develop.
If water still leaks, let the hose dry completely and apply a second layer of patch material. For stubborn leaks, consider replacing the damaged section of hose entirely—sometimes a patch isn’t enough for heavy wear.
⏰ Step 5: Store the Hose Properly to Prevent Future Damage
After fixing the hose, coil it neatly and store it in a dry place, away from sharp objects or heavy equipment. I always hang my hoses on a hook or lay them flat in a hose reel to avoid kinks and tangles.
If your hose gets chewed by pets or animals, consider wrapping it in hose armor or a protective sleeve for future use. A little prevention goes a long way in keeping your hose in good shape for seasons to come.
Tips & tricks for leak-proof hose repairs
Real talk: A quick patch can fail if you don't nail the prep work. Here's how to make every repair last.
Damage Assessment: In Step 1, don't just eyeball the cut—flex the hose while running water through it. You'll often find hidden weak spots that need attention too. I've seen cases where a tiny tear near a fitting caused the whole repair to fail. If the cut is larger than a quarter-inch, consider a clamp instead of tape.
Cleaning is Critical: The instructions mention cleaning, but I can't stress enough how important this is. In Step 2, use a bit of fine-grit sandpaper on stubborn grime—it roughens the hose surface so the patch grips better. And always let the hose dry completely; even slight dampness can cause the repair to peel within hours. I learned this the hard way after my first patch failed after just one use.
Pressure Test Like a Pro: When testing your repair in Step 4, don't just watch for leaks—listen too. A hissing sound means air is escaping, which often indicates a poor seal. I've found that running the hose for the full 2 minutes at maximum pressure (not just a trickle) reveals weak spots that wouldn't show otherwise. If you hear anything unusual, dry it completely and add a second layer.
Preventive Armor: For hoses that get chewed regularly, consider wrapping them in hose armor before storing. I use a simple plastic sleeve around the most vulnerable sections—it's cheap and adds years to your hose's life. This is especially helpful for gardeners with pets or wild animals in their yard.
Pro Tips for Fix A Cut Garden Hose
- Real talk: A quick patch can fail if you don't nail the prep work. Here's how to make every repair last.
- Damage Assessment: In Step 1, don't just eyeball the cut—flex the hose while running water through it. You'll often f...
- Cleaning is Critical: The instructions mention cleaning, but I can't stress enough how important this is. In Step 2, ...
Frequently asked questions
Got questions about fixing a cut garden hose? You’re not alone! Here are some of the most common concerns—and quick answers—to help you get back to watering without a hitch.
Can I fix a cut garden hose temporarily before replacing it?
For small cuts or leaks, a quick-fix patch (like a rubber repair clamp or hose tape) buys you time. Just clean the area, apply the patch, and test for leaks. If the cut is jagged or large, though, consider replacing the hose—especially if it’s old or brittle.
Will duct tape or electrical tape work as a hose repair?
In a pinch, yes, but it’s not ideal for long-term use. Duct tape or electrical tape can seal minor leaks temporarily, but water pressure and UV rays will degrade them fast. For a durable fix, use a rubber repair clamp, hose repair kit, or epoxy-based solution instead.
How long does a DIY hose repair last?
With the right materials (like a hose repair clamp or epoxy), a well-applied fix can last months to years, depending on water pressure and exposure. Check the repair every season—if it cracks or loosens, reapply or replace. For heavy-duty hoses (like those for sprinklers), invest in a reinforced patch.
What’s the best time to fix a leaking hose?
Fix it as soon as you spot the leak—especially before watering season starts! Wait too long, and the cut could worsen, or the hose may weaken from pressure. If you’re not ready to repair it immediately, coil the hose and store it in a dry place to prevent further damage.
Is there a permanent fix for a cut garden hose?
For a truly permanent solution, replace the damaged section with a hose coupling or use a hose repair sleeve (like those made for heavy-duty hoses). If the cut is near a connector, consider cutting out the damaged part and splicing in a new section with hose fittings. For DIYers, a two-part epoxy can also create a watertight bond.
What should I NOT do when fixing a cut hose?
Here’s what to avoid:
- Ignoring the leak—even small cuts can turn into bigger problems.
- Using super glue or silicone sealant alone—these won’t hold up to water pressure.
- Skipping cleanup—dirt or debris weakens repairs.
- Over-tightening clamps—this can crush the hose and cause new leaks.
Wrapping up and next steps
Fixing a cut garden hose doesn’t have to be a hassle—with the right tools and a little know-how, you’ll have it leak-proof in no time! 🌱 Whether you used a hose repair clamp, a rubber patch, or even duct tape as a temporary fix, you’ve just saved yourself from wasted water and frustration.
Now that your hose is good as new, grab your gardening gloves and get back to watering those thriving plants or prepping for your next outdoor project.
Need to upgrade your hose game? Consider investing in a high-quality, durable hose next time—your future self (and your garden) will thank you! 🌿