
Pruning
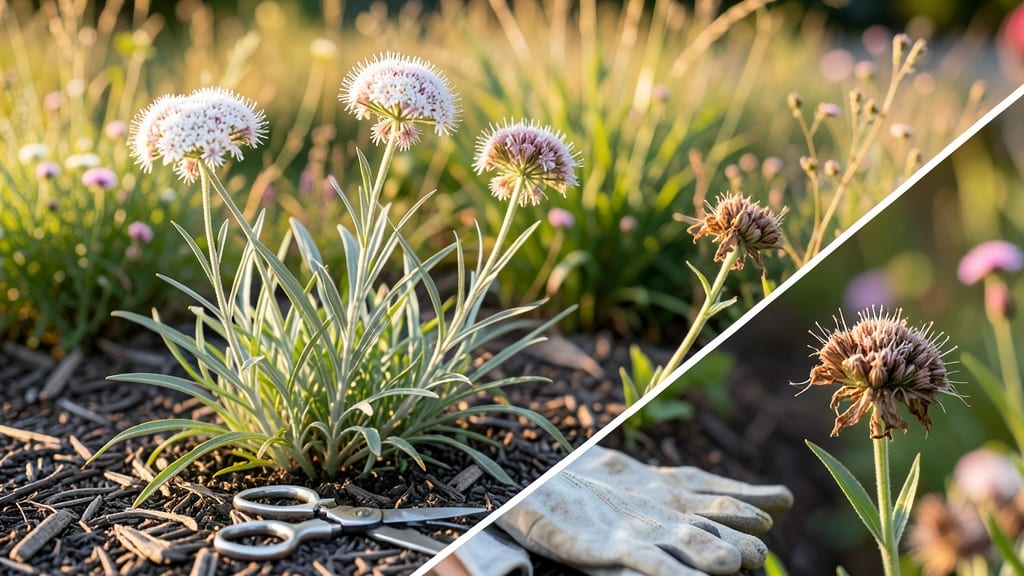
One simple snip keeps your gaura blooming all summer. ✨ I’ve watched this delicate plant go from a few scattered flowers to a cloud of pink and white blooms—just by mastering the deadheading technique. You only need sharp pruners (or clean scissors) and gardening gloves to protect your hands.
The key is timing: snip spent blooms right after they fade, but never cut into the woody stems—just above the next set of leaves. What you’ll get is a bushier plant with nonstop blooms from early summer until frost.
My gaura now looks like a pink waterfall, and the secret is in those quick, clean cuts. Avoid over-pruning—this plant thrives on light trims. And if you see leggy stems, a light haircut in early spring keeps it compact without sacrificing flowers.
📚 In This Guide
- What you need
- Instructions
- Tips and common mistakes
- Wrapping up and next steps
What you need
- ● Pruning shears or sharp scissors: Choose bypass pruners (not anvil-type) for clean cuts. A 5-inch pair works best for most Gaura stems.
- ○ Gloves (optional but recommended): Wear gardening gloves to protect your hands from thorns or rough stems. Lightweight, breathable fabric is ideal.
- ● Disinfectant (70% isopropyl alcohol or diluted bleach): A small spray bottle or wipe to sterilize tools between cuts (prevents disease spread).
- ● Trash bag or bucket: For collecting spent blooms and debris. A 5-gallon bucket is perfect for moderate-sized gardens.
- ● Water (for post-pruning care): A hose with a gentle spray nozzle or a watering can to hydrate plants after deadheading.
- ● Hand lens or magnifying glass: Helps spot hidden pests or damaged areas on stems.
- ● Garden kneeler or stool: For comfort, especially if your Gaura is tall or sprawling.
- ● Compost bin: To recycle spent blooms into nutrient-rich soil amendments.
- ● Plant food (balanced fertilizer): A 10-10-10 or 20-20-20 formula (diluted to half-strength) to give your Gaura a post-pruning boost.
Step-by-Step instructions for deadheading gaura
This simple technique keeps your gaura blooming all season—no fancy tools required.
✂️ Step 1: Wait for the Right Moment
Deadhead gaura when blooms begin to fade but haven't turned brown yet. Look for spent flowers that look slightly wilted or have lost their vibrant color. This is your cue—the plant is redirecting energy to seed production, not new blooms. I always check in the morning when flowers are fully open and easiest to spot.
If you wait until flowers turn brown, you're missing the best time to stimulate fresh blooms. The goal is to remove just the faded flower head while leaving the green stem intact. This encourages the plant to focus on producing more flowers instead of seeds.
✂️ Step 2: Use Clean Pruners or Fingers
Grab your clean, sharp pruners or simply use your fingers to pinch off the faded blooms. I prefer fingers for small clusters because it's faster and prevents accidentally cutting too much stem. Just grip the base of the spent flower head and give a gentle twist or pinch to remove it completely.
For larger clusters, I reach for my pruners and make a clean cut just above a set of healthy leaves or a leaf node. This ensures the plant has a clean surface to heal and continue growing. Avoid cutting into woody stems—gaura's delicate stems can't recover from deep cuts.
✂️ Step 3: Maintain the Plant's Shape
While you're deadheading, take a moment to check the overall shape of your gaura. This airy plant naturally grows in a mounding habit, but occasional trimming keeps it looking its best. I like to trim back any leggy stems that have lost their lower leaves—this encourages bushier growth.
For particularly tall stems, you can cut them back by about one-third to promote fuller growth. Just make your cuts at a 45-degree angle above a leaf node. This prevents water from pooling on the cut and helps the plant heal faster. You'll see new growth emerge from the sides within a few weeks.
💧 Step 4: Water and Fertilize Lightly
After deadheading, give your gaura a light watering to help it recover. The plant will need about 1 inch of water per week, but be careful not to overwater—gaura prefers well-draining soil and can't tolerate soggy roots. Water in the morning so any excess drains away during the day.
Follow up with a light application of balanced fertilizer (10-10-10) about two weeks after deadheading. Use about half the recommended strength to avoid burning the plant. This gives your gaura a gentle boost to produce even more beautiful blooms. I always fertilize in the morning when temperatures are cooler, which reduces stress on the plant.
☀️ Step 5: Repeat Regularly for Continuous Blooms
Gaura blooms continuously from early summer until fall, so you'll need to deadhead regularly. I check my plants every 5-7 days during peak bloom season and remove any faded flowers as soon as I spot them. This keeps the plant focused on producing new blooms instead of seeds.
With consistent deadheading, your gaura will reward you with an extended bloom season. The more you maintain it, the more flowers you'll see. Just remember to keep an eye out for any signs of stress—yellowing leaves or wilting can indicate overwatering or poor drainage, so adjust your care routine as needed.
Tips & tricks for perfect gaura deadheading
A few simple tricks will help you keep your gaura flowering like a pro—without the guesswork. Here's what I've learned after years of gardening with these delicate beauties.
Timing is Everything: Morning is the absolute best time to deadhead gaura. The dew has dried, so you can see the flowers clearly, but the plant hasn't yet used up its morning energy reserves. I've noticed that plants deadheaded in the morning show new buds within just 3-5 days, while afternoon cuts might take a week or more. The plant's natural rhythm matters more than you'd think—it's like giving it a fresh start each day.
Tool Selection Matters: Don't underestimate the importance of sharp tools! I've tried everything from dull garden shears to kitchen scissors, but nothing beats a pair of clean, sharp pruners for this job. The clean cut prevents tearing and minimizes stress on the plant. If you don't have pruners, disinfected kitchen shears work in a pinch—just wipe them with rubbing alcohol between cuts to prevent disease spread. The difference in how cleanly the stem separates is night and day.
Visual Cues for Perfect Cuts: When making your cut in Step 2, look for the small bump where a leaf or bud emerges—this is called the node. The cut should be about ¼ inch above this node at a 45-degree angle. This angled cut creates more surface area for water to evaporate, which helps prevent rot. I like to think of it as giving the plant a little "roof" to keep water off its neck—literally! The angle makes all the difference in preventing future problems.
Seasonal Adjustments: During the hottest months of summer, gaura's blooming slows naturally. Instead of the usual 4-6 week deadheading schedule from Step 5, I extend this to 6-8 weeks during peak heat. The plant conserves energy, and forcing it to bloom too frequently can stress it out. Think of it like giving your plant a little vacation—it comes back stronger when the weather cools.
Pro Tips for Deadhead Gaura
- A few simple tricks will help you keep your gaura flowering like a pro—without the guesswork. Here's what I've learne...
- Timing is Everything: Morning is the absolute best time to deadhead gaura. The dew has dried, so you can see the flow...
- Tool Selection Matters: Don't underestimate the importance of sharp tools! I've tried everything from dull garden she...
Frequently asked questions
about deadheading gaura—because even the pros have questions!How often should I deadhead my gaura?
Deadhead gaura regularly—about once a week during peak bloom (spring to fall). For continuous blooms, snip spent flowers as soon as they fade. Overgrown plants may need bi-weekly attention, but don’t stress—gaura is forgiving!
Can I deadhead gaura in winter?
Nope! Gaura goes dormant in winter (zones 5-9), so skip deadheading until early spring when new growth appears. Pruning in winter can damage tender stems. Instead, mulch to protect roots!
What if I forget to deadhead—will my gaura still bloom?
Yes! Gaura is low-maintenance and may still produce flowers, but they’ll be less abundant. Over time, neglected plants can get woody or leggy. Think of deadheading as a bloom boost—not a chore!
Are there alternatives to deadheading gaura?
If deadheading feels tedious, try these tricks:
- Shear lightly: Trim 1/3 of the plant in early spring for a fresh start.
- Let it go wild: Gaura self-seeds! Enjoy the natural charm of sporadic blooms.
- Use pruning shears with dampened blades to reduce tearing.
Why do my gaura flowers keep dropping before I can deadhead them?
This could mean:
- Overwatering: Gaura hates soggy roots—water deeply but infrequently.
- Pests: Check for aphids or spider mites (spray with water or neem oil).
- Heat stress: Provide afternoon shade in hot climates.
Wrapping up and next steps
Deadheading your gaura is a simple yet rewarding task that keeps your garden vibrant and encourages more stunning blooms! 🌸 With just a pair of clean pruners and a little patience, you can transform your plant into a year-round showstopper.
Remember, consistency is key—check your gaura regularly and trim as needed, especially after heavy blooming periods.
Now that you’re armed with the know-how, roll up your sleeves and enjoy the process! For extra flair, consider pairing your deadheaded gaura with complementary plants like lavender or ornamental grasses. Happy gardening! 🌿