
Landscaping
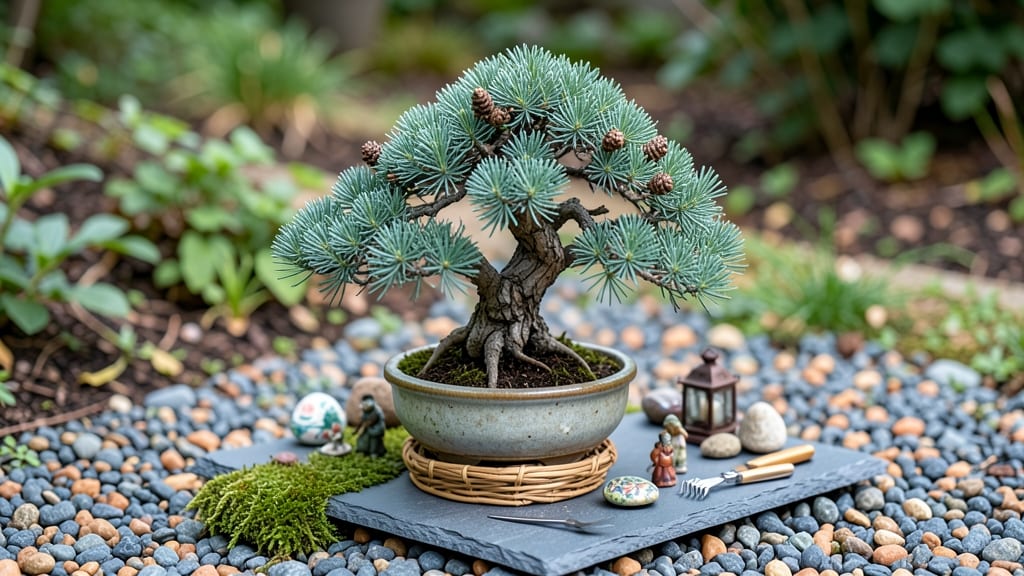
How to decorate a small tree and turn it into a vertical garden masterpiece takes just a few minutes—no fancy yard needed. ✨ Transforming an ordinary tree into a lush, inviting corner is easier than you think, and it works for any space, whether it’s a pot on your balcony or a tree planted in the ground.
The key is blending function with flair: use mulch rings to highlight the base, weave in climbing vines like jasmine or clematis for instant height, and add solar-powered fairy lights for evening magic.
Even painted accents (think striped trunks or geometric patterns) elevate the look without harming the tree—just use non-toxic, water-based paints. The best part? These ideas require zero pruning and keep maintenance lighter than traditional gardens.
Picture this: a tree bursting with trailing ferns at the base, blooming annuals cascading from hanging pots, and whimsical wind chimes swaying in the breeze. You’ll create a focal point that feels intentional, not forced, while keeping the tree healthy and happy.
The results? A space that feels alive, textured, and uniquely yours—no green thumb required.
Works for balconies, front porches, or even that lone tree in your tiny urban plot. Let’s make it happen without the hassle of a full garden overhaul.
📚 In This Guide
- What you need
- Instructions
- Tips and common mistakes
- Wrapping up and next steps
What you need
- ● Small tree (3–6 ft tall) – Choose a dwarf variety (e.g., Japanese maple, bonsai, or ornamental cherry) with a sturdy trunk.
- ● Potting soil – 2–3 gallons of well-draining, organic mix (e.g., cactus/succulent blend or peat-based soil).
- ● Slow-release fertilizer – 1–2 tbsp of granular or liquid fertilizer (e.g., 10-10-10 NPK ratio).
- ● Miniature plants or succulents – 5–10 small, trailing, or compact plants (e.g., ferns, ivy, or sedum).
- ● Decorative accents – 3–5 pieces (e.g., tiny garden flags, pebbles, or mosaic tiles for texture).
- ● Watering can with a fine rose – For gentle hydration without disturbing soil.
- ● Gloves – A pair to keep hands clean while handling soil and plants.
- ● Small hand trowel or spoon – For planting and adjusting soil.
- ○ Spray bottle – Optional, for misting delicate plants.
- ● Twine or decorative wire – Thin gauge (18–20) to loosely secure trailing plants (if needed).
- ○ LED string lights (optional) – Solar-powered or battery-operated for a magical glow.
- ● Tree collar or protective wrap – To shield the trunk from scratches (e.g., burlap or felt).
- ● A sunlight assessment – Confirm your tree gets 4+ hours of light (adjust plant choices accordingly).
- ● Drainage plan – Ensure the pot has holes or elevate it on a tray to prevent root rot.
- ● Patience (but not too much!) – Give plants 1–2 weeks to settle before full decorating.
Step-by-Step instructions for Transforming a small tree into a vertical garden
Here's how I turn bare branches into lush, living vertical displays—no green thumb required.
🪴 Step 1: Select and Prepare Your Tree
Choose a small tree with sturdy branches—apple, cherry, or even a potted olive tree works beautifully. Prune any dead or crossing branches first with clean, sharp pruners, cutting just above a leaf node. This ensures clean wounds and encourages new growth. I like to work on a cloudy day so the tree isn't stressed by midday sun.
For potted trees, remove it from its container and inspect the roots. Gently tease apart any circling roots with your fingers—this prevents future root-bound issues. If you're working with a young tree, now's the time to stake it if needed, using three stakes positioned at the base in a tripod formation.
🌱 Step 2: Create Hanging Planters or Pocket Planters
For a natural look, use fabric grow bags (available in 1-gallon sizes) or felt pocket planters that attach directly to branches. Cut the bags to fit around smaller branches and secure them with landscape fabric ties—never use wire, which can damage bark. Place one bag per branch, spacing them evenly along the tree's height for balanced growth.
Fill each bag with a lightweight potting mix (I blend 60% coco coir with 40% perlite for excellent drainage). Moisten the mix until it's damp but not soggy—you should be able to squeeze a handful without water dripping out. This prevents root rot while keeping moisture available for new plantings.
☀️ Step 3: Choose and Plant Complementary Plants
Select plants that thrive in similar light conditions. For full sun exposure, try succulents (like sedum) or herbs (thyme or oregano) that love dry conditions. In partial shade, opt for ferns or ivy—both cascade beautifully and tolerate occasional dry spells. Avoid heavy feeders like petunias; they'll outcompete your tree for nutrients.
Plant 1-2 small plants per bag, pressing the soil gently around the roots to eliminate air pockets. Water lightly immediately after planting to help settle the soil. Here's the thing—don't overcrowd. Each plant needs room to establish, and too many will compete for water and nutrients, leading to weak growth.
💧 Step 4: Establish a Watering and Maintenance Routine
Water deeply 2-3 times per week during the first month, checking that the soil in each bag is damp but not waterlogged. After that, adjust based on your climate—most vertical gardens need water when the top inch of soil feels dry to the touch. I use a gentle spray nozzle to avoid disturbing the plants while watering.
Fertilize lightly every 4-6 weeks with a balanced, water-soluble fertilizer (10-10-10 ratio) diluted to half-strength. This provides just enough nutrients without overwhelming the tree or plants. Watch for signs of over-fertilization, like yellow leaves or crispy edges—this means you're overdoing it.
✂️ Step 5: Prune and Refresh Seasonally
In early spring, trim any leggy or overgrown plants to encourage bushier growth. Use bypass pruners to make clean cuts just above a leaf node. This keeps the vertical garden looking neat and prevents plants from shading the tree's leaves too much. I also check for any planters that have become too heavy and replace them if needed.
Every 6-12 months, refresh the potting mix in each bag by removing the old soil and adding fresh lightweight mix. This prevents nutrient depletion and improves drainage. It's also a good time to rotate the planters to different branches if some are growing unevenly—this keeps the tree balanced and the plants happy.
Tips & tricks for perfect vertical tree decorations
Transforming a small tree into a vertical garden takes thoughtful planning—here's how to avoid common pitfalls and elevate your design.
Branch Selection Strategy: In Step 1, focus on branches that are at least ½-inch thick to support the weight of planters. Thinner branches may bend under the weight of even 1-gallon fabric grow bags. I test branch strength by gently pressing down—if it bends more than 10 degrees, skip it or reinforce with additional ties.
Planter Placement: When attaching planters in Step 2, follow the "thirds rule"—place them at the lower third (for ground-level plants), middle third (for mid-height plants), and upper third (for trailing varieties). This creates visual balance and prevents the tree from looking top-heavy. For extra security, I wrap the fabric ties in a figure-eight pattern around the branch.
Plant Pairing: In Step 3, pair plants with complementary growth habits—place trailing plants like ivy in the upper bags where they can cascade, and upright plants like thyme in the lower bags. This creates natural layers and prevents overcrowding. I always include at least one drought-tolerant plant per tree to reduce maintenance.
Watering Wisdom: During the initial 2-3 times per week watering in Step 4, use the "finger test" method: Insert your finger 1 inch into the soil. If it feels dry, water thoroughly until you see moisture at the bottom of the bag. Overwatering is the #1 killer of vertical gardens—always check drainage holes in the bags.
Pro Tips for Decorate A Small Tree
- Transforming a small tree into a vertical garden takes thoughtful planning—here's how to avoid common pitfalls and el...
- Branch Selection Strategy: In Step 1, focus on branches that are at least ½-inch thick to support the weight of plant...
- Planter Placement: When attaching planters in Step 2, follow the "thirds rule"—place them at the lower third (for gro...
Frequently asked questions
Got questions about turning your tiny tree into a stunning vertical garden? Here are some of the most common ones—and their answers!
What’s the best type of small tree for decorating?
Choose slow-growing, sturdy trees like Japanese maples, dwarf citrus, or bonsai-friendly varieties. Avoid fast-growing or brittle branches—they won’t hold decorations well. If you’re unsure, opt for a young, healthy tree with a natural, compact shape.
How long does it take to decorate a small tree?
Most projects take 30–60 minutes for basic decor (like fairy lights or small pots). If you’re adding climbing plants or intricate arrangements, budget 1–2 hours. Pro tip: Pre-measure and prep materials to save time!
Can I decorate a tree with artificial plants or ornaments?
Artificial plants, miniature figurines, or even DIY painted rocks work great for low-maintenance decor. Just ensure they’re lightweight and secured with soft ties (like floral wire) to avoid damaging branches. For a natural look, mix real and faux elements!
What if my tree’s branches are too thin to hold decorations?
No problem! Use bamboo stakes, small hooks, or adhesive clips to anchor heavier items. For ultra-delicate branches, try spray adhesive (like E6000) for lightweight decor. If the tree is very young, start with hanging planters or air plants that don’t require support.
Will decorations survive rain or wind?
Most decorations (like plastic ornaments or metal hooks) are weather-resistant, but check labels for durability. For windy areas, secure items with zip ties or weatherproof glue. If using live plants, opt for self-watering planters or drought-tolerant succulents to reduce maintenance.
How do I remove decorations without harming the tree?
Gently untie knots or unclip hooks to avoid snagging bark. If using adhesive, let it dissolve with rubbing alcohol (test a small area first). For stubborn decorations, trim ties with scissors—never pull! After removal, inspect branches for damage and prune if needed.
Wrapping up and next steps
Decorating a small tree doesn’t have to be complicated—just a little creativity and the right techniques! Whether you’re adding whimsical ornaments, lush greenery, or cozy lighting, the key is balancing scale, color, and harmony with nature. Start small, plan intentionally, and let your space sparkle with personality.
Now that you’re inspired, take the next step! Sketch a quick design, gather your supplies, and transform your tiny tree into a stunning vertical masterpiece. Your outdoor space (or indoor oasis) will thank you! 🌿✨