
Pests and Diseases
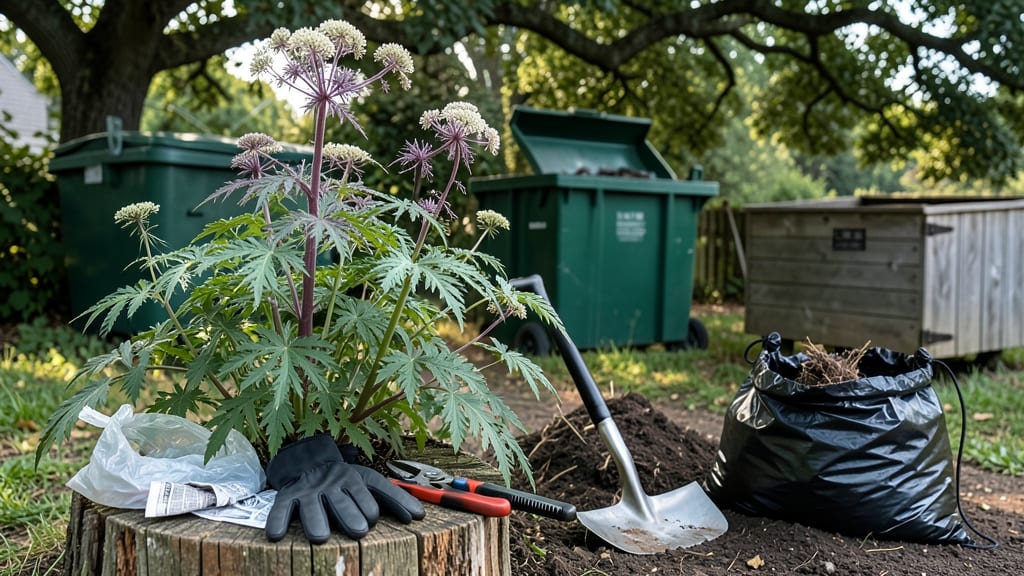
How to dispose of poison hemlock in your garden isn’t just a nuisance—it’s a dangerous plant that can poison pets, kids, and even livestock with just a few chewed leaves. ✨ I’ve had to remove it twice now, and the first time, I nearly made a costly mistake by tossing it in my compost pile. That’s why I’m sharing the exact steps I use to eliminate it safely, without risking contamination or accidental spread.
The key is containment and protection—you’ll need thick gloves, long sleeves, and sealed trash bags rated for hazardous waste. Never burn it (toxic fumes!), and avoid breaking stems, which releases milky sap that can irritate skin.
My go-to method is bagging the whole plant—roots and all—then sealing it in a second bag before disposal at a local hazardous waste facility. Always check local regulations first, as some areas have strict rules about toxic plant disposal.
Once it’s gone, you’ll breathe easier knowing your garden is completely free of this toxic invader. The relief of knowing kids and pets can’t accidentally ingest it is worth the effort.
I also add a layer of cardboard over the soil where it grew to prevent any lingering seeds from sprouting. This plant doesn’t deserve a second chance—neither should you take any risks with it.
If you’re unsure whether you’ve got poison hemlock (it looks eerily like wild carrot), double-check before digging—mistakes happen, and the consequences are serious. When in doubt, call your local extension office for confirmation. Safety first, always. Now, let’s get that toxic plant out of your garden for good.
📚 In This Guide
- What you need
- Instructions
- Tips and common mistakes
- Wrapping up and next steps
What you need
- ● Heavy-duty gloves (nitrile or latex, waterproof, rated for chemical/toxin exposure). Quantity: 2 pairs (one for handling, one backup).
- ● Long-sleeved shirt and pants (preferably thick, non-porous fabric like cotton or polyester). Avoid: Loose clothing that could snag on plants.
- ● Face mask (N95 or respirator) to prevent inhaling spores or dust from dried plants.
- ● Heavy-duty trash bags (20–30 gallon, thick plastic like contractor-grade). Quantity: 3–5 bags (depending on plant size).
- ● Pruning shears or loppers (for cutting stems at the base; sterilize with rubbing alcohol afterward).
- ● Shovel or garden fork (for digging up roots—hemlock can regrow from fragments!).
- ● Disinfectant spray (70% isopropyl alcohol or bleach solution 1:9 with water).
- ● Plastic tarp or sheeting (4’x6’ minimum, to contain debris during disposal).
- ● Wheelbarrow or sturdy container (for transporting cut plants without direct handling).
- ● Garden hose with spray nozzle (to rinse tools and gloves post-disposal).
- ● Plastic bucket with lid (for soaking small plant parts in vinegar or bleach solution before bagging).
- ● Labeling tape and marker (to tag bags as “TOXIC WASTE—DO NOT COMPOST”).
- ● Pet or child safety barriers (if working near a yard where kids/pets roam).
Step-by-Step instructions for removing poison hemlock safely
This is the method I use to eliminate poison hemlock without spreading toxins or harming other plants.
🪴 Step 1: Identify and Confirm the Plant
Poison hemlock (Conium maculatum) looks like giant Queen Anne's lace but with purple-spotted stems and a foul odor when crushed. I always double-check by snapping a stem—if it smells like mouse urine, it's hemlock. Never dig up a plant based on photos alone; confirm with a local extension office or field guide first.
Wear gloves and long sleeves to avoid skin contact with the sap. The plant's toxins—coniine and gamma-coniceine—can cause respiratory distress if inhaled when crushed. Work in a well-ventilated area, preferably outdoors with a gentle breeze carrying any airborne particles away.
✂️ Step 2: Cut the Plant at the Base
Use heavy-duty pruners or a sharp shovel to cut the stem 2-3 inches below ground level. This prevents regrowth from the root crown, which is where many invasive plants rebound. I like to make a clean cut rather than pulling, as this reduces the chance of breaking the root system and spreading fragments.
Bag the entire plant immediately, including stems and leaves, in thick plastic trash bags (at least 2-mil thickness). Seal the bag tightly at the top and twist the opening to minimize leaks. Label the bag clearly with "POISON HEMLOCK—DO NOT COMPOST" in permanent marker.
💧 Step 3: Treat the Soil to Prevent Regrowth
Dig around the cut area with a spade to expose the root zone. Apply vinegar-based herbicide (5% acetic acid or stronger) directly to the soil where the roots were. I use a 1:1 ratio of white vinegar and water in a pump sprayer, applying until the soil is thoroughly saturated within a 6-inch radius of the cut stem.
Cover the treated area with black plastic sheeting for 4-6 weeks to block sunlight and kill any remaining root fragments. Secure the edges with bricks or soil to prevent wind from lifting it. This solarization method ensures no viable root pieces survive to regrow.
🌱 Step 4: Dispose of the Plant Material Properly
Place the sealed plastic bag with the hemlock in your municipal trash collection on the day it's scheduled for pickup. Never burn hemlock—its toxins release harmful fumes when combusted. If your local landfill doesn't accept hazardous waste, contact your county extension office for disposal guidelines; some areas have special toxic plant drop-off days.
Wash all tools, gloves, and clothing with hot, soapy water immediately after handling. I like to add a splash of bleach solution (1 part bleach to 10 parts water) to the wash cycle to neutralize any residual toxins. Store tools in a dry place until they're fully dry to prevent rust or contamination.
☀️ Step 5: Monitor the Area for New Growth
Check the treated site weekly for 3 months for any new shoots. Poison hemlock can sprout from even small root fragments, so act quickly if you spot regrowth. Repeat the cutting and soil treatment process if needed, but this time, dig deeper—8-10 inches down—to ensure all root material is removed.
After the 3-month period, you can replant the area with non-invasive species. I recommend deep-rooted perennials like comfrey or clover, as they outcompete weeds and help restore soil health. Avoid planting edibles in the same spot for at least 6 months to be safe.
Tips & tricks for safe poison hemlock removal
Here's what I've learned after years of dealing with this dangerous plant—these details make all the difference between a clean removal and potential regrowth.
Safety First: In Step 1, when you're identifying the plant, snap a stem near the base to confirm that mouse urine smell—this is your definitive test. The toxins in poison hemlock can cause respiratory distress if inhaled, so work in a well-ventilated area with a gentle breeze carrying any airborne particles away. I always wear a face mask rated for organic dust when handling it, even though the instructions don't mention it—better safe than sorry.
Root Removal Technique: For Step 2, when cutting 2-3 inches below ground level, use a sharp spade to make a clean vertical cut rather than pulling. This prevents breaking the root system into fragments that could sprout later. I've seen hemlock regrow from what looked like tiny root pieces—don't underestimate those roots!
Vinegar Application: In Step 3, when applying the vinegar solution, focus on the exact 6-inch radius around the cut stem. I've found that using a pump sprayer with a narrow nozzle gives me better control than just pouring it on. Also, reapply the vinegar solution after the first rain—it gets diluted quickly.
Plastic Sheeting Hack: For the 4-6 week solarization period in Step 3, I recommend using heavy-duty landscape fabric instead of just plastic sheeting. It's more durable, lets some moisture through, and stays put better in windy conditions. If you use plastic, weigh down all edges with bricks or soil to prevent wind from lifting it.
Pro Tips for Dispose Of Poison Hemlock
- Here's what I've learned after years of dealing with this dangerous plant—these details make all the difference betwe...
- Safety First: In Step 1, when you're identifying the plant, snap a stem near the base to confirm that mouse urine sme...
- Root Removal Technique: For Step 2, when cutting 2-3 inches below ground level, use a sharp spade to make a clean ver...
Frequently asked questions
Can I burn poison hemlock in my backyard?
No, never burn poison hemlock—even in small amounts. Burning releases toxic compounds into the air, posing risks to you, pets, and wildlife. Instead, use the safe disposal methods outlined earlier, like bagging and landfill disposal or contacting local hazardous waste programs.
What’s the best time of year to remove poison hemlock?
The ideal time is late spring to early summer (May–June), when the plant is actively growing but before it produces seeds. This makes it easier to pull or dig up roots. Avoid removing it in fall, as seeds may already be spreading. Always wear gloves and protective gear!
Is it safe to compost poison hemlock?
Absolutely not. Poison hemlock contains toxic alkaloids that won’t break down in compost. These chemicals can leach into soil or contaminate compost, harming plants, pets, or even humans. Stick to approved disposal methods like sealed trash bags for landfill pickup.
How do I keep pets and kids away while disposing of poison hemlock?
Create a designated disposal zone far from play areas or pet zones. Use temporary fencing or bright markers to warn others. Wear gloves, long sleeves, and a mask to avoid accidental contact. Store cut plants in sealed, labeled containers until disposal day. Supervise pets/kids until the area is fully cleaned.
Will vinegar or herbicide kill poison hemlock?
Vinegar (10–20% acetic acid) can weaken young plants but may not kill mature roots. For herbicides, use glyphosate-based products (like Roundup) only as a last resort, following label instructions precisely. Never use herbicides near edible plants or water sources. Physical removal (digging) is the safest long-term solution.
Wrapping up and next steps
Disposing of poison hemlock safely is all about protection, precision, and proper disposal—keeping you, your family, and the environment secure.
By following the right steps—wearing gloves, sealing it in a trash bag, and contacting local waste services—you’re not just removing a hazard; you’re reclaiming your garden with confidence. Now’s the time to take action! 🌱
Your Next Step:
- 🔍 Inspect your garden for any lingering signs of poison hemlock or other invasive plants.
- 📞 Reach out to your local extension office or waste facility for tailored disposal advice.
- 🌿 Transform your space with safe, toxin-free plants—your garden (and peace of mind) will thank you!