
Vegetables
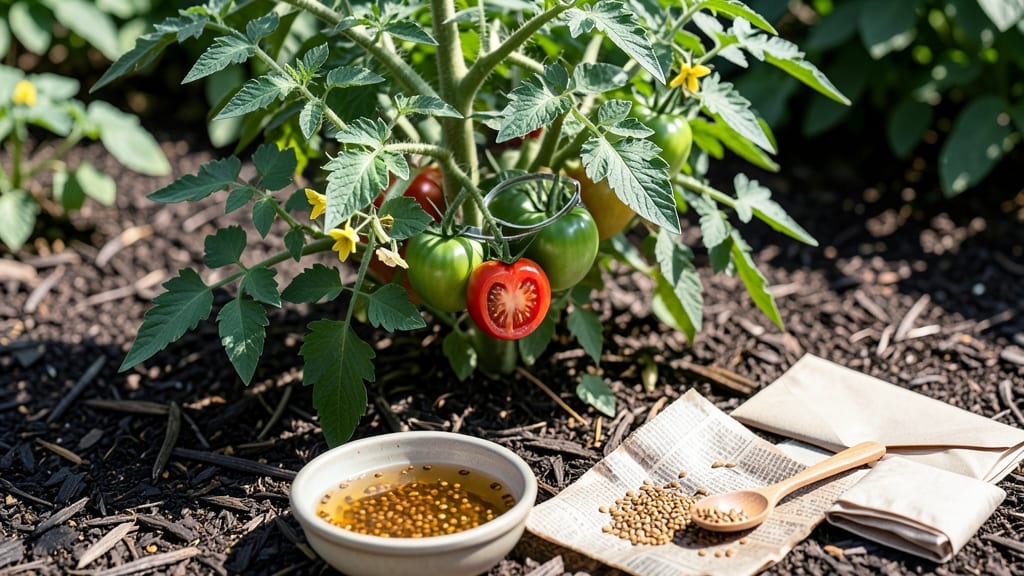
How to dry tomato seeds for planting properly means next year’s garden starts with strong, viable sprouts. 🌱 I’ve saved seeds from heirloom tomatoes for years, and this fermentation method guarantees seeds that germinate reliably—no more weak seedlings or wasted effort. The process is simple but requires patience: scoop out the gel-filled seeds, ferment them in water for 2-3 days, then rinse and dry them completely. Skipping fermentation leaves sticky residue that prevents germination, while over-drying kills viability. After drying on paper towels for 3-5 days, you’ll have clean, dark seeds ready for storage. Test a few by pressing them between your fingers—they should crumble slightly but hold shape, signaling perfect moisture balance. This method works for all tomato varieties, from beefsteaks to cherry tomatoes. Store seeds in a cool, dark place for up to 5 years, and you’ll always have fresh starts for your garden.
📚 In This Guide
- What you need
- Instructions
- Tips and common mistakes
- Wrapping up and next steps
What you need
- ● Ripe tomatoes: 3–5 medium-sized (or as many as you’d like to save seeds from). Choose heirloom or open-pollinated varieties for best results.
- ● Small bowl or container: A shallow, non-metallic dish (glass or ceramic works best) to hold tomato pulp and water.
- ● Water: Enough to cover the tomato pulp (about 1–2 cups total, depending on tomato size). Use room-temperature or slightly warm water.
- ● Fine-mesh strainer or sieve: A kitchen strainer with small holes (0.02–0.04 inch mesh) to separate seeds from gel.
- ● Paper towels or coffee filters: 2–3 sheets to line a drying tray or plate.
- ● Drying tray or plate: A flat, clean surface (like a ceramic plate or baking sheet) to spread seeds evenly.
- ● Small spoon or fork: For stirring and transferring seeds.
- ● Labeling supplies: Tiny envelopes or a marker to label seed varieties (especially useful if saving multiple types!).
- ● Desiccant pack (silica gel): A small packet to speed up drying in humid climates (place in a sealed container with seeds).
- ● Fine paintbrush: For gently separating stubborn seeds stuck to the gel.
- ● Air-tight container: A small jar or envelope with a zip-top bag inside to store dried seeds long-term.
- ○ Humidity monitor: A hygrometer (optional) to check if your drying environment is ideal (aim for 30–50% humidity).
- ● Patience! Seeds need 7–14 days to dry fully—don’t rush it!
- ● A clean, well-ventilated workspace (avoid direct sunlight or high humidity).
- ● Time to let tomatoes ferment for 2–3 days (this removes bad seeds naturally).
Step-by-Step instructions for drying tomato seeds
Here's the foolproof way to save seeds from your best tomatoes—no special tools needed, just patience and a little science.
🌱 Step 1: Scoop Out the Gel and Rinse the Seeds
Cut open a ripe tomato and scoop out the seeds along with their surrounding gel into a clean bowl. The gel contains enzymes that help break down the fruit, but it also needs to be removed before drying. Let the mixture sit for 1-3 days in a warm spot—you'll see the gel ferment and turn cloudy while the viable seeds sink to the bottom.
After fermentation, pour the mixture through a fine-mesh strainer or cheesecloth into another bowl, letting the water rinse away the gel. Swish the seeds gently under cool water to remove any remaining pulp. Good seeds will feel dense and heavy; floaters are non-viable. Discard the floaters and spread the remaining seeds on a clean paper towel or mesh screen.
💧 Step 2: Dry the Seeds Thoroughly
Place the seeds in a warm, dry spot with good airflow—like a sunny windowsill or a seed dryer set to 70-80°F. Avoid direct sunlight, which can overheat them and reduce viability. Stir the seeds every 12 hours to ensure even drying. They're ready when completely dry to the touch and brittle—about 3-7 days depending on humidity.
If your climate is damp, speed up the process with a small fan on low setting. The goal is to remove all moisture—any leftover dampness will cause mold or rot during storage. Test a few seeds by crushing them between your fingers; they should crumble easily without sticking together.
⏰ Step 3: Store Seeds Properly for Next Year
Transfer the dried seeds into a labeled envelope or small glass jar. Add a packet of silica gel or a few uncooked rice grains to absorb any lingering moisture. Store in a cool, dark place like a pantry or seed vault. Under ideal conditions, tomato seeds retain viability for 4-6 years, though germination rates drop after 2 years.
Label your seeds with the tomato variety and harvest date—this helps track performance over time. For best results, test a few seeds each year by planting them in moist paper towels to confirm germination before committing to a full garden bed.
☀️ Step 4: Test Germination Before Planting
Before sowing your saved seeds, do a quick germination test. Moisten a paper towel, place 10-20 seeds between two towels, and fold them into a small packet. Keep it in a warm, dark place and check daily. Viable seeds should sprout in 5-10 days. If fewer than 50% germinate, store the rest in the freezer for another year—the cold can actually improve viability for some varieties.
Once you confirm strong germination, you're ready to plant. Sow seeds ¼ inch deep in warm soil and keep them moist until sprouts appear. This method ensures you'll have healthy, vigorous seedlings to start your next tomato crop.
Tips & tricks for perfect tomato seed drying
Here's what I learned after saving seeds from my garden for years—these little details make all the difference.
Fermentation Time Matters: The 1-3 days fermentation in Step 1 is crucial. If you're impatient, don't rush it—this process breaks down the gel that would otherwise prevent germination. I've seen seeds fermented for only 24 hours produce weak sprouts, while 3-day fermentation gave me strong, healthy seedlings. Keep the bowl covered loosely to allow airflow while preventing fruit flies.
Drying Conditions Are Everything: The 70-80°F temperature range in Step 2 is ideal for most homes, but humidity is the real game-changer. If your climate is damp, that small fan on low can be your best friend—it speeds up drying without overheating. I once left seeds in a humid basement for 7 days and still had mold. The brittle test (crushing between fingers) is foolproof—don't skip it!
Storage Wisdom: That 4-6 year viability window is only true if you remove all moisture. I've had seeds last 5 years in my cool pantry, but they germinated at only 60% after 3 years. For longer storage, consider adding a tiny silica gel packet to your jar—it's worth the investment for heirloom varieties. Labeling with the harvest date saves headaches when you're ready to plant next spring.
Pro Tips for Dry Tomato Seeds For Planting
- Here's what I learned after saving seeds from my garden for years—these little details make all the difference.
- Fermentation Time Matters: The 1-3 days fermentation in Step 1 is crucial. If you're impatient, don't rush it—this pr...
- Drying Conditions Are Everything: The 70-80°F temperature range in Step 2 is ideal for most homes, but humidity is th...
Frequently asked questions
Got questions about drying tomato seeds? You’re not alone—here are the most common ones with straightforward answers to help you succeed!
How long does it take to dry tomato seeds completely?
Drying time varies by method: paper towel takes 3–7 days, screen method 5–10 days, and oven drying just 1–2 hours at 140°F (60°C). Test readiness by crushing a seed—if it’s hard and crumbly, it’s ready! Store in a cool, dry place for up to 4 years.
Can I dry seeds too fast or too slow?
Yes! Too fast (high heat or direct sun) can kill embryos, while too slow (high humidity) risks mold. Aim for slow, even drying (like a dehydrator on low) or use a fan for airflow. If seeds feel damp after a week, extend drying time by 2–3 days.
What if my seeds don’t sprout after drying?
First, check viability: float test—sinkers are good, floaters are bad. If seeds dried properly but still fail, try stratification (mix with damp paper towels, refrigerate 1–2 weeks) or use a seed starter with warmth. Some heirloom varieties need extra patience!
Do I need to remove all the gel before drying?
Not always! The fermentation step breaks down most gel, but rinse seeds until water runs clear if you prefer. Leaving a tiny bit of gel won’t harm drying, but excess moisture can slow the process. For stubborn gel, soak seeds in 1% bleach solution (1 tsp bleach per cup water) for 5 minutes, then rinse.
Can I reuse dried seeds from store-bought tomatoes?
Maybe! Hybrid tomatoes (like Roma or Beefsteak) often produce weak or sterile seeds. For best results, save seeds from heirloom or open-pollinated varieties. If you’re unsure, label seeds as "experimental" and test a few—you might get surprises!
How should I store dried tomato seeds long-term?
Keep seeds in an airtight container (like a glass jar with a silica packet) in a cool, dark place (50–70°F / 10–21°C). Avoid the fridge—temperature swings cause condensation. Label with the variety and date! With proper storage, seeds stay viable for 2–4 years (some last even longer).
Wrapping up and next steps
Drying tomato seeds for planting doesn’t have to be complicated—with the right method, you’ll unlock a foolproof way to save seeds from your favorite tomatoes and grow vibrant plants next season. 🌱 Whether you’re a seasoned gardener or just starting out, fermenting and drying seeds ensures high viability and sets you up for a thriving harvest.
Now that you’ve mastered the process, it’s time to put those seeds to work!
🌱 Your Next Step: Planting with Confidence
Once your seeds are dried and stored, grab a seed-starting kit or repurpose small pots to kickstart your indoor seedlings. Keep an eye on moisture levels, and before you know it, you’ll be transplanting lush, homegrown tomatoes into your garden. Happy growing—your future harvests are waiting! 🍅✨