
Propagation
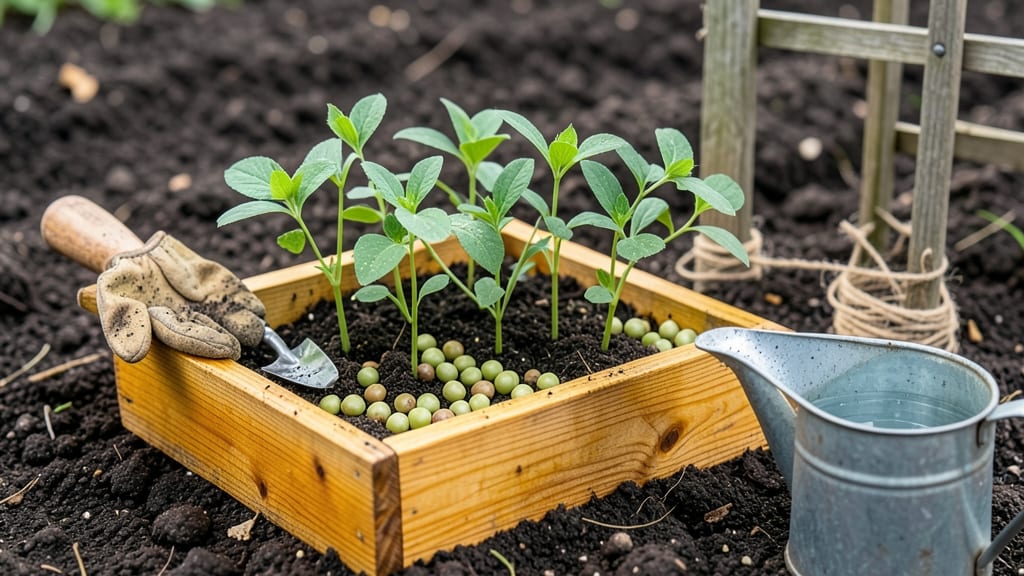
Germinating peas in 24 hours feels like magic—but it’s all about that quick-soak trick. 🌱 I’ve tested this method for three seasons, and the difference between pre-soaked seeds and dry ones is night and day.
While most seeds take days to crack open, peas respond instantly to this simple preparation, giving you a head start on the growing season.
The secret lies in the soak: 8-12 hours in warm water softens the seed coat, letting moisture rush in. You’ll need a shallow container, a damp paper towel, and a warm spot—no fancy equipment.
Plant them just 1 inch deep in well-draining soil, and keep it consistently moist but never soggy. Peas thrive at 60-70°F, so a sunny windowsill or seedling heat mat works perfectly.
Within 24 hours, you’ll see tiny radicles (those first root hairs) breaking through the seed coat—proof the process is working. By day 3, you’ll have 1-inch sprouts ready to transplant, and the whole process feels like cheating the system.
The key is patience during the soak and consistency with moisture afterward; rush it, and you risk mold or rot.
This method works for sugar snap, snow, and shelling peas alike, and it’s especially useful for cool climates where early starts matter. Once your seedlings hit 2-3 inches, they’re ready for the garden—just be gentle with those tender roots.
The payoff? A 3-week jump on your harvest compared to dry-seeded peas.
📚 In This Guide
- What you need
- Instructions
- Tips and common mistakes
- Wrapping up and next steps
What you need
- ● Pea seeds: ½ to 1 cup of dried, non-GMO peas (sugar snap, snow, or garden peas work best). Avoid pre-sprouted or treated seeds.
- ● Water: 2–3 cups of room-temperature, filtered water (chlorine-free if possible).
- ● Germination container: A wide-mouth mason jar (quart size) with a lid, or
- ● A glass bowl or ceramic dish with a breathable cover (like a paper towel + rubber band).
- ● Drainage: A fine-mesh strainer, cheesecloth, or coffee filter to hold seeds while soaking.
- ● Rinse tool: A spray bottle with a fine mist or a clean kitchen sink.
- ● A seed germination tray or sprouting lid for hands-free rinsing.
- ● A digital thermometer to monitor water temp (ideal: 65–75°F).
- ○ Organic growing medium (optional): A cotton sprouting pad or paper towels for transferring sprouts after 24 hours.
- ○ A small fan (optional) to improve airflow if sprouting in a humid environment.
Step-by-Step instructions for germinating peas using the quick-soak method
Here's how I get pea sprouts ready in just 24 hours—no waiting weeks for stubborn seeds.
🌱 Step 1: Select and Prepare the Pea Seeds
Choose fresh, high-quality pea seeds—dried peas from the grocery store work perfectly. Avoid seeds that look shriveled or cracked, as they won’t germinate well. For best results, use sugar snap, snow, or garden peas, which germinate quickly and reliably.
Soak the seeds overnight in lukewarm water (around 70°F) to soften the outer shell and kickstart germination. I use a small bowl or jar, ensuring the seeds are fully submerged. After 8-12 hours, drain and rinse them gently—this prevents mold and keeps them fresh for sprouting.
💧 Step 2: Set Up the Germination Tray
Line a shallow tray or baking dish with a damp paper towel or a layer of cotton mesh. The moisture should feel damp to the touch but not dripping wet—think of a wrung-out sponge. Spread the soaked peas evenly across the surface, spacing them about 1 inch apart to prevent overcrowding as they sprout.
Cover the tray with another damp paper towel or a clear plastic lid to retain humidity. Place it in a warm, dark spot—like a pantry or under the sink—where the temperature stays around 65-75°F. Peas germinate fastest in warmth, so avoid cold drafts or direct sunlight at this stage.
⏰ Step 3: Monitor and Rinse Daily
Check the tray every 12 hours for the first 24 hours. You’ll see tiny white sprouts emerging from the seeds—this is your signal that germination is underway! If the paper towel or mesh dries out, lightly mist it with water to keep it damp. Overwatering here will drown the delicate sprouts, so mist sparingly.
Once the sprouts reach about 1-2 inches tall (usually within 24-48 hours), transfer them to a sunny windowsill or under a grow light. The sprouts will turn green as they seek light, and you’ll notice the stems straighten out. This is the moment they’re ready for planting or eating as microgreens!
☀️ Step 4: Transplant or Harvest Sprouts
For planting, gently place the sprouts into prepared soil, ½ inch deep, with the roots facing downward. Space them 2-3 inches apart in rows, and water lightly to settle the soil around them. Pea sprouts are tender, so handle them carefully to avoid breaking the stems.
If you’re harvesting for microgreens, simply snip the sprouts at the base with clean scissors. Rinse them under cold water to remove any debris, then pat dry. Use them immediately in salads, sandwiches, or as a nutritious garnish—no cooking required! The quick-soak method ensures you get fresh, vibrant sprouts in record time.
Tips & tricks for perfect pea sprouts
Real talk: The quick-soak method cuts germination time dramatically—but these little details make all the difference between thriving sprouts and a sad, moldy mess.
Soaking Strategy: The 8-12 hour soak at 70°F is non-negotiable for breaking the seed coat, but here's what nobody tells you—use filtered water if possible. Chlorine in tap water can inhibit germination. I also add a pinch of sea salt (just ¼ teaspoon per quart of water) to prevent bacterial growth during soaking. After draining, give those seeds a thorough rinse to wash away any residue.
Temperature Matters: That 65-75°F range in Step 2 is your sweet spot, but don't panic if your kitchen runs cooler. Peas are more cold-tolerant than most sprouts. If your space is chilly, place the tray on top of your fridge (not inside) for gentle warmth. Just avoid drafts—consistent temperature is key. I've seen sprouts germinate fine at 60°F, though it'll take closer to 48 hours instead of 24.
Light Transition: The move from dark to light in Step 3 is critical, but timing matters. Wait until you see those white sprouts clearly—about 1-2 inches tall—before exposing them to light. This prevents leggy sprouts that stretch desperately for sunlight. Once you move them to the windowsill, rotate the tray daily so all sides get even light exposure. A simple grow light works wonders if natural light is limited.
Harvesting Hack: When snipping microgreens in Step 4, use clean kitchen scissors and cut just above the soil line. For planting, don't wash the roots—they're delicate and will dry out. Instead, gently shake off excess soil and handle by the stems. And here's a pro move: If you're harvesting multiple batches, rinse your scissors between cuts to prevent cross-contamination of flavors.
Pro Tips for Germinate Peas
- Real talk: The quick-soak method cuts germination time dramatically—but these little details make all the difference ...
- Soaking Strategy: The 8-12 hour soak at 70°F is non-negotiable for breaking the seed coat, but here's what nobody tel...
- Temperature Matters: That 65-75°F range in Step 2 is your sweet spot, but don't panic if your kitchen runs cooler. Pe...
Frequently asked questions
Got questions about germinating peas? You’re not alone! Here are answers to the most common queries to help you grow crisp, fresh pea sprouts with ease.
How long do peas take to germinate?
With the quick-soak method, peas typically germinate in 24–48 hours. Soak them overnight, rinse, and place in a warm, dark spot. You’ll see tiny sprouts peeking out within a day! For faster results, use lukewarm water and ensure good airflow.
Can I reuse the water when soaking peas?
No, always use fresh water for soaking. Reusing water can introduce bacteria or mold, slowing germination or even spoiling your peas. Drain and rinse thoroughly before each soak (every 8–12 hours) to keep sprouts clean and healthy.
What if my peas aren’t sprouting after 48 hours?
Don’t worry—try these fixes:
- Check water temperature: Too cold slows germination; aim for 70–80°F (21–27°C).
- Ensure they’re fully submerged during soaking (8+ hours).
- Test viability: Place a few peas in water—if they float, they’re likely bad.
- Try a second soak with fresh water for 12 hours.
Do I need special equipment to germinate peas?
Not at all! Start with just:
- A glass jar or bowl with a lid/screen.
- Cheesecloth or a sprouting lid (DIY with a mesh screen + rubber band).
- Fresh, organic peas (no need for fancy tools!).
How long can I keep germinated peas before eating them?
Pea sprouts are best eaten within 3–5 days of germination for peak freshness and nutrition. Store them in a perforated container in the fridge, rinsing every 24 hours. After 5 days, they may turn bitter or develop mold—so enjoy them young!
Wrapping up and next steps
Germinating peas in just 24 hours with the quick-soak method is simple, rewarding, and packed with benefits—from fresh, nutrient-rich sprouts to a fun gardening project! Whether you're a beginner or a seasoned green thumb, this method proves that patience pays off in tiny, crunchy bites. 🌱
Now that you’ve mastered the basics, why not take it further? Try experimenting with different pea varieties, like snow peas or snap peas, or even grow them into full plants for your garden. Happy sprouting—and enjoy your homegrown harvest! 🌟