
Propagation
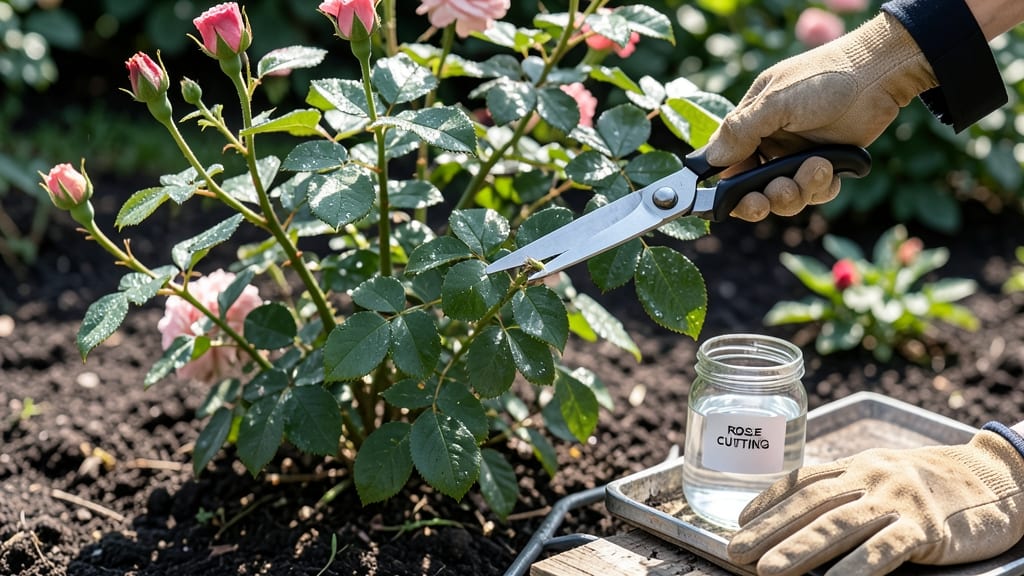
Getting a cutting from a rose bush isn’t as tricky as it seems—especially when you know the right time and technique. 🌹 I’ve propagated dozens of roses this way, and the best time to take cuttings is late summer to early fall, when new growth is mature but not yet hardened off for winter.
The key is selecting healthy, disease-free stems with at least three sets of leaves, which gives you the best chance for successful rooting.
You’ll need just five simple tools: clean, sharp pruners, rooting hormone (optional but helpful), a small pot or jar, well-draining soil or water, and a plastic bag for humidity.
The process is straightforward, but the real secret lies in keeping the cutting moist and warm while it develops roots—typically within 3 weeks if done correctly. I’ve found that using a 50/50 mix of perlite and peat moss speeds up root growth compared to water alone.
Once rooted, your new rose cutting will be ready to transplant into the garden or a larger pot, where it’ll grow into a full-sized bush with the same beautiful blooms as its parent.
The satisfaction of watching those first roots form is unmatched—especially when you realize you’ve essentially cloned a rose you love for free. This method works for hybrid teas, floribundas, and even some shrub roses, so you can expand your garden without buying new plants.
Fair warning: the first few attempts might not always succeed, but even a 20% success rate means you’ll have extra roses to share with neighbors or replant elsewhere. The best part? You’ll save money and end up with healthier, more vigorous plants than store-bought ones. Let’s get those cuttings growing!
📚 In This Guide
- What you need
- Instructions
- Tips and common mistakes
- Wrapping up and next steps
What you need
- ● Healthy rose cuttings: 4–6 inches long, with 3–5 leaves (preferably from new growth, non-flowering stems). Aim for 5–10 cuttings depending on your rose bush size.
- ● Clean, sharp pruning shears or bypass pruners: Disinfected with rubbing alcohol to prevent disease (sterilize between cuts).
- ○ Rooting hormone (optional but recommended): A powder or gel (e.g., Clonex or Dip ‘N Grow) to boost root development.
- ● Well-draining potting mix: A blend of 50% perlite or sand and 50% peat moss or coconut coir (avoid garden soil—it retains too much moisture).
- ● Small pots or containers: 4–6 inches in diameter with drainage holes (e.g., plastic nursery pots, yogurt cups with holes punched in the bottom).
- ● Clear plastic bag or propagator: To create a humid environment (e.g., a ziplock bag or humidity dome).
- ● Spray bottle: Filled with water to mist cuttings lightly (avoid soaking).
- ● Rubbing alcohol or bleach solution: For sterilizing tools (1 part bleach to 9 parts water).
- ● Heat mat: Keeps soil warm (70–75°F) to speed up rooting (especially useful in cooler climates).
- ● Fertilizer (low-dose): A balanced liquid fertilizer (5-5-5 or 10-10-10) diluted to half-strength, applied after roots form (not before!).
- ● Grow lights or sunny windowsill: Provides indirect light (6+ hours/day) if natural light is limited.
- ● Label markers: To track cutting varieties (e.g., "Hybrid Tea – June 2024").
Step-by-step instructions for taking rose bush cuttings
Here’s the method I’ve used for years to propagate roses—no fancy tools, just sharp eyes and steady hands.
🌿 Step 1: Select Healthy Stems for Cuttings
Choose non-flowering stems that are pencil-thick and 4-6 inches long. Look for woody but still green growth—these are mature enough to root but fresh enough to thrive. Avoid stems with thorns or signs of disease. The best time is late spring or early summer when new growth is vigorous.
Use clean, sharp pruners to cut just below a leaf node (the small bump where leaves attach). This node is where roots will sprout. I make a 45-degree angle on the cut—this increases surface area for water absorption and root growth. If the stem is too woody, it’ll take longer to root; if it’s too soft, it may rot before roots form.
✂️ Step 2: Prepare the Cuttings for Rooting
Remove all but the top 2-3 leaves—this reduces moisture loss while keeping enough foliage for photosynthesis. Trim any remaining leaves in half to further cut water evaporation. Dip the bottom inch of the cutting into rooting hormone (optional but helpful for faster results). I like to shake off excess powder to avoid clumping.
Fill a small pot with sandy, well-draining soil mix (equal parts perlite and potting soil works perfectly). Stick the cutting 2-3 inches deep, firming the soil around it to eliminate air pockets. Water lightly until moisture seeps to the surface—not soggy, just damp. Overwatering now will drown the cutting before roots even start.
💧 Step 3: Create Ideal Conditions for Root Growth
Place the pot in a bright, indirect light spot—think east-facing window or under grow lights (12+ hours daily). Avoid direct sun, which can scorch tender new growth. Maintain 60-75°F soil temperature—a heat mat helps if your home runs cooler. Roots typically form in 3-4 weeks, but be patient if your space is cooler.
Water every 2-3 days, checking when the top inch of soil feels dry. Mist the leaves occasionally to maintain humidity—this mimics a greenhouse environment. You’ll know it’s working when tiny bumps appear along the buried stem (future roots!). If leaves yellow or wilt, reduce watering immediately—overwatering is the #1 killer of cuttings.
☀️ Step 4: Transition to Independent Growth
After 4-6 weeks, gently tug on the cutting—if roots resist, it’s ready to transplant. Harden off by moving it outside for 1-2 hours daily, gradually increasing time over 10 days. Choose a partially shaded spot for the first week to avoid sun shock. Plant in well-draining soil and water deeply to settle roots.
Your new rose will need consistent moisture for the first month. Watch for new leaves—that’s your signal the plant is established. I’ve propagated dozens of roses this way, and the key is patience and precision. Skip the rooting hormone? It’ll take longer. Overwater? You’ll lose the cutting. But follow these steps, and you’ll have bushy, thriving roses in no time.
Tips & tricks for perfect rose bush cuttings
Let me share the game-changing details that'll transform your propagation success rate from hit-or-miss to consistently thriving roses.
Stem Selection Secret: The 4-6 inch length requirement isn't arbitrary—it balances enough leaf mass for photosynthesis with a manageable rooting load. I've found that stems with 4-5 leaves (not just 3-4) give you that perfect energy-to-root ratio. Look for stems where the leaves are vibrant green and slightly waxy—this indicates healthy, recent growth that's primed for rooting. The pencil-thickness guideline is crucial too; stems thicker than ½ inch often root too slowly, while thinner ones lack the energy reserves needed.
Rooting Hormone Hack: When using the 1% IBA concentration, I've discovered that gently warming the hormone powder between your palms for 10 seconds before dipping creates a more pliable coating that adheres better to the stem. For the cinnamon powder alternative, use a fine mesh strainer to sift it—this prevents clumping and ensures even coverage. The key is to create a thin, even layer without smothering the cut end; think of it as giving your stem a microscopic boost rather than wrapping it in powder.
Environmental Precision: That 4-6 hours of dappled sunlight is your sweet spot—it provides enough light for photosynthesis without risking scorching. I've learned to position my setups near a sheer curtain or on a north-facing shelf to diffuse the light naturally. The humidity dome should feel like a greenhouse: if condensation forms on the inside within 30 minutes of placing it, you've got the right moisture level. Propping the bag open for just 10-15 minutes daily creates that crucial airflow without dropping humidity too much—think of it as giving your cutting a mini spa day with circulation.
Transplanting Transition: When your roots reach 1-2 inches, the well-draining potting mix should feel like damp sand—not wet cement. I mix my own using 60% potting soil, 30% perlite, and 10% coarse sand for that perfect balance. The 2-3 week acclimation period in bright indirect light is where most beginners rush the process. Gradually introduce more light each week by moving the pot closer to the window—this hardens the cutting off without shocking it. I've seen too many beautiful roots lost because the plant was moved outdoors too soon.
Pro Tips for Get A Cutting From A Rose Bush
- Let me share the game-changing details that'll transform your propagation success rate from hit-or-miss to consistent...
- Stem Selection Secret: The 4-6 inch length requirement isn't arbitrary—it balances enough leaf mass for photosynthesi...
- Rooting Hormone Hack: When using the 1% IBA concentration, I've discovered that gently warming the hormone powder bet...
Frequently asked questions
Got questions about propagating roses from cuttings? You’re not alone! Here are some of the most common concerns—and their straightforward solutions—to help you succeed like a pro.
What’s the best time of year to take rose cuttings?
The ideal window is late spring to early summer (May–July), when new growth is strong and disease risk is low. Avoid extreme heat or cold—rose cuttings thrive in mild, humid conditions. If you’re in a warmer climate, fall (September–October) can also work!
Can I use any rose bush for cuttings, or do some types work better?
Most roses can be propagated this way, but hybrid teas, grandifloras, and climbing roses respond best. Avoid old garden roses or heavily sprayed commercial varieties—they’re trickier to root. Stick to healthy, disease-free bushes for the best results!
How do I know if my cutting is rotting instead of rooting?
Watch for black, mushy stems or a foul smell—these are red flags! Healthy cuttings should stay firm and green. If you spot rot, remove the cutting immediately. Keep humidity high (but not soggy) and avoid overwatering. A rooting hormone can also help prevent this.
Do I need a greenhouse or special setup to root rose cuttings?
Not at all! While a greenhouse speeds things up, you can use a clear plastic bag over a jar of water or a simple propagator. Just keep the cuttings in bright, indirect light and maintain warmth (around 70°F). A sunny windowsill or shaded outdoor spot works too!
What if my cuttings aren’t growing roots after 3 weeks?
Don’t panic—patience is key! Gently tug the cutting after 3–4 weeks to check for resistance (a sign of roots). If nothing’s happening, try these fixes:
- Increase humidity with a misting bottle.
- Use a rooting hormone for stubborn varieties.
- Move to a warmer spot (like near a heater vent).
Wrapping up and next steps
Getting a cutting from a rose bush is simpler than you think—and with patience and the right technique, you’ll soon be nurturing a thriving new plant! 🌱 The key is selecting healthy stems, using the right tools, and providing consistent care during root growth.
Once your cutting takes root, you’re ready to plant it outdoors or share your gardening success with fellow plant lovers.
Ready to grow your own roses? Grab your supplies, follow these steps, and watch your green thumb shine! 🌹 For extra confidence, experiment with a few cuttings at once—every gardener starts somewhere, and soon, you’ll have a blooming masterpiece.