
Flowers
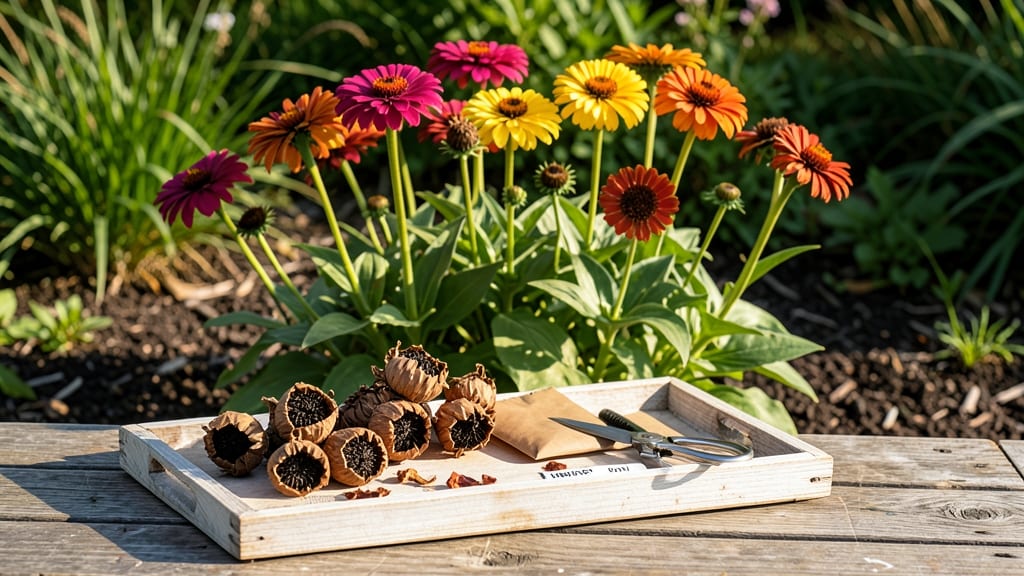
How to get zinnia seeds from the flowers—it’s easier than you’d think! 🌻 I’ve saved seeds from my garden for years, and the process is simpler than you’d think—no fancy equipment needed, just patience and a little know-how. The moment those papery petals fall away reveals plump, fertile seeds ready for replanting.
Start by letting spent zinnias dry completely on the plant or in a breathable paper bag. Once the heads turn crisp and brown, gently rub them between your fingers to release the seeds.
Store them in a cool, dry envelope until planting season—these little powerhouses can last 3-5 years if kept properly. The key is timing: harvest seeds when the blooms have fully faded but before they scatter naturally.
You’ll end up with vibrant, true-to-type zinnias that thrive even better than store-bought varieties. The payoff? A garden bursting with the same cheerful colors you love, all from seeds you grew yourself. Plus, it’s a great way to experiment with heirloom varieties that disappear from seed racks every year.
Works for all zinnia types—dwarf, giant, or trailing—and even doubles as a fun project for kids. Just avoid mixing varieties in the same bag if you want to preserve specific colors. Ready to turn this year’s blooms into next year’s seeds?
📚 In This Guide
- What you need
- Instructions
- Tips and common mistakes
- Wrapping up and next steps
What you need
- ● Mature zinnia flowers: Choose fully bloomed, dried zinnia heads (preferably from healthy plants). Aim for at least 5-10 heads for a good seed yield.
- ● Scissors or pruning shears: A sharp pair to cleanly snip the dried flower heads from the stems.
- ● Paper bags or brown paper: 2-3 medium-sized bags (lunch-sized or grocery bags work great) for drying seeds indoors.
- ● Rubbing alcohol (70% or higher) or hydrogen peroxide: A small bottle (2 oz) to sterilize tools and prevent mold.
- ○ Small bowl or container: For rinsing or soaking seeds (optional but helpful for cleaning).
- ● Pencil or marker: To label your paper bags with the zinnia variety and date.
- ● Envelope or small container: For storing seeds long-term (e.g., a 3x5-inch index card or a small glass jar).
- ● Desiccant packets: Place one in your seed storage container to absorb moisture and extend shelf life.
- ● Fine mesh sieve: Helps separate seeds from chaff more easily when drying is complete.
- ● Notebook or seed catalog: To track varieties, colors, and growing notes for future reference.
- ● Humidity pack (for long-term storage): A silica gel packet or uncooked rice in a small cloth bag to keep seeds dry.
- ● Glove or tissue paper: Protects your hands from tiny seed debris while handling.
Step-by-Step instructions for harvesting zinnia seeds
Here's how to save seeds from your zinnia blooms for next season's garden—simple and rewarding.
🌿 Step 1: Wait for Flowers to Fully Mature
Leave the spent blooms on the plant until they turn brown and dry completely. You'll know they're ready when the flower head feels papery and crumbly to the touch. This usually takes about 4-6 weeks after the initial bloom fades.
Don't rush this step—zinnia seeds need full maturity to germinate well next year. If you cut flowers too early, the seeds won't develop properly. I always leave a few of the most vigorous stems on the plant specifically for seed saving.
✂️ Step 2: Harvest the Dried Flower Heads
Use clean, sharp scissors to cut the entire dried flower head from the stem. Hold the stem firmly and snip just above where it attaches to the plant. This ensures you capture all the seeds that may have fallen into the stem's base.
Place the harvested heads in a paper bag or envelope—this prevents moisture buildup that could cause mold. I like to label each bag with the zinnia variety and harvest date. This makes it easier to track which seeds you've saved and when they were collected.
🪴 Step 3: Dry the Flower Heads Thoroughly
Spread the harvested flower heads out on a clean, dry surface in a warm, dry location. This could be a windowsill, countertop, or even a mesh screen. Allow them to dry for an additional 1-2 weeks until completely crisp and brittle.
During this time, gently shake the heads occasionally to release any seeds that may have dried enough to fall out. This helps ensure you capture all viable seeds. Keep them in a well-ventilated area to prevent any moisture from causing mold or mildew.
🌱 Step 4: Extract the Seeds
Once the flower heads are completely dry, rub them between your fingers or use a fork to gently break them apart. The seeds will fall out easily—you'll see small, dark, and slightly oval-shaped seeds. Place these seeds in a clean, dry container.
I like to use a small glass jar with a tight-fitting lid for seed storage. This keeps the seeds protected from moisture and pests. You can also use a paper envelope, but glass jars are better for long-term storage.
⏰ Step 5: Store Seeds Properly for Next Year
Keep the extracted seeds in a cool, dry place with low humidity. A sealed container stored in the refrigerator is ideal for long-term seed viability. Zinnia seeds can remain viable for up to 3-4 years when stored properly.
Label your container with the variety name and the year of harvest. This helps you keep track of which seeds you've saved and ensures you can plant them at the right time. When it's time to plant, simply sow the seeds directly in your garden or seed-starting mix for next year's vibrant blooms.
Tips & tricks for perfect zinnia seed harvesting
Took me a while to figure these out, so here goes—these simple tricks will help you capture every viable zinnia seed without the frustration.
Patience Pays Off: In Step 1, that 4-6 week waiting period is non-negotiable for full seed maturity. I learned this the hard way after planting seeds from flowers cut too soon—they barely sprouted. Look for that papery texture and slight crumble when you touch them. If you're impatient, resist the urge to cut them early!
Harvesting Strategy: For Step 2, I recommend cutting flower heads on a dry day when humidity is low. This prevents any accidental moisture absorption that could start mold before you even get them indoors. Also, use a small paper bag to collect them—it catches any seeds that might fall during transport.
Drying Optimization: During the 1-2 week drying phase in Step 3, I place my flower heads on a mesh screen over a baking sheet. This allows airflow on all sides while keeping them contained. If your kitchen is humid, add a small packet of silica gel to the drying area to absorb excess moisture.
Seed Extraction Hack: When breaking apart dried flower heads in Step 4, I find using a fork works better than fingers for stubborn stems. Place the dried head in a ziplock bag and gently crush it with the fork—this prevents seeds from scattering while making extraction easier. Then, simply pour the contents onto your clean container.
Pro Tips for Get Zinnia Seeds From Flowers
- Took me a while to figure these out, so here goes—these simple tricks will help you capture every viable zinnia seed ...
- Patience Pays Off: In Step 1, that 4-6 week waiting period is non-negotiable for full seed maturity. I learned this t...
- Harvesting Strategy: For Step 2, I recommend cutting flower heads on a dry day when humidity is low. This prevents an...
Frequently asked questions
Got questions about saving zinnia seeds? You’re not alone! Here are answers to the most common concerns—so you can turn this year’s blooms into next year’s garden stars.
How do I know when zinnia seeds are fully mature and ready to harvest?
Look for dry, papery flower heads that turn brown and crunchy when squeezed. The seeds inside should rattle—this means they’re ready! Harvest them on a dry day to prevent mold. If left too long, the heads may shatter, scattering seeds everywhere.
Can I harvest zinnia seeds in the fall or early winter?
Yes, but act fast! Harvest seeds before the first hard frost (typically late fall). If frost hits, the flower heads may rot or attract pests. Store seeds in a cool, dry place until spring—just don’t let them freeze.
What if my zinnia seeds won’t come out of the flower head?
Try these tricks:
- Let the head dry indoors for 1–2 days.
- Gently rub the dried head between your palms to loosen seeds.
- Use a fork or your fingers to pry open stubborn pods.
Are store-bought zinnia seeds better than homegrown ones?
Not necessarily! Homegrown seeds often adapt better to your local climate and soil. Plus, saving seeds is free and rewarding. Just ensure your zinnias are open-pollinated (not hybrid) for reliable results.
How should I store zinnia seeds for planting next year?
Keep seeds in a paper envelope (not plastic!) in a cool, dark place (like a jar in the fridge). Label with the variety and date—most zinnias stay viable for 2–3 years. Avoid humidity to prevent mold.
Wrapping up and next steps
Saving zinnia seeds is a rewarding way to grow stunning blooms year after year—no fancy tools or expertise required!
With just a little patience, you’ll turn this year’s flowers into next season’s vibrant garden stars. 🌻 Now that you know the simple steps, why not try it with your favorite zinnias?
Grab a pair of scissors, find a sunny spot, and let nature do the rest—your future garden will thank you!
Pro tip: Label your seeds and store them in a cool, dry place to maximize their viability. Happy gardening! 🌱