
Size
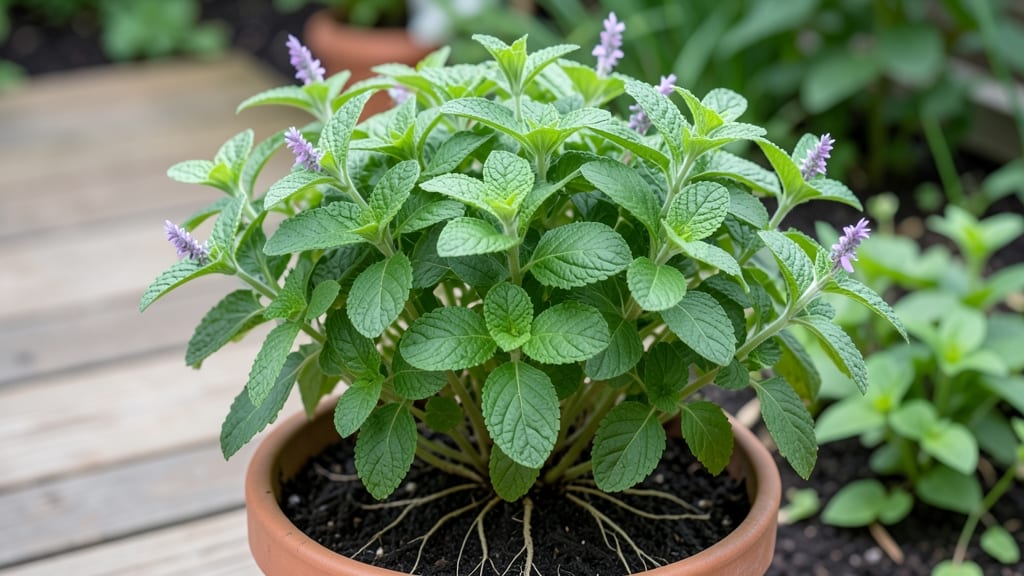
How to grow chocolate mint herb transforms desserts with its rich cocoa scent—but cultivating it from seed feels like magic. 🌱 I’ve turned my kitchen windowsill into a fragrant herb factory by starting seeds in damp paper towels, and within 6 weeks, you’ll have lush, dark-green leaves ready for baking or tea. The secret lies in moisture and patience—this mint thrives in damp soil but hates soggy roots. Plant seeds in well-draining pots (it spreads aggressively in gardens) and keep them in bright, indirect light until sprouts appear. A 5-inch pot per plant prevents takeover, and pruning regularly keeps it manageable. By summer, your plants will be bursting with growth, their leaves releasing that irresistible chocolatey aroma when crushed. Harvest leaves in the morning for the strongest flavor, and watch your kitchen smell like a gourmet bakery. Containment is key—this mint spreads like wildfire. Use containers with drainage or plant it in a sunken bed lined with landscape fabric to keep it from escaping. Now, let’s get those seeds sprouting!
📚 In This Guide
- What you need
- Instructions
- Tips and common mistakes
- Wrapping up and next steps
What you need
- ● Chocolate mint seeds – Start with Mentha × piperita 'Chocolate' seeds (or seedlings if available). Aim for 5-10 seeds per pot or 10-15 seeds for direct sowing in the ground.
- ● Growing containers or garden bed – For containers: Use 5-6 inch pots (at least 1 per plant to prevent overcrowding). Ensure pots have drainage holes.
- ● For ground planting: Choose a sunny spot with 6+ hours of light and well-draining soil.
- ● Potting soil or garden soil – A well-draining, peat-based mix (or add perlite/sand for better aeration). Avoid heavy clay soil.
- ● Watering can or spray bottle – Keep soil consistently moist (not soggy) during germination and growth.
- ○ Fertilizer (optional but helpful) – A balanced liquid fertilizer (10-10-10 or 20-20-20) diluted to half-strength.
- ● Or organic options like compost tea or fish emulsion.
- ● Gloves – Protect your hands from soil and mint’s slightly sticky leaves.
- ● Trowel or small shovel – For planting seeds or transplanting seedlings.
- ● Pruning shears – To harvest and shape your mint as it grows.
- ○ Mulch (optional) – Straw or shredded leaves to retain moisture and suppress weeds.
- ● Plant labels – Mark your chocolate mint to avoid mixing it with other herbs!
- ● Patience – Chocolate mint grows slowly from seed (germination takes 2-4 weeks).
- ● Sunlight access – Partial shade (4-6 hours of sun/day) works best; avoid harsh afternoon sun.
- ● Regular care – Mint loves moisture but hates waterlogged roots.
- ● Container control (if needed) – Chocolate mint is invasive; use containers to keep it contained!
Step-by-step instructions for growing chocolate mint herb
Here's how to coax fragrant chocolate mint from tiny seeds into a thriving, aromatic plant.
🌱 Step 1: Start Seeds Indoors for Faster Growth
Chocolate mint seeds need warmth to germinate, so begin indoors 6-8 weeks before your last frost date. Fill 2-inch deep seed trays with moistened seed-starting mix—never garden soil, which can harbor fungal diseases. Press the mix down gently until firm but not compacted, then scatter seeds ¼ inch apart on the surface. Lightly cover with a fine layer of additional mix (just enough to obscure their shape).
Mist the surface with a spray bottle until evenly damp—no soggy clumps. Place the tray in a clear plastic dome or cover it with plastic wrap to retain moisture and warmth. Keep the soil at 70-75°F using a seedling heat mat if needed. Germination takes 14-21 days, but don't be discouraged if it takes longer—chocolate mint can be slow to sprout.
💧 Step 2: Provide Optimal Light and Water
Once seedlings emerge, remove the dome immediately to prevent damping-off. Place them under grow lights (14-16 hours daily) or in the brightest window—south-facing is ideal. Chocolate mint seedlings stretch toward light quickly, so keep the lights 2-3 inches above the plants and raise them gradually as the seedlings grow. You'll know the light is right when leaves stay dark green and compact rather than pale and leggy.
Water from the bottom by placing the tray in ½ inch of water for 10 minutes, then drain thoroughly. This method prevents fungal issues while keeping roots moist. Let the top ½ inch of soil dry between waterings—overwatering is the fastest way to kill tender seedlings. Avoid wetting the leaves to prevent mildew.
🌿 Step 3: Transplant Seedlings to Larger Pots
When seedlings develop 3-4 sets of true leaves (about 4-6 weeks after germination), transplant them into 4-inch pots filled with well-draining potting mix. Gently remove each seedling by grasping the soil around the base—never the stems—and place it in its new pot, burying up to the first set of leaves. This encourages strong root growth.
Firm the soil lightly around the roots and water deeply to settle everything. Place the pots in a spot with partial shade for a week to reduce transplant shock. Chocolate mint is hardy but can wilt if stressed, so monitor soil moisture closely—it should stay evenly damp but not soggy. After a week, gradually introduce them to morning sun to harden off.
☀️ Step 4: Move Outdoors and Maintain Growth
After 2 weeks of hardening off, transplant your chocolate mint into the garden or 8-inch containers (for 4 plants). Choose a location with partial shade to full sun—morning sun and afternoon shade work best in hot climates. Space plants 12-18 inches apart if gardening in beds, as they spread aggressively. Mix 1 tablespoon of compost into the planting hole to boost growth.
Water at the base of the plant (never overhead) to keep the soil consistently moist—chocolate mint loves humidity but hates soggy roots. Mulch with 1 inch of shredded bark to retain moisture and suppress weeds. Pinch back the tips of the stems when they reach 4-6 inches to encourage bushier growth. This is where the magic happens—the more you prune, the more fragrant the leaves become.
✂️ Step 5: Harvest and Encourage Continuous Growth
Harvest chocolate mint when the plants reach 6-8 inches tall by snipping the stems just above a set of leaves. This encourages new growth and keeps the plant compact. The leaves will be most fragrant in the morning, right after the dew dries but before the sun intensifies. Store harvested leaves in an airtight container in the fridge for up to 2 weeks, or dry them for long-term use.
To keep your chocolate mint thriving, fertilize every 4-6 weeks with a balanced liquid fertilizer (10-10-10) diluted to half strength. Avoid over-fertilizing—chocolate mint prefers lean soil and grows best when slightly hungry. If the plant spreads too aggressively, divide it in early spring by digging up clumps and separating the roots. You'll have 4 new plants ready to replant or share!
Tips & tricks for growing chocolate mint herb
Here's what nobody tells you about growing this fragrant herb from scratch—lessons I learned after watching my first batch struggle.
Germination Patience: Chocolate mint seeds can take up to 21 days to sprout, but the key is maintaining that 70-75°F soil temperature consistently. I used a seedling heat mat for the first 10 days and saw a dramatic improvement in germination rates. If your kitchen stays cooler, consider a small greenhouse or even placing the tray on top of your fridge (not inside) to maintain warmth. The moment you see those first tiny sprouts, remove the dome immediately to prevent damping-off disease—this is non-negotiable.
Lighting Strategy: Those 14-16 hours of daily light are crucial for preventing leggy seedlings. I placed my grow lights 2-3 inches above the plants and adjusted them weekly as the seedlings grew. Pro tip: If you don't have grow lights, position your seedlings in the brightest south-facing window and rotate the tray quarter-turn daily so all sides get equal light exposure. You'll notice the difference when leaves stay dark green and compact rather than stretching toward one light source.
Transplanting Technique: When moving your seedlings to 4-inch pots after developing 3-4 sets of true leaves, bury them just up to their first set of leaves. This might seem counterintuitive, but it encourages stronger root growth from the buried stem. After transplanting, place the pots in partial shade for a week to reduce shock—chocolate mint can wilt dramatically if stressed. I found that misting the leaves lightly with water (not soaking) during this adjustment period helped them recover faster.
Harvesting Hack: The most fragrant leaves grow right after morning dew has dried but before the sun intensifies. I harvest mine around 9-10 AM and immediately store them in an airtight container with a paper towel to absorb excess moisture. For long-term storage, dry the leaves by hanging small bundles upside down in a dark, well-ventilated space. Once completely dry, store them in a sealed jar away from light—they'll keep their aroma for months.
Pro Tips for Grow Chocolate Mint Herb
- Here's what nobody tells you about growing this fragrant herb from scratch—lessons I learned after watching my first ...
- Germination Patience: Chocolate mint seeds can take up to 21 days to sprout, but the key is maintaining that 70-75°F ...
- Lighting Strategy: Those 14-16 hours of daily light are crucial for preventing leggy seedlings. I placed my grow ligh...
Frequently asked questions
Got questions about growing chocolate mint? You’re not alone! Here are answers to the most common queries to help you cultivate a thriving herb garden with ease.
How long does it take for chocolate mint to grow from seed?
Patience is key! Chocolate mint seeds can take 4–6 weeks to germinate, especially in cooler conditions. Once sprouted, expect visible growth (1–2 inches) in about 6–8 weeks. For faster results, opt for young plants from a nursery—they’ll mature in 3–4 weeks.
Can I grow chocolate mint indoors, or does it need outdoor sunlight?
Chocolate mint thrives outdoors in partial shade to full sun (6+ hours/day), but it can also grow indoors near a south-facing window or under grow lights (12–14 hours/day). Just ensure good airflow to prevent mold and keep soil moist but not soggy.
Why is my chocolate mint turning yellow or brown?
Yellowing leaves often signal overwatering or poor drainage. Brown edges? It could be underwatering or excessive sun. Check soil moisture (top inch should be dry) and ensure pots have drainage holes. Pro tip: Chocolate mint loves humidity—mist leaves occasionally if your home is dry!
Can I use regular mint seeds instead of chocolate mint seeds?
While regular mint (Spearmint/Peppermint) is easier to find, chocolate mint (Mentha × piperita ‘Chocolate’) has a unique caramel-like flavor and slower growth. If you can’t find chocolate mint seeds, try a reputable online seed bank or propagate from a friend’s plant via stem cuttings.
How often should I harvest chocolate mint for the best growth?
Harvest regularly (every 4–6 weeks) to encourage bushier growth! Snip leaves just above a node (where leaves meet the stem) with clean scissors. Avoid harvesting more than ⅓ of the plant at once—this keeps it healthy and productive. Bonus: Morning harvests yield the most potent flavor!
Wrapping up and next steps
Growing your own chocolate mint herb is a rewarding journey that brings fragrant, flavorful leaves right to your kitchen! With the right light, soil, and patience, you’ll have a thriving plant in just 6 weeks—perfect for teas, cocktails, or fresh garnishes.
Don’t let a few challenges discourage you; even experienced gardeners face pests or slow growth—adjust and adapt!
Now that you’re armed with tips and tricks, roll up your sleeves and start planting. Share your progress with fellow herb lovers or experiment with recipes using your homegrown harvest. Happy gardening—your future minty masterpieces are waiting! 🌱✨