
Size
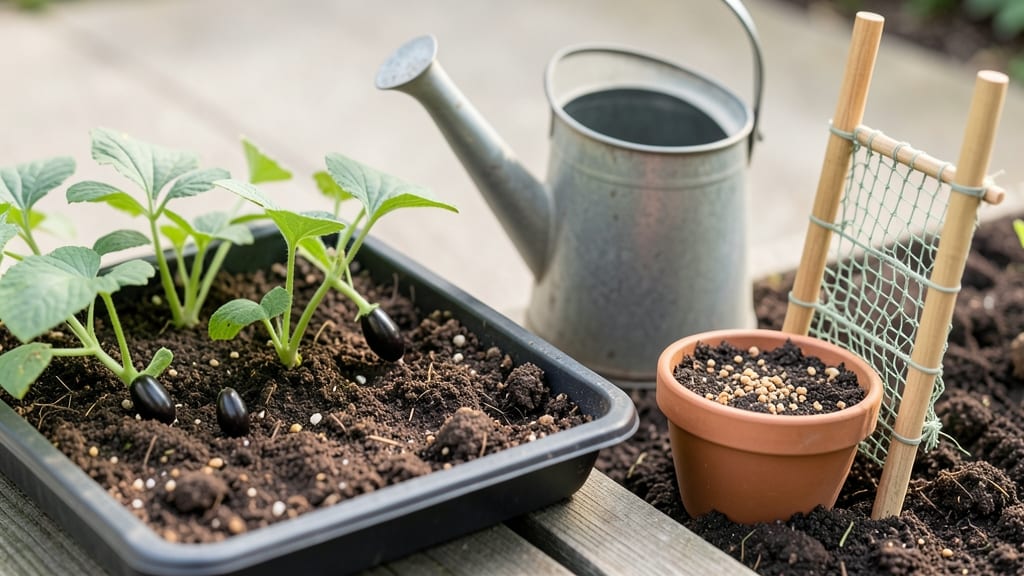
Growing cucamelons from seeds is the fastest way to turn a sunny windowsill into a mini greenhouse. 🌱 These tiny, teardrop-shaped fruits pack a peppery punch and grow like weeds—perfect for small spaces or impatient gardeners who want results in weeks, not months.
The secret starts with warm soil (70°F+) and shallow planting—just ½ inch deep. Germination happens in 7-14 days, and seedlings sprout fast if you keep the soil damp (not soggy). Thin to the strongest sprout to avoid competition, and expect vines to climb or sprawl within 3-4 weeks.
What you’ll end up with are lush, fast-growing vines producing 1-inch fruits that taste like a cross between cucumber and lime. The key is consistent moisture and a trellis to keep vines off the ground—no fancy equipment needed.
Even in small pots, these plants thrive with 6+ hours of sunlight daily. Here’s how to keep them happy from seed to harvest without common pitfalls like damping off or leggy growth.
📚 In This Guide
- What you need
- Instructions
- Tips and common mistakes
- Wrapping up and next steps
What you need
- ● Cucamelon seeds – 5–10 seeds (or more if you want a full harvest!)
- ● Containers or pots – 4–6 inch diameter (1–2 plants per pot) or a raised bed (if planting directly)
- ● High-quality potting mix – Well-draining, organic soil (avoid garden soil—it can compact)
- ○ Seed-starting tray or small pots – For germinating seeds (optional but helpful)
- ● Watering can or spray bottle – For gentle hydration (avoid soaking the soil)
- ● Fertilizer – Balanced organic fertilizer (e.g., 10-10-10) or compost tea (start after germination)
- ● Trellis or stakes – 3–4 feet tall (cucamelons are vining plants!)
- ● Grow lights or sunny windowsill – 6+ hours of sunlight daily (or artificial light for indoor starts)
- ● Mulch – To retain moisture and suppress weeds
- ● Plant markers – To track varieties (if growing multiple types)
- ● Pruning shears – For shaping vines and removing excess growth
- ● Harvest basket or small container – For picking those adorable mini cucumbers!
Step-by-Step instructions for growing cucamelon seeds
Here’s the straightforward method I’ve used to grow vigorous cucamelon vines—no fancy equipment needed.
🌱 Step 1: Start Seeds Indoors 4-6 Weeks Before Last Frost
Fill small seed-starting pots with sterile seed-starting mix (not garden soil) and moisten it until damp but not soggy. Press the mix down lightly to remove air pockets. Plant 2-3 seeds per pot at a depth of ½ inch, since cucamelons need warmth to germinate. Cover the pots with a clear plastic dome or wrap them in plastic wrap to retain moisture and warmth.
Place the pots in a warm spot—70-80°F is ideal—like on top of a refrigerator or near a sunny window. Germination takes 7-14 days, depending on temperature. Once the seeds sprout, remove the dome immediately to prevent fungal growth. Watch for the first true leaves (the second set after the initial seed leaves) before transplanting.
☀️ Step 2: Provide Bright Light and Fertilize Lightly
Cucamelons need full sun (6-8 hours daily) to thrive, so move seedlings to a south-facing window or under grow lights as soon as they sprout. If using a window, rotate the pots quarter-turn daily to prevent leggy growth. You’ll know the light is sufficient when the seedlings develop compact, dark green leaves and stems stay sturdy.
After the second set of true leaves appears, fertilize with a balanced liquid fertilizer (10-10-10) diluted to half strength. Over-fertilizing now can burn tender roots. Water the seedlings at the soil level—avoid wetting the leaves—to prevent disease. Let the top inch of soil dry between waterings to encourage strong root development.
🪴 Step 3: Transplant Outdoors After Last Frost
Wait until the soil is at least 60°F and all frost risk has passed before moving cucamelons outside. Choose a sunny spot with well-draining soil and space the plants 12-18 inches apart in rows 3-4 feet apart. Harden off seedlings by placing them outside in a shaded area for 1-2 hours daily over 5-7 days, gradually increasing exposure to sunlight and wind.
Transplant on a cool, overcast day to reduce stress. Bury the seedlings deeper than their original depth—cucamelons have long stems that can root along the length, giving them extra stability. Water deeply immediately after planting to settle the soil and encourage root growth. Mulch around the base with straw or shredded leaves to retain moisture and suppress weeds.
💧 Step 4: Support Vines and Water Consistently
Cucamelons are vining plants, so install trellises, cages, or stakes at planting time to guide their growth. Train the main vine along the support and prune side shoots to encourage upward growth. Harvesting regularly (every 5-7 days) also encourages more fruit production. You’ll know it’s time to harvest when the fruits turn yellow-green with dark stripes and are about 1-2 inches long.
Water the plants deeply 1-2 times per week, aiming for 1 inch of water per week. Let the soil dry slightly between waterings—consistent moisture prevents bitter-tasting fruit. Avoid overhead watering, especially in the evening, to reduce the risk of fungal diseases like powdery mildew. If you notice yellowing leaves, it’s often a sign of overwatering or poor drainage, so adjust accordingly.
✂️ Step 5: Prune and Harvest for Continuous Production
Prune the vines regularly to remove yellow or diseased leaves and encourage airflow. Pinch off the first few flowers to redirect the plant’s energy into stronger vines and more fruit later in the season. Once the plants are established, they’ll produce tiny, grape-sized fruits that taste like a cross between cucumber and melon. Harvest in the morning when the fruits are firm and crisp.
Cucamelons are prolific producers, so expect a bountiful harvest if you keep the plants well-supported and fertilized. Store harvested fruits in the fridge for up to 2 weeks or eat them fresh for the best flavor. If frost threatens before the season ends, harvest any remaining fruits and bring the plants inside to a sunny window for a few more weeks of production.
Tips & tricks for perfect cucamelon growth
Here's what I learned after growing cucamelons for three seasons—these simple adjustments make all the difference.
Germination Warmth: If your kitchen stays below 70°F, consider using a seedling heat mat set to 75°F for those first 7-14 days. I've seen germination speed up dramatically when seeds maintain consistent warmth—sometimes in as little as 5 days! The key is keeping that sterile seed-starting mix consistently warm without drying out. A simple solution is to place your pots on top of a refrigerator (not the heating element) where it stays reliably warm.
Lighting Strategy: For the critical 6-8 hours of daily light in Step 2, I recommend supplementing natural light with a basic LED grow light if your windows aren't sufficient. Position the light just 6 inches above seedlings and keep it on for 12-14 hours daily. You'll notice the difference immediately—seedlings develop that compact, dark green growth instead of stretching leggy. Rotate your pots quarter-turn daily to prevent any uneven growth toward the light source.
Transplanting Technique: When transplanting outdoors after last frost, I always bury the stems deeper than the original planting depth—this encourages additional root growth along the buried stem. For extra stability, especially in windy areas, you can bury up to half of the stem length. The deeper you plant, the more robust your cucamelon vines will become. Just be sure your soil is well-draining at 60°F or warmer to prevent rot.
Harvesting Cues: The perfect time to harvest is when fruits reach 1-2 inches with those distinctive yellow-green stripes. I've found that harvesting in the morning gives you the crispest, most flavorful fruits. Use small scissors or pruners to cut the stems—this prevents damaging the main vine. Regular harvesting every 5-7 days actually stimulates more fruit production, so don't wait until the plants are loaded down!
Pro Tips for Grow Cucamelon Seeds
- Here's what I learned after growing cucamelons for three seasons—these simple adjustments make all the difference.
- Germination Warmth: If your kitchen stays below 70°F, consider using a seedling heat mat set to 75°F for those first ...
- Lighting Strategy: For the critical 6-8 hours of daily light in Step 2, I recommend supplementing natural light with ...
Frequently asked questions
about growing cucamelons—because even the tiniest seeds have big answers!How long does it take for cucamelon seeds to germinate?
Cucamelon seeds typically sprout within 7–14 days after planting, depending on warmth and moisture. Keep soil consistently damp (not soggy) and maintain temperatures above 70°F (21°C) for faster germination. Patience is key—some seeds may take up to 3 weeks!
When is the best time to plant cucamelon seeds indoors vs. outdoors?
Start seeds indoors 4–6 weeks before your last frost date (usually late winter/early spring). Transplant seedlings after soil warms to 60°F (15°C) and nighttime temps stay above 55°F (13°C), typically late spring to early summer. Cucamelons thrive in heat but hate frost!
Can I grow cucamelons in containers, and what size pot do I need?
Use containers at least 12–18 inches deep with good drainage. A 5-gallon pot works well for 1–2 plants. Ensure pots get 6+ hours of sunlight and use a lightweight, well-draining potting mix. Trellising saves space—these vines love to climb!
What are the most common pests or diseases, and how do I prevent them?
Watch for aphids, cucumber beetles, and powdery mildew. Prevent pests with:
- Neem oil sprays
- Row covers for young plants
- Crop rotation
- Avoid overhead watering
Ensure good airflow and prune lower leaves to reduce humidity-related issues. Healthy plants resist problems best!
Do cucamelons need to be trellised, and how do I support them?
Yes! Trellising keeps vines off the ground, improves air circulation, and boosts fruit production. Use a small trellis, cage, or sturdy stakes. Gently weave vines through supports as they grow. Bonus: Trellised plants yield bigger, cleaner fruits!
What if my cucamelons turn bitter or develop yellow spots?
Bitter taste often means overripe fruit—harvest when 1–2 inches long and bright green. Yellow spots? Likely sunburn (too much direct heat) or nutrient deficiency (try a balanced fertilizer). Check soil moisture too—uneven watering can cause stress. Shade cloth helps in extreme heat!
Wrapping up and next steps
Growing cucamelons from seeds is a rewarding journey that brings a burst of flavor and fun to your garden! With the right soil, sunlight, and care, you’ll soon enjoy these tiny, tangy treasures—perfect for snacking or gourmet dishes. 🌱✨
Now that you’re armed with tips and tricks, take the next step: grab those seeds, prep your space, and watch your cucamelons thrive! Share your harvest with friends or experiment with recipes—your garden adventure starts today. Happy growing! 🌿💚