
Size
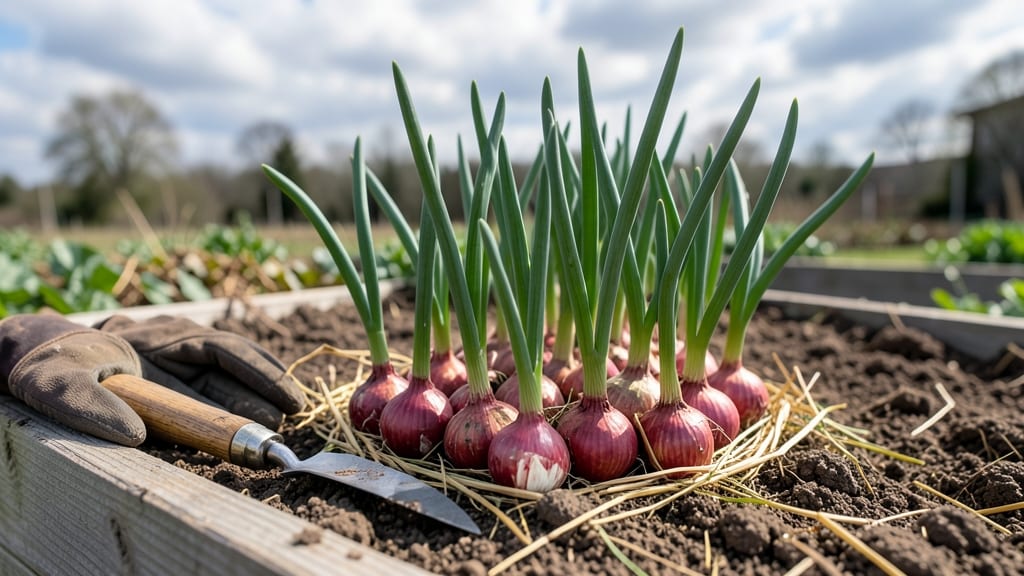
How to grow red onion sets in your garden means sharp flavors and fewer tears. 🌱 I’ve grown them for years, and the secret to bold harvests starts with the right soil and spacing—no fancy tools needed. The process is simple: plant sets in well-drained soil, space them 4-6 inches apart, and water consistently. They’ll thrive in full sun, and in just 60 days, you’ll have plump bulbs ready to pull. The key is keeping the soil moist but not soggy—too much water turns onions bitter. You’ll know they’re ready when tops flop over, signaling mature bulbs below. Harvest before they split, and store them in a cool, dry place for weeks of flavor. Even beginners get perfect results with this method. Perfect for small gardens, containers, or even windowsill pots. Let’s get those onions growing!
📚 In This Guide
- What you need
- Instructions
- Tips and common mistakes
- Wrapping up and next steps
What you need
- ● Red onion sets: 100–200 sets (choose firm, dry bulbs with no sprouts or soft spots).
- ● Well-draining soil: A mix of garden soil + compost (60% soil, 40% compost) or potting mix for containers.
- ● Fertilizer: Balanced 10-10-10 fertilizer (1 tbsp per 10 sq ft).
- ● Organic option: Composted manure or worm castings (½ cup per planting area).
- ● Watering can or hose with a gentle spray nozzle.
- ○ Mulch (optional but recommended): Straw, grass clippings, or wood chips (2–3 inches thick).
- ● Garden trowel or hand fork (for planting).
- ● Gloves (to protect hands while handling soil or sharp onion skins).
- ● Measuring tape or ruler (to space sets 4–6 inches apart).
- ○ Garden twine or stakes (optional, for trellising if onions grow tall).
- ○ Container or raised bed (optional, for small spaces: 5-gallon pots or 12-inch-deep beds).
- ● Sunlight: Full sun (6–8 hours daily)—onions are sun-worshippers! 🌞
- ● Climate: Plant when soil temps are 45–85°F (spring or fall for best results).
- ● Drainage: Avoid soggy soil—onions hate waterlogged roots!
- ● Patience: Red onion sets mature in 60–90 days, so plan ahead for harvest time!
Step-by-Step instructions for growing red onion sets
Here's how I get vibrant, bold red onions ready in just 60 days—no fuss, no fussing.
🌱 Step 1: Prepare the Soil for Planting
Red onion sets thrive in well-draining soil with a pH between 6.0 and 7.0. I start by tilling the top 6 inches of soil to loosen it—this helps roots spread without resistance. Mix in 2 inches of compost to enrich the soil naturally, ensuring nutrients are available right where the roots will grow.
If your soil is heavy clay, add a handful of coarse sand or perlite per square foot to improve drainage. Test the soil moisture by squeezing a handful—it should hold together but not be sticky. Planting in well-aerated soil prevents rot and encourages strong bulb development.
🪴 Step 2: Plant Onion Sets at the Right Depth and Spacing
Place the red onion sets 1 inch deep in the soil, spacing them 4-6 inches apart in rows that are 12 inches apart. I use the tip of a small shovel to make a hole just deep enough to cover the top half of each set. This ensures the roots have room to grow downward while the green tops emerge above soil level.
Don’t bury the sets too deep—you’ll stunt the growth of the green shoots. After planting, gently firm the soil around each set with your fingers to eliminate air pockets. Water lightly to settle the soil and encourage immediate root contact.
☀️ Step 3: Provide Consistent Water and Sunlight
Red onion sets need full sun—at least 6 hours daily. I plant mine in a location where they’ll receive morning sun and afternoon shade if temperatures exceed 85°F, as extreme heat can cause bolting (premature flowering). Keep the soil evenly moist but never soggy—water when the top 1 inch feels dry.
I use a drip irrigation system to deliver water directly to the soil, avoiding wetting the leaves, which can lead to fungal diseases. Mulch around the plants with 1 inch of straw to retain moisture and suppress weeds. You’ll notice the green tops growing taller and thicker within 2-3 weeks.
✂️ Step 4: Monitor for Pests and Fertilize Lightly
Check for onion flies or aphids weekly—these pests can stunt growth. If you spot them, spray the plants with a mix of 1 tablespoon neem oil per gallon of water. I also fertilize lightly with a balanced, 10-10-10 fertilizer every 4-6 weeks to support steady growth without overfeeding.
When the green tops flatten and the bulbs start to swell (around 60 days), stop fertilizing. Overfeeding at this stage can lead to weak bulbs or excessive leaf growth at the expense of the harvestable onion. Instead, focus on keeping the soil moist and the area weed-free.
🌿 Step 5: Harvest and Cure the Onions
Harvest when the tops yellow and fall over naturally, or when the bulbs reach 1-1.5 inches in diameter. I pull them gently from the soil, shaking off excess dirt. Leave the roots attached—they help the onions cure properly. Lay the onions in a dry, shaded area with good airflow for 2-3 weeks to cure.
During curing, the skins toughen and the bulbs dry slightly, extending storage life. Once fully cured, trim the roots and tops to 1 inch and store in a cool, dry place. Your bold red onions will keep for months—ready to add color and flavor to any dish!
Tips & tricks for growing bold red onion sets
Common mistakes can turn your onion harvest from bold to bland—here’s how to avoid them and maximize those vibrant red bulbs.
Soil Prep Secret: Don’t skip the compost in Step 1! The 2 inches of compost isn’t just for nutrients—it improves soil structure, helping those onion roots spread like they should. If your soil feels dense, mix in a handful of perlite per square foot to create those tiny air pockets roots need to thrive. I’ve seen onions grow twice as fast in amended soil compared to heavy clay.
Planting Precision: Those 1-inch deep holes in Step 2 are critical—any deeper and you’ll smother the shoots. Use a small stick or your finger to check depth after planting. For extra security, especially in windy areas, press the soil firmly around each set to eliminate air pockets that could dry out the roots. Think of it like tucking them in for a good night’s sleep.
Sunlight Strategy: The 6 hours of full sun in Step 3 is non-negotiable, but here’s the trick: if your summer temps hit 85°F, move plants to partial afternoon shade. I’ve lost entire batches to bolting when they got too much midday heat. A simple row cover or shade cloth works wonders—your onions will thank you with bigger, sweeter bulbs.
Pro Tips for Grow Red Onion Sets
- Common mistakes can turn your onion harvest from bold to bland—here’s how to avoid them and maximize those vibrant re...
- Soil Prep Secret: Don’t skip the compost in Step 1! The 2 inches of compost isn’t just for nutrients—it improves soil...
- Planting Precision: Those 1-inch deep holes in Step 2 are critical—any deeper and you’ll smother the shoots. Use a sm...
Frequently asked questions
Got questions about growing red onion sets?
You’re not alone—growing these vibrant bulbs is easier than you think, but a few common hurdles pop up. Below, we’ve tackled the most asked questions to help you grow a thriving crop with confidence.
Can I grow red onion sets from store-bought onions?
Nope! Store-bought onions are often treated to prevent sprouting. Instead, buy certified onion sets (small bulbs) from garden centers or online. They’re pre-sprouted and ready to plant. Pro tip: Look for "sets" labeled for your climate zone—some varieties thrive in cooler regions while others need heat.
How long does it take for red onion sets to mature?
Most red onion sets mature in 60–90 days, depending on the variety and weather. Smaller "short-day" types (like ‘Red Creole’) may mature faster in cooler climates, while larger "long-day" types (like ‘Red Baron’) need more warmth. Check the seed packet for days-to-maturity—aim to plant 8–10 weeks before your first frost!
What if my onion sets rot in cold, wet soil?
Onion sets hate soggy soil—it causes neck rot or mold. To prevent this:
- Plant in well-draining soil (amend with compost if needed).
- Avoid waterlogging by spacing rows 4–6 inches apart.
- Use raised beds or containers if your soil stays damp.
Can I grow red onion sets in containers or small spaces?
Red onion sets are perfect for containers—just use a pot at least 6 inches deep with drainage holes. Plant 3–4 sets per 12-inch pot, keeping them 2–3 inches apart. Container-grown onions need regular watering (keep soil moist but not soggy) and full sun (6+ hours/day).
What should I do if my onion sets bolt (send up flowers) too early?
Bolted onions taste bitter and won’t form bulbs. To prevent bolting:
- Choose short-day varieties for cooler climates.
- Avoid planting too early—wait until soil is 50°F+.
- Use shade cloth (30–50%) if temps spike suddenly.
Bonus Tip: How do I store harvested red onion sets?
Store whole, dry red onions in a cool (40–50°F), dark, and well-ventilated spot (like a mesh bag in the pantry). Avoid refrigeration—they’ll spoil faster! For longer storage, braid them or keep in a paper bag to retain freshness.
Wrapping up and next steps
Growing red onion sets is a rewarding and fast way to enjoy homegrown veggies—no fancy skills needed! 🌱 With just a sunny spot, well-draining soil, and patience, you’ll harvest flavorful bulbs in as little as 60 days.
Whether you’re a beginner or a seasoned gardener, these hardy plants thrive with minimal effort, making them perfect for small spaces or containers.
Now that you’re armed with tips and tricks, roll up your sleeves and plant those sets! Start small—try a few rows—and soon, you’ll be savoring the crisp, sweet satisfaction of homegrown red onions. Happy gardening! 🌿