
Picking
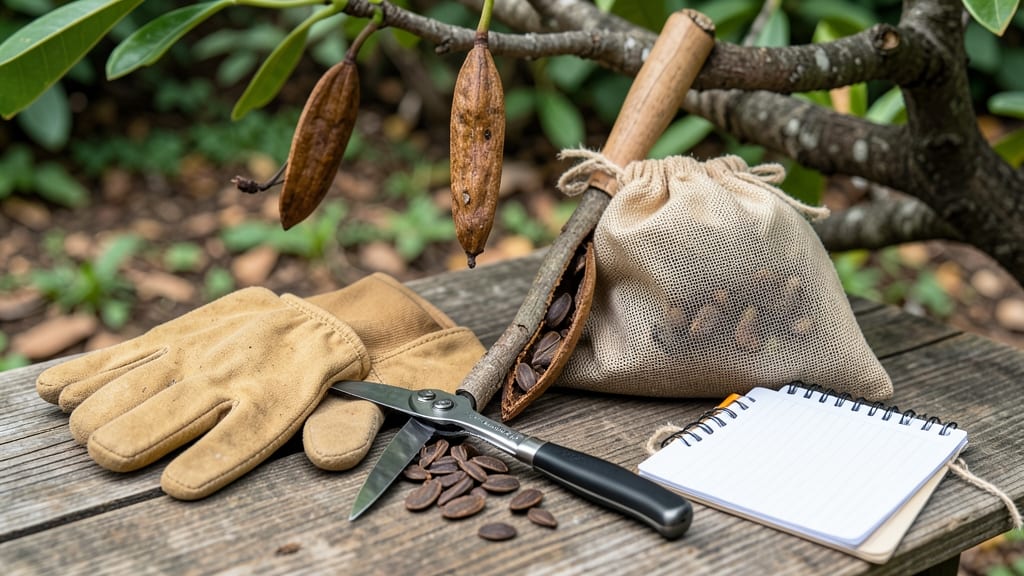
Harvesting plumeria seed pods at the right moment saves hours of frustration. 🌿 The pods turn from green to brown when ready—waiting too long means seeds lose viability, while harvesting too early means they’re not developed. I’ve learned that patience here pays off with stronger seedlings later.
You’ll need just a few tools: sharp pruning shears, a paper bag for collecting pods, and a clean workspace. The key is precision—cutting too close to the stem damages the plant, while leaving too much stem can rot the pod.
I always sanitize my tools first to prevent infections that could spread to other parts of the plant.
Once you’ve collected the pods, let them dry in a warm, shaded spot for about 2 weeks. This step is critical—wet pods mold quickly, and dry seeds store better.
After drying, gently crack open each pod to reveal the flat, papery seeds inside. These are your future plumerias waiting to sprout.
Common mistakes? Harvesting pods that are still green or storing them in plastic bags. Both lead to mold or spoiled seeds. Instead, keep them in a breathable container until you’re ready to plant. With these steps, you’ll have healthy seeds ready for germination in no time.
📚 In This Guide
- What you need
- Instructions
- Tips and common mistakes
- Wrapping up and next steps
What you need
- ● Mature Plumeria seed pods: Choose fully swollen, brown, and slightly leathery pods (they should feel firm but yield slightly when pressed). Aim for at least 3-5 pods per plant if harvesting for propagation.
- ● Sharp, clean pruning shears or scissors: Sterilize with rubbing alcohol to prevent disease transfer. Opt for bypass pruners (4-6 inch blades) for precision.
- ○ Disposable gloves (optional but recommended): Latex or nitrile gloves to protect your hands from sap (which can irritate skin) and keep the seeds clean.
- ● Paper towels or newspaper: For drying seeds and cleaning sap from tools/pods. Use at least 2-3 sheets per batch of pods.
- ● Small bowls or containers: 2-3 shallow, wide-mouth containers (e.g., ceramic bowls or plastic takeout containers) for sorting seeds and collecting sap.
- ● Fine-mesh strainer or sieve: #80 or #100 mesh size to separate seeds from pulp and debris. A 6-inch diameter strainer works well for small batches.
- ● Spray bottle with water: For rinsing seeds gently. Use distilled or dechlorinated water if possible.
- ● Paper bags or breathable seed envelopes: Brown kraft paper bags (1 per 50 seeds) or seed-saving envelopes for storage.
- ● Permanent marker: To label pods/seeds with harvest dates and plant varieties.
- ● Hair dryer or fan: For speed-drying seeds (set to low heat to avoid scorching).
- ● Hydrogen peroxide (3%) or bleach solution: 1 part bleach to 9 parts water for sterilizing tools between uses.
- ● Plastic wrap or ziplock bags: For temporary seed storage while drying (poke holes for airflow).
- ● Notebook or app: To log pod maturity, harvest dates, and germination notes.
- ● Child-safe scissors (if harvesting with kids): For supervised, gentle pod opening.
Step-by-step instructions for harvesting plumeria seed pods
Here's how to collect and process plumeria seed pods without damaging the delicate seeds inside.
🌿 Step 1: Identify and Locate Mature Seed Pods
Plumeria seed pods mature when they turn from green to a papery brown and begin to split open slightly on their own. Look for pods that are 3-4 inches long and feel dry to the touch—these are ready for harvesting. I always check my plumeria plants in late summer or early fall, as that's when most seed pods reach maturity in my climate.
Gently shake the plant to see if seeds rattle inside. If you hear movement, the pod is ready. Avoid harvesting pods that are still green or firm, as the seeds inside won't be fully developed. You'll know it's time when the pod feels light and brittle, almost like dried paper.
✂️ Step 2: Carefully Remove the Pods From the Plant
Use clean, sharp pruning shears to snip the seed pod from the stem, leaving about ½ inch of stem attached. This helps preserve the seed's connection to the pod during handling. I always sterilize my shears with rubbing alcohol first to prevent introducing any pathogens to the plant or seeds.
Place the harvested pods in a paper bag or breathable container to allow airflow. Avoid plastic bags, as condensation can cause mold. Handle the pods gently—squeezing or crushing them can damage the seeds inside. If you have multiple pods, label them with the date and variety if known.
🪴 Step 3: Dry and Prepare the Pods for Seed Extraction
Let the pods dry in a warm, dry place for 3-5 days until they are completely brittle. You'll know they're ready when they crumble easily between your fingers. I like to place them in a single layer on a tray lined with paper towels to catch any seeds that might fall out prematurely.
Once fully dry, open the pods gently by squeezing them between your palms or tapping them lightly on a hard surface. The seeds should fall out easily. If the pod resists, let it dry for another day or two. Avoid using tools like knives or scissors, as they can damage the delicate seed coats.
💧 Step 4: Clean and Store the Seeds Properly
Remove any debris or empty seed husks from the collected seeds. Place them in a bowl of lukewarm water and stir gently to separate the viable seeds from any chaff or damaged seeds. Viable seeds will sink to the bottom, while empty or damaged ones will float. Skim off any floating material and discard it.
Spread the cleaned seeds on a paper towel in a single layer and let them air-dry for 24 hours before storing. Once dry, place them in a sealed envelope or small container with a desiccant packet to absorb moisture. Store the seeds in a cool, dark place—like a refrigerator—where they can remain viable for up to 6 months.
⏰ Step 5: Plant the Seeds at the Right Time
Sow plumeria seeds in late winter or early spring, just as the soil begins to warm up. Fill small pots with a well-draining seed-starting mix and plant the seeds ¼ inch deep. Keep the soil consistently moist but not soggy, as plumeria seeds need warmth and humidity to germinate.
Place the pots in a warm, sunny spot or under a grow light. Germination can take 3-6 weeks, so be patient. Once seedlings emerge, provide bright, indirect light and keep the soil moist until they are ready to transplant outdoors after the last frost.
Tips & tricks for perfect plumeria seed pod harvesting
Working with plumeria seed pods requires patience and precision—here's how to avoid common pitfalls and maximize your success.
Timing is Everything: Harvest pods only when they're completely dry and brown, not when they're still green or slightly leathery. I learned this the hard way after trying to extract seeds from premature pods—those seeds were either nonviable or took forever to germinate. If you're unsure, wait another week rather than rushing. The natural splitting of the pod is your best indicator of readiness.
Gentle Extraction Matters: That sticky sap from plumeria branches isn't just annoying—it can actually irritate your skin and damage the delicate seed pods. Always wear gloves and use sharp pruning shears to make clean cuts. I keep a small bottle of rubbing alcohol handy to clean the shears between cuts, which prevents sap buildup and keeps my tools ready for the next pod.
Storage Wisdom: Once you've extracted the seeds, store them in an airtight container with a desiccant packet to maintain their viability. I've found that labeling containers with the harvest date helps track freshness—seeds stored properly can last up to a year, but germination rates drop significantly after 6 months. Keep containers in a cool, dark place until you're ready to stratify.
Stratification Secrets: The 4-6 week refrigeration period is crucial for breaking dormancy, but don't let the paper towel get soggy—excess moisture causes rot. I wrap the bag loosely in plastic wrap to prevent evaporation while still allowing some airflow. Check weekly by gently squeezing the towel—it should feel damp like a wrung-out sponge, not dripping wet.
Pro Tips for Harvest Plumeria Seed Pods
- Working with plumeria seed pods requires patience and precision—here's how to avoid common pitfalls and maximize your...
- Timing is Everything: Harvest pods only when they're completely dry and brown, not when they're still green or slight...
- Gentle Extraction Matters: That sticky sap from plumeria branches isn't just annoying—it can actually irritate your s...
Frequently asked questions
Got questions about harvesting plumeria seed pods? You’re not alone! Here are answers to the most common queries to ensure your seed collection goes smoothly—from timing to troubleshooting.
When is the best time to harvest plumeria seed pods?
Harvest seed pods when they’re dry and brown but before they split open on their own. This usually happens 6–8 weeks after flowering, depending on your climate. If pods crack prematurely, seeds may lose viability. Aim for a mild, dry day to avoid humidity-related mold.
How long does it take for plumeria seeds to germinate?
Plumeria seeds can take 2–6 weeks to germinate, depending on conditions. Use a warm, humid environment (75–85°F) and keep soil consistently moist but not soggy. Patience is key—some seeds may take up to 3 months! Avoid refrigerating seeds, as they need warmth to sprout.
What do I do if my seed pods won’t open naturally?
If pods stay stubbornly closed, gently tap or roll them on a hard surface to encourage splitting. Avoid cutting—this can damage seeds. If pods are rock-hard, let them dry longer in a well-ventilated area. If they’re still sealed after 2 months, they may not contain viable seeds.
Can I harvest seeds from store-bought plumerias?
Yes, but check the plant’s origin first. Many nursery plumerias are grafted (not grown from seed), so they won’t produce true seeds. If you’re unsure, ask the seller or look for seed-grown plumerias labeled for propagation. Hybrid varieties may yield unpredictable seedlings!
What’s the best way to store plumeria seeds until planting?
Store seeds in a paper envelope or breathable container with a desiccant packet (like silica gel) to prevent moisture buildup. Keep them in a cool, dark place (60–70°F) for up to 6 months. Avoid plastic bags—condensation can cause mold. Label seeds with the harvest date!
Wrapping up and next steps
Harvesting plumeria seed pods is a rewarding process that unlocks the potential to grow these fragrant beauties from scratch! By following the right steps—patience, gentle handling, and proper drying—you’ll maximize your chances of viable seeds for future blooms. 🌱
Now that you’re equipped with the know-how, why not take the next step? Share your seeds with fellow gardeners, experiment with propagation, or even start a small nursery. Your green thumb could inspire others to grow their own plumeria paradise!