
Tools
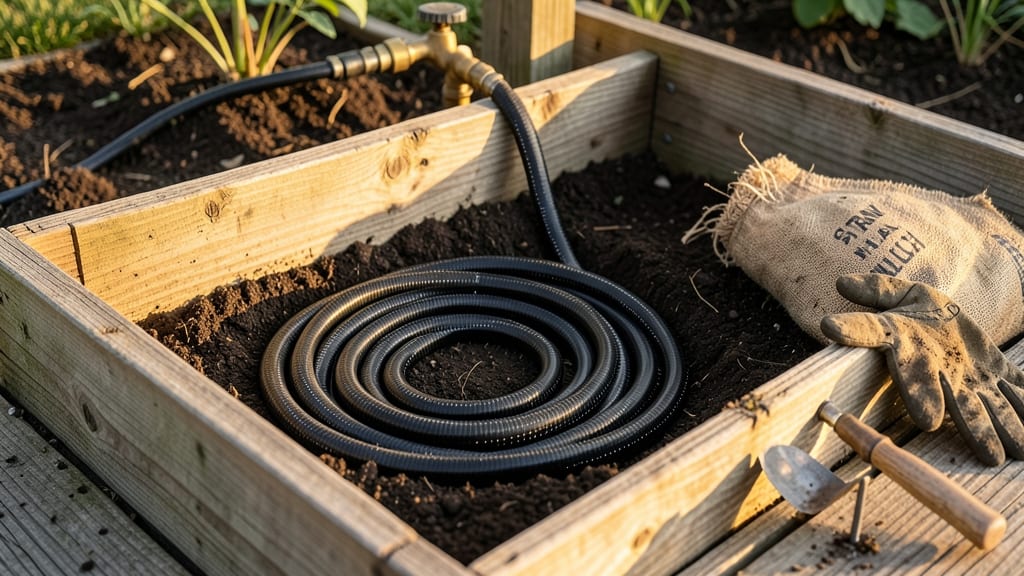
Installing a soaker hose in your raised bed cuts watering time by half. 💧 I’ve struggled with uneven moisture before—until I discovered this game-changer that keeps roots consistently hydrated without wasting a drop. The setup takes less than an hour, and the difference in plant health is noticeable within days.
You’ll need a soaker hose (1/4-inch or 1/2-inch diameter), a timer or manual valve, and basic tools like scissors and a measuring tape. Most importantly, choose a hose long enough to reach all corners of your bed—no more lugging watering cans or hoses that kink mid-stream.
The right setup means fewer weeds, healthier soil, and plants that thrive instead of just survive.
Place the hose along the base of your plants, securing it with landscape staples or pins to keep it in place. Run it in a zigzag pattern for even coverage, and avoid sharp bends that can restrict water flow.
Once connected, test it at low pressure to check for leaks or clogs—this is where most people trip up, but a quick inspection saves headaches later.
The payoff? Less water waste, stronger roots, and a system that works even when you’re not home. My tomatoes and peppers grow faster, and I spend less time fussing over watering. It’s the kind of upgrade that makes gardening feel effortless—once you get it right.
📚 In This Guide
- What you need
- Instructions
- Tips and common mistakes
- Wrapping up and next steps
What you need
- ● Soaker hose: ¼-inch to ½-inch diameter, with holes pre-punched or porous material (length should match your raised bed’s perimeter + extra for bends).
- ● Hose connectors: 2–4 (adjustable or slip-type) to attach the soaker hose to your water source.
- ● Hose end cap: 1 (to seal the end of the hose if not using a full loop).
- ● Hose clamp or zip ties: 3–5 (to secure connections and prevent leaks).
- ● Shovel or garden fork: 1 (for adjusting bed depth if needed).
- ● Scissors or utility knife: 1 (for trimming hose if necessary).
- ● Measuring tape: 1 (to calculate hose length and bed dimensions).
- ● Water source: Garden hose with a compatible connector (threaded or quick-connect).
- ● Hose timer or smart sprinkler controller: For automated watering on a schedule.
- ● Hose filter: To prevent debris from clogging the soaker hose.
- ● Landscape fabric or mulch: To cover the hose and retain moisture.
- ● Pressure regulator: If your water pressure exceeds 40 PSI (soaker hoses work best at 15–30 PSI).
- ● Garden hose reel: For easy storage when not in use.
Step-by-step instructions for installing a soaker hose in a raised bed
Here's how I set up soaker hoses in my raised beds—no more water waste, no more uneven moisture.
🪴 Step 1: Plan Your Hose Layout and Gather Supplies
Start by measuring your raised bed's length and width. You'll want the soaker hose to run along the center or one long side, depending on your bed's shape. For a 4-foot-wide bed, I place the hose 6-8 inches from the edge—this ensures even water distribution without oversaturating the outer plants. Mark the path with a piece of string or chalk before digging.
Gather your supplies: a soaker hose (length matching your bed), hose connectors (if needed), a hose clamp, and landscape fabric to prevent soil from clogging the hose. I also grab a shovel and gloves—this step gets a little dirty. The key is to work methodically so you don’t accidentally puncture the hose with sharp rocks or roots.
💧 Step 2: Prepare the Hose Path and Bury the Soaker Hose
Use the shovel to create a shallow trench along your marked path, about 2-3 inches deep. This depth ensures the hose stays hidden but still delivers water directly to the roots. Avoid digging too deep—you want the hose to be 1-2 inches below the soil surface for optimal coverage. Smooth out the trench with your hands, removing any sharp objects that could tear the hose.
Lay the soaker hose in the trench, making sure it follows the bed’s curves without kinks. Connect any necessary sections using the connectors and tighten them with the hose clamp. If your bed has multiple levels (like tiered raised beds), run the hose along the lowest tier first to prevent water from pooling unevenly. Once positioned, cover the hose with landscape fabric to block soil from entering the pores.
✂️ Step 3: Test the Hose and Adjust for Even Watering
Before covering the trench, attach the soaker hose to a garden hose and turn on the water at a medium flow rate. Walk along the bed and check for even water distribution—you should see moisture seeping out along the entire length, not just in a few spots. If water gushes from a single hole, that section is clogged or damaged. I’ve found that soaking the hose for 10-15 minutes before burying it helps flush out any debris.
Adjust the hose path if needed—if one side of the bed stays dry, shift the hose slightly closer to that area. For long beds over 8 feet, I add a second hose running parallel to the first for uniform coverage. Once satisfied, backfill the trench with soil, pressing lightly to secure the hose without compacting it. Water the bed thoroughly to settle everything in place.
🌿 Step 4: Maintain Your Soaker Hose System
After installation, rinse the hose monthly by running water through it for 5-10 minutes to prevent mineral buildup. I do this while watering other plants to save time. If you notice uneven watering after a few weeks, lift the soil near the hose and check for clogs or shifts in position. Mulch the bed with 2-3 inches of organic mulch to help retain moisture and protect the hose from extreme temperature swings.
In winter, drain the hose completely to prevent freezing and cracking. If you’re in a cold climate, I recommend disconnecting and storing the hose indoors or wrapping it in insulation foam. This simple maintenance keeps your system running smoothly for years—no more guessing whether your plants are getting enough water.
Tips & tricks for perfect raised bed irrigation
These simple strategies will help you avoid common mistakes and get the most out of your soaker hose setup.
Depth Matters: The 2-3 inch trench depth isn't just about hiding the hose—it's about positioning it perfectly for root access. For most vegetables, aim to place the hose 1-2 inches below the soil surface after backfilling. This ensures water reaches the root zone where your plants need it most, rather than just wetting the surface. I've seen many gardeners bury it too shallow, which leads to evaporation before the water reaches the roots.
Prevent Clogs Before They Start: Before burying your soaker hose, give it that 10-15 minute soak as mentioned in Step 3. This flushes out any factory debris or dust that might have accumulated during storage. I've had to dig up hoses before because they clogged after just a few weeks—always do this pre-installation flush, especially if you've stored the hose for any length of time. It only takes a few minutes but saves hours of troubleshooting later.
Double Up for Long Beds: When dealing with beds over 8 feet long, that second parallel hose makes all the difference. I've tested this myself—single hoses in long beds often leave dry spots in the middle. The parallel setup creates a more uniform watering pattern, especially for plants with deeper root systems like tomatoes or peppers. Just make sure to space them evenly across the bed width.
Winter Protection: That monthly 5-10 minute rinse isn't just about mineral buildup—it's also your first line of defense against winter damage. If you're in a cold climate, disconnecting and storing the hose indoors is the safest option. I've seen hoses crack after just one freeze-thaw cycle when left connected. For those who prefer to leave it in place, wrap it in insulation foam and bury it deeper than usual—about 3-4 inches below the frost line.
Pro Tips for Install A Soaker Hose In A Raised Bed
- These simple strategies will help you avoid common mistakes and get the most out of your soaker hose setup.
- Depth Matters: The 2-3 inch trench depth isn't just about hiding the hose—it's about positioning it perfectly for roo...
- Prevent Clogs Before They Start: Before burying your soaker hose, give it that 10-15 minute soak as mentioned in Step...
Frequently asked questions
Got questions about soaker hoses in raised beds?
Here are answers to the most common ones to help you get it right the first time!
When is the best time to install a soaker hose in a raised bed?
Install your soaker hose before planting—ideally when you first set up your raised bed. This lets you bury it slightly (2–3 inches deep) for even watering without disturbing roots later. If you’re retrofitting, do it during the off-season or when plants are dormant to minimize disruption.
Can I use a soaker hose for both watering and fertilizing?
Yes! Soaker hoses are great for fertigation (fertilizing through irrigation). Just dilute liquid fertilizer in your watering schedule—follow the product’s instructions for concentration. Avoid overdoing it, though, to prevent root burn. A slow, steady release works best!
How do I protect my soaker hose from freezing in winter?
Drain the hose completely and coil it in a warm, dry spot (like a garage or shed) before the first frost. If you must leave it in the bed, bury it deeper (4+ inches) and use a frost-proof connector. Pro tip: Add air-admittance valves to prevent water from freezing inside the hose.
What if my plants aren’t getting enough water with a soaker hose?
Check for clogs (use a needle or compressed air to clear blockages), ensure the hose is fully submerged in water, and adjust the water pressure (most soaker hoses work best at 20–40 PSI). If soil is too dry, water longer in shorter sessions. For sandy soil, consider a drip irrigation timer for consistency.
Are there cheaper alternatives to soaker hoses for raised beds?
Yes! DIY options include:
- PVC pipe with holes: Drill small holes in a perforated pipe and bury it.
- Old garden hose with punctures: Poke holes every 1–2 feet and secure with tape.
- Woven landscape fabric: Lay it flat and water over it to distribute moisture.
Wrapping up and next steps
Installing a soaker hose in your raised bed is a game-changer—it saves time, conserves water, and keeps your plants thriving with minimal effort! 🌱 With the right tools, a little planning, and the step-by-step guide above, you’ll have a low-stress, efficient irrigation system up and running in no time.
Now that you’re ready to dig in (literally), why not take it a step further?
Next, explore customizing your setup—like adding timers, mulching for extra moisture retention, or even pairing your soaker hose with a drip irrigation system for larger gardens. Happy gardening! 🌿