
Tools
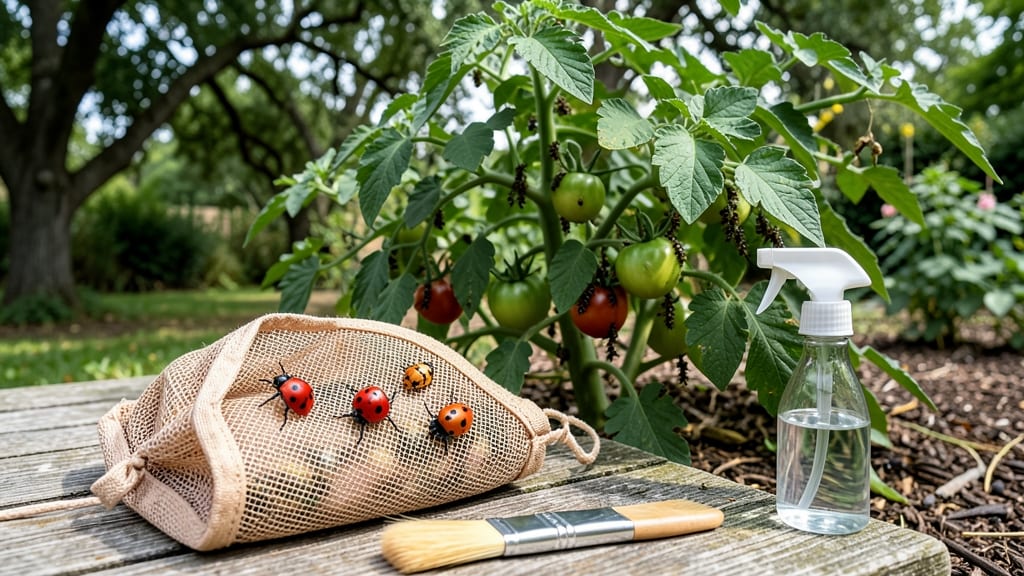
How to introduce ladybugs to your garden—it’s like adding a tiny, hungry pest-control army that multiplies faster than weeds. 🌱 I’ve released them three seasons running, and my aphid problems vanished within weeks. The secret isn’t just buying them; it’s creating a welcoming environment where they’ll stick around and reproduce. Start with 10-20 adults per 100 square feet—more if your pest population is heavy. Buy from reputable suppliers (avoid those cheap online deals—they’re often mislabeled or dead). Release them in the early morning or late evening when it’s cool, and place them directly on plants with aphids or under leaves where pests hide. Within 2-3 weeks, you’ll see tiny orange eggs and larvae—proof they’re settling in. Provide water sources (shallow dishes with pebbles) and nectar-rich flowers like dill or fennel to keep them fed. Avoid pesticides entirely, even organic ones, as they’ll kill your new allies too. This isn’t a one-time fix—it’s a self-sustaining ecosystem. Once established, ladybugs will overwinter in leaf litter and return next year, ready to tackle pests before they even appear. The best part? You’ll never need to buy them again.
📚 In This Guide
- What you need
- Instructions
- Tips and common mistakes
- Wrapping up and next steps
What you need
- ● Live ladybugs: Purchase 10–50 adults (depending on garden size) from a reputable supplier. Look for Hippodamia convergens or Adalia bipunctata—they’re hardy and effective!
- ● Release container: A small mesh cage (like a butterfly habitat) or a ventilated cardboard box with holes punched in the lid (at least 1" diameter).
- ● Water source: A shallow dish with pebbles or a sponge (to prevent drowning) or a spray bottle for misting.
- ● Food for ladybugs: Mealworms (dried or live, 5–10 per 10 ladybugs).
- ● Aphids (if available—collect from infested plants or buy online).
- ○ Gloves (optional but recommended): Thin gardening gloves to handle ladybugs gently and avoid squishing them.
- ● Target pests: Ensure your garden has aphids, mites, or soft-bodied insects—their primary food source. If not, introduce a few aphids (ethically sourced!) to give them a buffet.
- ● Shelter options: Plant diversity: Ladybugs love dill, fennel, marigolds, or yarrow for nectar and shelter.
- ● Rock piles or dense foliage: Creates hiding spots during the day.
- ● Avoid pesticides! Chemical sprays will kill ladybugs—stick to neem oil or insecticidal soap if pest control is needed.
- ● Ladybug habitat: A small wooden box with straw or a pre-made ladybug house for overwintering (if you’re in a cold climate).
- ● Pheromone traps (for monitoring): Helps track ladybug activity if you’re curious about their success!
- ● Notebook & pen: To log release dates, locations, and observations (fun for tracking their multiplication!).
Step-by-Step instructions for introducing ladybugs to your garden
Here’s how to invite these voracious aphid-eaters to thrive in your garden—where they’ll multiply quickly and keep pests at bay.
🌱 Step 1: Purchase Ladybugs from a Reputable Supplier
Buy ladybugs from a trusted supplier, ideally in the fall or early spring when they’re most active. Look for native species like Hippodamia convergens—avoid exotic varieties that may not adapt. I always order from certified sources to ensure the bugs are healthy and free of pesticides or mites. Check the packaging for signs of life (wiggling or movement) before bringing them home.
Arrive home quickly—these insects are delicate. Place the container in a shaded, sheltered spot (like a garage or basement) for 24 hours before releasing them. This helps them acclimate to temperature changes and reduces stress. If the weather is too cold (below 50°F), delay release until daytime temperatures stabilize.
🌿 Step 2: Release Ladybugs During Optimal Conditions
Release them on a cool, overcast day when predators like birds are less active. Early morning or late afternoon works best. I gently tip the container and let the ladybugs crawl out onto a leaf or flower—never force them. If they’re sluggish, place the container in a warm, sunny spot for 10-15 minutes to encourage movement.
Focus on areas with aphid infestations first—their primary food source. Avoid releasing them near water sources or in windy spots, as they’re weak fliers and may not establish themselves. Watch for 1-2 days to confirm they’re staying and feeding. If they disappear, check for predators like spiders or ants.
⏰ Step 3: Provide Shelter and Food Sources
Ladybugs need shelter to overwinter or escape harsh weather. Plant native perennials with dense foliage, like yarrow or dill, near their release sites. I also leave patches of bare soil or mulch—they’ll burrow into it during cold nights. Avoid over-tidying the garden; leaf litter and small debris create microhabitats they’ll use.
Ensure aphids are present in moderate numbers—too few, and the ladybugs will leave. If aphids are scarce, introduce a small, controlled infestation by lightly spraying a few plants with diluted honey water (aphids are attracted to it). This gives the ladybugs a reliable food source while they establish their population.
☀️ Step 4: Monitor and Encourage Population Growth
Check weekly for signs of reproduction: tiny orange eggs clustered on undersides of leaves or pupae that look like small, bumpy capsules. A successful introduction means you’ll see larvae within 2-3 weeks. Ladybugs lay hundreds of eggs in their lifetime, so patience is key—they’ll multiply fast if conditions are right.
If you notice ladybugs disappearing, inspect for predators like lacewings or parasitic wasps. You can also add a shallow dish of water with a bit of honey to attract and retain them. Avoid pesticides entirely—even "organic" sprays can harm ladybugs. If aphids are eradicated too quickly, the ladybugs may leave in search of food.
💧 Step 5: Maintain a Ladybug-Friendly Garden Long-Term
Keep the garden diverse with nectar-rich flowers like marigolds, cosmos, or sunflowers to feed adult ladybugs when aphids are scarce. I plant these in clusters near vegetable beds to create a food chain that supports both pests and predators. Avoid monocultures—they offer fewer hiding spots and food sources.
Water deeply but infrequently to prevent fungal growth, which can harm ladybugs. Early morning watering is best, as wet foliage at night attracts slugs and other pests that may compete with ladybugs. With consistent care, your garden will become a self-sustaining ecosystem where ladybugs thrive and multiply year after year.
Tips & tricks for introducing ladybugs to your garden
These key strategies will help your ladybug population thrive faster and establish a self-sustaining pest control system.
Acclimation is Critical: That 24-hour acclimation period in Step 1 isn't just about temperature—it's about reducing shock. I've seen ladybugs refuse to leave containers when rushed. Place the container near a window during acclimation so they can see outdoor light patterns, which helps orient them. If your home is particularly warm, move the container to a cooler spot like a basement to prevent overheating during this time.
Timing Your Release: The 10-15 minute warm-up in Step 2 works wonders for sluggish ladybugs, but don't overdo it. Direct sunlight can stress them—watch for when they start moving actively. I've found that releasing them just as the sun begins to warm the plants (around 8-9 AM) gives them immediate access to dew-covered aphids, their favorite morning snack. This early release also helps them avoid midday predators like birds.
Creating the Perfect Habitat: In Step 3, focus on creating microclimates that cater to different life stages. While dense foliage plants like yarrow are excellent, add some low-growing ground covers too—they provide shelter for pupae. I've had success with clover patches near release sites, as they attract aphids while also offering ladybugs a secondary food source when their primary prey becomes scarce.
Monitoring Without Disturbing: When checking for reproduction signs in Step 4, use a magnifying glass to examine undersides of leaves rather than handling the bugs. Ladybugs are sensitive to disturbance, and stressed adults may abandon their eggs. I keep a small notebook near my garden to track egg sightings—this helps me identify which plants are becoming ladybug hotspots. The 2-3 week window for larvae appearance is your best indicator of success.
Pro Tips for Introduce Ladybugs To Garden
- These key strategies will help your ladybug population thrive faster and establish a self-sustaining pest control sys...
- Acclimation is Critical: That 24-hour acclimation period in Step 1 isn't just about temperature—it's about reducing s...
- Timing Your Release: The 10-15 minute warm-up in Step 2 works wonders for sluggish ladybugs, but don't overdo it. Dir...
Frequently asked questions
about introducing ladybugs to your garden—because every gardener deserves a pest-free paradise!When is the best time to release ladybugs?
The ideal time is spring or early summer when temperatures are between 50–80°F (10–27°C). Avoid releasing them in extreme heat or cold—they’re delicate! If you must release them in fall, opt for adults (not eggs) since they’ll overwinter better. Timing ensures they’re active and hungry for pests like aphids.
What if my ladybugs disappear after release?
Don’t panic! Ladybugs are mobile and may fly away if they sense predators (like birds) or lack food. To improve retention:
- Release them late in the day when they’re less active.
- Provide water sources (shallow dishes with pebbles).
- Avoid releasing near broadleaf plants (they attract ladybug predators).
Can I buy ladybugs online, or should I find them locally?
Both work! Online suppliers (like Garden Safe or Arbico Organics) ship live ladybugs, but local sources (farmers’ markets, native plant nurseries) often provide species better adapted to your climate. Pro tip: Ask for native ladybugs (e.g., Hippodamia convergens)—they’re hardier and less likely to fly away.
What if my garden has no aphids when I release ladybugs?
No aphids? No problem! Ladybugs are omnivores—they’ll eat pollen, nectar, and even small mites. To attract them long-term:
- Plant flowering herbs (dill, fennel, marigolds).
- Add aphid magnets like nasturtiums.
- Release them near newly infested plants to encourage them to stay.
Will ladybugs harm my plants or beneficial insects?
Ladybugs are plant-safe and target only pests like aphids, mites, and soft-bodied insects. However, avoid releasing them near bees or butterflies—while ladybugs won’t attack them, competition for nectar can occur. Never use pesticides after release, as chemicals will kill them (and their prey).
Wrapping up and next steps
Introducing ladybugs to your garden is a simple yet powerful way to boost your natural pest control—without harsh chemicals! 🌱 These tiny allies thrive in healthy ecosystems, and with the right approach, they’ll multiply fast and keep your plants protected.
Now that you’re ready to welcome them, take the next step: monitor their activity and adjust their habitat as needed. Soon, you’ll enjoy a garden buzzing with life—and fewer pests to worry about! 🐞✨