
How To
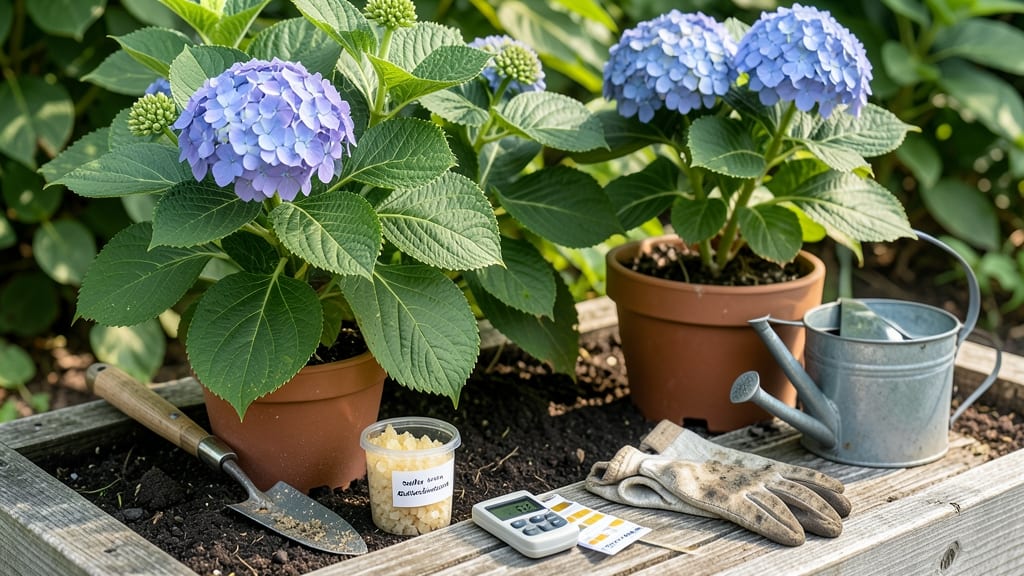
How to test and adjust soil pH for hydrangeas
Hydrangeas are famous for their color-changing blooms, but achieving that vibrant blue requires soil with a pH between 5.0 and 5.5. If your hydrangeas are stubbornly pink, it’s likely your soil is too alkaline.
The good news? Testing and adjusting pH is simpler than you think. Let’s dive into the step-by-step process to transform your soil and unlock those dreamy blue flowers.
Before you grab any amendments, you’ll need to test your soil’s current pH. This step is non-negotiable—guessing can lead to over-adjustment or even plant stress.
Most garden centers sell affordable soil test kits (around $10), or you can send a sample to a local extension office for a more precise analysis. For a quick fix, you can also use digital pH meters, though they’re less accurate than lab tests.
Once you’ve tested your soil, you’ll get a pH reading between 0 and 14. Aim for 5.0–5.5 for blue hydrangeas. If your reading is above 6.0, you’ll need to lower the pH.
The key is to make gradual changes—hydrangeas are sensitive to sudden shifts, which can burn roots or stunt growth. Think of it like adjusting the temperature in your home: slow and steady wins the race.
Now, let’s talk amendments. The two most effective options are elemental sulfur and aluminum sulfate. Both work quickly but require careful dosing. For elemental sulfur, apply 1–2 pounds per 100 square feet of soil and water it in well.
It takes 2–4 months to fully acidify the soil, so plan ahead if you’re eager for blue blooms. Aluminum sulfate is faster—use 1–2 tablespoons per gallon of water for a soil drench—but it can over-acidify if overused.
For a more organic approach, consider peat moss or pine needles. Mix 2–3 inches of peat moss into the top 6 inches of soil, or spread pine needles around the base of your hydrangeas.
These options are slower-acting but improve soil structure while lowering pH. Coffee grounds also work—just avoid clumping them around the roots, as they can mat and suffocate roots over time.
After amending, re-test your soil in 2–3 months. Hydrangeas don’t respond instantly, so give them time to adjust. If the pH is still too high, repeat the process with a slightly smaller dose.
Patience is key—rushing can lead to root damage or even plant death. Think of it like training a new pet: consistency and gentle adjustments yield the best results.
Step-by-Step Guide to Lowering pH for Hydrangeas
- 🔍 Test your soil using a kit or digital meter. Aim for a pH of 5.0–5.5 for blue blooms.
- 📝 Record your results and calculate how much the pH needs to drop.
- 💧 Choose your amendment: Elemental sulfur (slow) or aluminum sulfate (fast) for chemical methods; peat moss or pine needles for organic.
- 🌱 Apply evenly around the base of the hydrangea, avoiding direct contact with stems.
- 💦 Water thoroughly to help amendments integrate into the soil.
- ⏳ Wait 2–4 months before re-testing and adjusting again if needed.
- 🌸 Observe your hydrangeas—blue blooms should appear by next season!
One common mistake is overdoing it with amendments. Too much sulfur or aluminum sulfate can create toxic levels of aluminum in the soil, which harms roots.
Always start with the minimum recommended dose and adjust gradually. If you’re unsure, consult a local extension office for soil-specific advice—they’re a goldmine of knowledge!
Finally, remember that maintaining the right pH is an ongoing process. Every few years, re-test your soil and top-dress with amendments if needed. Hydrangeas thrive in acidic, well-draining soil, so pair your pH adjustments with regular mulching and composting to keep the soil healthy.
With a little patience and science, you’ll be rewarded with stunning blue hydrangeas that steal the show in your garden.
Ready to see those blooms turn blue? Grab your soil test kit and get started—your hydrangeas will thank you! 🌸
Organic vs chemical methods: which pH-lowering solution works best?
Lowering your hydrangea soil's pH level doesn't have to mean harsh chemicals. Organic and chemical methods both work, but they offer different benefits and drawbacks. Let me break down the best options for your garden, whether you prefer natural solutions or faster-acting amendments.
For organic methods, think of them as slow-release soil conditioners. They improve soil health over time while gently lowering pH. These are perfect if you're growing other plants nearby or want to avoid synthetic additives. The trade-off? Results take weeks or months to appear.
Chemical amendments, like elemental sulfur or aluminum sulfate, deliver faster results—sometimes in just a few weeks. They're ideal when you need quick color changes before summer blooming season. However, they require careful measurement to avoid over-acidifying your soil.
| Method | Best For | Speed | Cost | Soil Health |
|---|---|---|---|---|
| Elemental Sulfur | Quick results, large gardens | 2-4 weeks | Moderate ($10-$20) | Good |
| Aluminum Sulfate | Fastest results, established plants | 1-2 weeks | Moderate ($15-$25) | Fair (can build up) |
| Pine Needles | Natural gardens, slow release | 3-6 months | Low ($0-$5) | Excellent |
| Coffee Grounds | Small gardens, composting | 2-3 months | Low ($0-$3) | Very Good |
| Peat Moss | Long-term acidity, new plantings | 1-2 months | Moderate ($10-$15) | Excellent |
My favorite organic amendment is pine needles—they're free if you have pine trees nearby and release acidity slowly. Just spread a 1-inch layer around your hydrangeas in early spring. For faster results, mix coffee grounds into the top 2-3 inches of soil before planting.
If you're in a hurry, elemental sulfur is my top chemical recommendation. Sprinkle 1-2 pounds per 100 square feet and water thoroughly. For immediate results, use aluminum sulfate at 5 pounds per 100 square feet, but test soil pH regularly to avoid over-acidification.
Remember, the best method depends on your garden goals. Want vibrant blue blooms next summer? Start with chemical amendments now. Prefer long-term soil health? Go organic. Either way, test your soil pH again in 3 months to monitor progress.
🌱