
How To
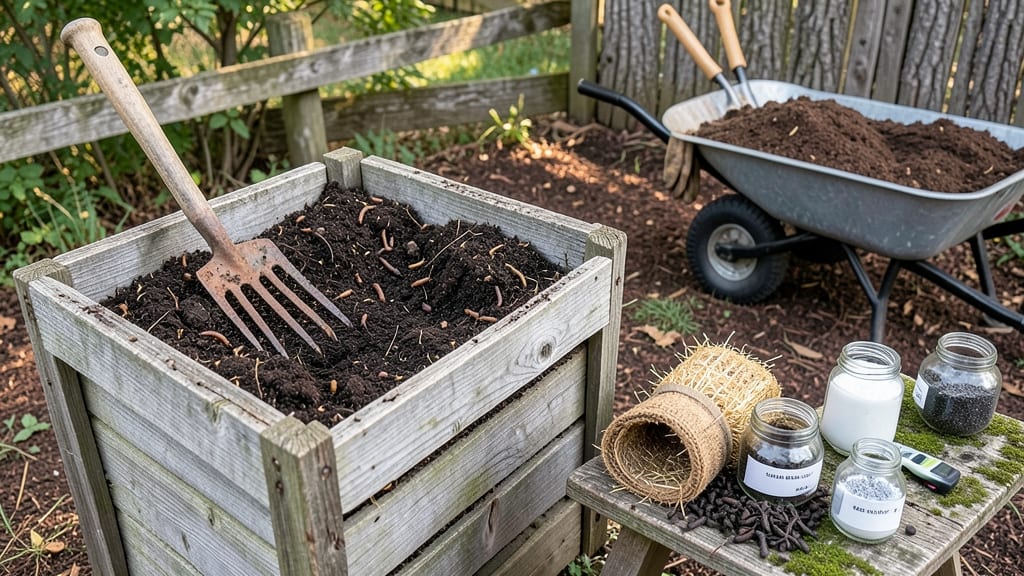
Your vegetable garden deserves soil richer than anything you can buy in bags. 🌱 I spent years struggling with store-bought mixes that compacted, drained poorly, and lacked the life my plants needed—until I learned to blend my own.
The secret isn't complexity; it's matching the right ingredients in simple ratios that work for your climate and plants.
You'll need just five basic components: compost (the foundation), aged manure (for fertility), coarse sand or perlite (for drainage), garden soil (the base), and optional amendments like worm castings or bone meal.
The magic happens when you combine them in one of three proven mixes—each designed for different garden needs, from heavy clay to sandy loam.
By the end, you'll have soil that holds moisture like a sponge, feeds roots continuously, and resists compaction. Your tomatoes will vine stronger, your greens grow faster, and you'll cut fertilizer costs by half. The best part? This method works in raised beds, in-ground plots, or even container gardens.
Fair warning: the first batch might smell like a forest floor—earthy, alive, and unmistakably different from sterile bagged soil. That's exactly what your vegetables want. Let's get mixing!
📚 In This Guide
- What you need
- Instructions
- Tips and common mistakes
- Wrapping up and next steps
What you need
- ● Topsoil (60-70%): 1 part (about 3 cubic feet per 4 sq ft of garden bed). Look for loamy soil with a mix of sand, silt, and clay.
- ● Compost (20-30%): 1 part (1 cubic foot per 4 sq ft). Use well-aged, homogeneous compost—avoid fresh manure or wood chips.
- ● Perlite or Vermiculite (5-10%): 1 part (½ cubic foot per 4 sq ft). Improves drainage and aeration. Perlite is lighter; vermiculite holds moisture better.
- ○ Sand (optional but recommended for heavy clay soil, 5-10%): 1 part (½ cubic foot per 4 sq ft). Use coarse, builder’s sand (not fine beach sand).
- ● Garden fork or tiller: For mixing and aerating the soil.
- ● Wheelbarrow or large bucket: To transport and blend materials.
- ● Garden gloves: Protect your hands from sharp tools and rough soil.
- ○ pH testing kit (optional but helpful): Ensures your soil is in the ideal range (6.0–7.0) for veggies.
- ● Watering can or hose: To moisten the mix before planting.
- ● Test your existing soil (a simple jar test works!). Amend if it’s too sandy, clay-heavy, or compacted.
- ● Choose a sunny or partially shaded spot for your garden bed (most veggies need 6+ hours of sunlight).
- ● Clear the area of weeds, rocks, and debris before mixing.
Step-by-Step instructions for building nutrient-rich vegetable garden soil
Here's how I create three proven soil mixes that transform garden plots into thriving ecosystems.
🌱 Step 1: Source and Prepare Base Materials
Gather equal parts of three foundation materials: topsoil (the mineral backbone), compost (the nutrient powerhouse), and organic matter like aged leaves or straw (the structure builder). I always use screened topsoil—unscreened clumps create air pockets that stunt root growth. For a 4-cubic-foot batch, you'll need 1 cubic foot of each component. Store compost in a covered bin for at least 6 months to ensure it's fully decomposed and free of weeds.
Break up any clumps in the topsoil with a garden fork before mixing. If your topsoil is sandy, add 10% peat moss to improve water retention. For clay-heavy soil, mix in 20% perlite to prevent compaction. The goal is a texture that crumbles easily between your fingers—like a well-worn pencil eraser.
🌿 Step 2: Mix Components by Volume, Not Guesswork
Use a wheelbarrow or large bin to combine materials in equal proportions by volume. Start with the topsoil, then layer in compost and organic matter. I like to alternate layers—2 inches topsoil, 2 inches compost, 2 inches straw—to ensure even distribution. For a 4-cubic-foot mix, that's 16 quarts of each. Use a garden rake to blend thoroughly, breaking up any remaining clumps.
Add 1 cup of bone meal (for phosphorus) and 1 cup of kelp meal (for trace minerals) per 4 cubic feet of mix. These amendments dissolve slowly, feeding plants over the growing season. Work them in with a hand trowel until uniformly distributed. The final blend should smell earthy, not sour or ammonia-like—this indicates proper decomposition.
💧 Step 3: Condition and Test for Plant Readiness
Moisten the mix until it holds together when squeezed but doesn't form a tight ball. Aim for 40-60% moisture—like a wrung-out sponge. I test this by grabbing a handful: if water drips out when you open your fist, it's too wet. If it crumbles instantly, add more water. Let the mix sit for 24-48 hours to allow moisture to distribute evenly.
Before planting, perform a finger test: press your thumb into the soil. It should hold its shape briefly but yield slightly when you poke it. This indicates proper aeration and drainage. For heavy feeders like tomatoes, add 1 tablespoon of 5-10-10 fertilizer per square foot of bed. For lighter crops like lettuce, skip the fertilizer—your compost should provide enough nutrients.
☀️ Step 4: Apply and Maintain Your Custom Soil
Spread the finished mix over your garden bed to a depth of 6-12 inches, depending on the crop. For root vegetables like carrots, aim for 12 inches of depth. Use a broadfork to loosen the native soil below before adding your mix—this prevents a hardpan from forming at the transition layer. Water thoroughly after application to settle the soil and eliminate air pockets.
Top-dress with 1 inch of compost every spring and fall to replenish nutrients. Mulch with straw or wood chips to retain moisture and regulate temperature. Avoid tilling after planting—this disrupts the soil structure you've carefully created. Instead, use a hand fork to gently aerate around plants as needed. Your custom soil will stay fertile for 3-5 years with proper maintenance.
Tips & tricks for perfect garden soil mixes
These simple yet powerful tricks will help you create the ideal foundation for your vegetable garden—without the guesswork.
The Texture Test: In Step 1, when preparing your topsoil, don't just break up clumps—run a simple texture test. Press the soil between your thumb and forefinger: it should crumble like a well-worn pencil eraser. If it feels gritty or sandy, your 10% peat moss addition will be even more critical for moisture retention. For clay-heavy soil, that 20% perlite becomes non-negotiable to prevent compaction. This texture check at the start saves you headaches later when roots struggle to penetrate.
Layering Technique: The alternating 2-inch layers in Step 2 aren't just about distribution—they create micro-environments that improve nutrient availability. Start with topsoil at the bottom to provide mineral stability, then compost for nutrients, and straw on top to prevent crusting. This layering mimics natural soil stratification and gives you better control over each component's contribution. Pro tip: Use a straight-edged board to create perfectly even layers if you're working with large volumes.
Moisture Mastery: That 24-48 hour conditioning period in Step 3 is your secret weapon. Don't rush it! The moisture needs time to penetrate all layers uniformly. I've learned the hard way that skipping this step leads to uneven water distribution—some areas too wet, others bone dry. For large batches, consider using a hose with a gentle spray nozzle to distribute water evenly rather than dumping it all at once. The goal is that perfect "wrung-out sponge" consistency throughout the entire mix.
Pro Tips for Make Your Own Soil For Vegetable Gardens
- These simple yet powerful tricks will help you create the ideal foundation for your vegetable garden—without the gues...
- The Texture Test: In Step 1, when preparing your topsoil, don't just break up clumps—run a simple texture test. Press...
- Layering Technique: The alternating 2-inch layers in Step 2 aren't just about distribution—they create micro-environm...
Frequently asked questions
Got questions about DIY garden soil? You’re not alone! Here are answers to the most common queries—so you can grow confidently with your homemade nutrient-rich loam.
How often should I refresh my homemade garden soil?
Refresh your soil every 1–2 years or after heavy planting. Mix in 1–2 inches of compost or aged manure annually to replenish nutrients. If you notice wilting plants or poor growth, it’s time to amend! Test your soil’s pH (aim for 6.0–7.0 for most veggies) to spot deficiencies early.
How long does it take for homemade soil to be ready for planting?
Most mixes are ready in 4–6 weeks if properly aged. Speed this up by:
- Using fully decomposed compost (no clumps!)
- Avoiding fresh manure (wait 3–6 months to prevent burning roots).
- Turning the pile every 2 weeks to boost aeration.
Can I skip compost and still get good results?
Yes, but with trade-offs! Skip compost only if you:
- Use high-quality peat moss or coconut coir (for moisture retention).
- Add worm castings or aged chicken manure (10–15% of the mix) for nutrients.
- Supplement with slow-release fertilizer (like bone meal or kelp).
What if my homemade soil smells bad or has pests?
Bad smells or pests (like ants or fungi) usually mean improper decomposition. Fix it with:
- Turn the pile to improve airflow (prevents anaerobic smells).
- Add dry leaves or straw to absorb excess moisture.
- Sprinkle diatomaceous earth (food-grade) for pests.
- Avoid overwatering—soil should feel like a wrung-out sponge.
Can I reuse old garden soil from last year?
Reuse 50–70% of last year’s soil
and top-dress with:
- 20% fresh compost
- 10% perlite or vermiculite (for drainage)
- A handful of mycorrhizal fungi (boosts root health).
Wrapping up and next steps
Creating your own nutrient-rich soil for your vegetable garden is easier—and more rewarding—than you might think! 🌱 By blending organic matter like compost, aged manure, and garden soil, you’re not just growing plants; you’re nurturing a thriving ecosystem.
With the right mix, you’ll enjoy healthier crops, fewer pests, and a garden that feels like a well-loved masterpiece.
Now that you’ve got the know-how, roll up your sleeves and start mixing! Try one of the three simple recipes this season, and don’t forget to test and adjust as you go. Happy gardening—your future harvests will thank you! 🥕✨