
Propagation
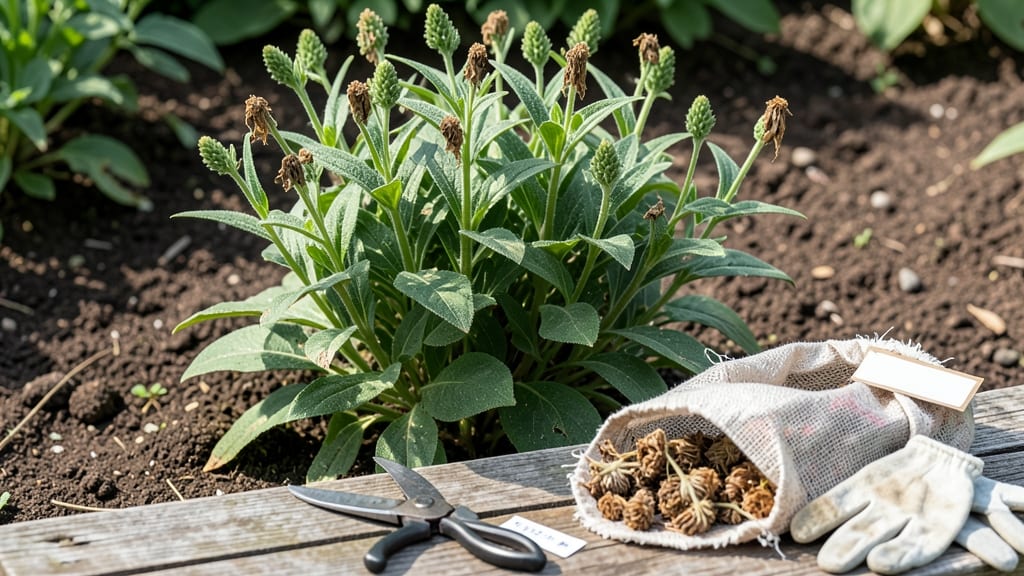
Collecting phlox seeds turns last year's spent blooms into next season's showstopper. 🌸 I learned the hard way that waiting too long means missing the perfect window—those tiny pods dry out fast, and the seeds scatter before you can blink.
Start by spotting the dry, papery seed pods that form after blooms fade. They’ll turn from green to brown, splitting open when ready. Harvest them carefully—use clean scissors or your fingers to snip them off stems before they burst. A paper bag works best for collecting them whole.
Once home, lay the pods on a tray to dry completely (about 1-2 weeks in a warm, dry spot). Then, gently crush them to release seeds, sifting out debris. Store in an envelope until spring planting—these seeds are light-sensitive, so keep them dark and cool.
The payoff? A self-sustaining phlox patch that multiplies year after year. Just don’t skip the drying step—wet seeds won’t germinate. Here’s how to nail it every time.
📚 In This Guide
- What you need
- Instructions
- Tips and common mistakes
- Wrapping up and next steps
What you need
- ● Mature phlox plants: Choose healthy, disease-free plants with fully developed seed pods (usually late summer to early fall).
- ● Pruning shears or sharp scissors: 1 pair (sterilized with rubbing alcohol for hygiene).
- ● Paper bags or breathable seed envelopes: 5–10 (brown kraft paper or mesh bags work best for airflow).
- ● Permanent marker: 1 (to label seed varieties).
- ● Flat surface or tray: 1 (for drying seeds indoors).
- ● Fine mesh screen or paper towels: 1–2 (for separating seeds from chaff).
- ● Seed drying rack: Speeds up the process and keeps seeds organized.
- ● Desiccant packets: Helps absorb excess moisture during drying.
- ● Magnifying glass: Useful for inspecting seed viability.
- ● Digital scale: For weighing seeds (helpful for large batches).
- ● Storage containers: Airtight jars or vacuum-sealed bags for long-term seed preservation.
Step-by-Step instructions for collecting phlox seeds
Here's how to turn this year's spent blooms into next season's vibrant garden stars.
🌿 Step 1: Identify the Right Time to Collect
Wait until your phlox plants have finished blooming for the season and the flower heads have turned completely brown. This usually happens in late summer or early fall, depending on your climate. The seed pods will be dry and papery at this stage, which is your cue that they're ready for collection.
Don't rush—if you pick them too soon, the seeds won't be fully developed. I always wait until at least 75% of the pods on a stem have turned brown before starting. This ensures you get the most viable seeds for planting next year.
🌱 Step 2: Gather the Seed Pods
Use clean, sharp scissors or pruning shears to snip the dried seed pods from the stems. Cut just above the first set of leaves where the stem meets the pod. This prevents damage to the plant and makes the pods easier to handle.
Place the collected pods in a paper bag or envelope—paper breathes better than plastic and prevents moisture buildup, which can cause mold. I like to label each bag with the phlox variety and the year collected. This helps me keep track of what I've saved for next season.
💧 Step 3: Dry and Store the Seed Pods
Let the pods dry completely in a warm, dry place away from direct sunlight for about 1-2 weeks. This extra drying time ensures any remaining moisture evaporates, which helps prevent mold during storage. You'll know they're fully dry when the pods feel light and brittle to the touch.
Once dry, gently rub the pods between your fingers or tap them lightly on a hard surface to release the tiny seeds. Phlox seeds are very small, so I use a fine-mesh strainer to catch them all. Store the seeds in a sealed envelope or small jar in a cool, dark place until you're ready to plant them next spring.
⏰ Step 4: Prepare for Next Season's Planting
Phlox seeds need a cold period to germinate properly, so you can either plant them outdoors in fall or stratify them in the refrigerator for 4-6 weeks before spring planting. If you choose to plant in fall, scatter the seeds on prepared soil and lightly cover them with ¼ inch of soil.
In spring, you'll see seedlings emerge in 2-3 weeks if all went well. Thin them to 6 inches apart once they have a few leaves to give each plant room to grow. This method ensures you'll have a fresh batch of phlox blooms next year, just like the ones you collected from!
Tips & tricks for perfect phlox seed collection
Between us, I've collected phlox seeds for years—and these little tricks make all the difference when you're turning last year's blooms into next year's garden stars.
Timing Secret: In Step 1, don't just wait for brown pods—look for a crisp, papery texture. If you gently squeeze a pod and it crumbles easily, it's ready. I've learned the hard way that waiting for 100% brown is better than rushing with 75%! This ensures maximum seed viability. The pods should also rattle when shaken lightly, which means the seeds are fully developed inside.
Gathering Technique: When you're cutting pods in Step 2, work on a dry day. Dew or morning moisture makes the pods stick to your scissors and can introduce mold risks. I also recommend cutting pods from the bottom of stems first—they tend to dry out more completely. This prevents any premature drying issues that might affect seed quality. Use a small bucket lined with newspaper to collect pods as you go—it keeps them organized and prevents loss.
Drying Wisdom: For Step 3, I've found that spreading pods on a screen or mesh bag with good airflow speeds up drying. Place it in a spot where it gets indirect sunlight—like a covered porch or under a shade cloth. If you're in a humid climate, consider using a small fan on low to circulate air. This cuts the 1-2 week drying time by about 30% without risking mold. Just don't use heat sources—they can actually cook the seeds!
Storage Strategy: When storing your seeds in Step 3, add a tiny silica gel packet to your envelope or jar. These packets absorb any lingering moisture that could cause mold during storage. I also date each container and write the phlox variety on masking tape—this helps me track which seeds are oldest when it's time to plant. Store containers in the darkest part of your pantry or fridge for maximum longevity.
Pro Tips for Collect Phlox Seeds
- Between us, I've collected phlox seeds for years—and these little tricks make all the difference when you're turning ...
- Timing Secret: In Step 1, don't just wait for brown pods—look for a crisp, papery texture. If you gently squeeze a po...
- Gathering Technique: When you're cutting pods in Step 2, work on a dry day. Dew or morning moisture makes the pods st...
Frequently asked questions
Got questions about collecting phlox seeds? You’re not alone!
Here are answers to the most common queries to help you turn this year’s blooms into next year’s garden stars.
When is the best time to harvest phlox seeds?
Collect seeds when the flower heads turn brown and dry out—usually 4–6 weeks after blooming. For most phlox varieties, this happens in late summer to early fall (August–September). Avoid harvesting too early; green pods won’t yield viable seeds.
How long do phlox seeds stay viable for storage?
Phlox seeds remain viable for 1–2 years if stored properly in a cool, dry place (like a paper envelope in the fridge). For best results, plant them as soon as possible—germination rates drop over time. Pro tip: Label your seeds with the harvest date!
What do I do if my phlox pods don’t open on their own?
If pods stay closed, gently squeeze or twist them to release seeds (wear gloves—some phlox have tiny barbs!). Alternatively, place pods in a paper bag for a few days; the movement will help them open naturally. Avoid cutting pods open too soon—immature seeds won’t sprout.
Can I collect phlox seeds from hybrid varieties?
Yes, but results may vary! Hybrid phlox (like ‘David’ or ‘Lipstick’) can produce seeds, but the offspring might not match the parent plant’s color or size. For consistent blooms, opt for heirloom or open-pollinated varieties. Fun fact: Some hybrids self-seed reliably—just experiment!
What’s the easiest way to clean phlox seeds?
Spread dried pods on a tray or clean towel and gently rub them to separate seeds from chaff. Use a fine-mesh sieve to sift out debris. For stubborn pods, a quick rinse in lukewarm water (then dry thoroughly) works too. Pro tip: Store seeds in a sealed container with a desiccant packet to prevent mold.
Wrapping up and next steps
Collecting phlox seeds is a rewarding way to grow vibrant blooms year after year—just follow these simple steps! 🌸 By harvesting mature seed pods, drying them properly, and storing seeds in a cool, dry place, you’ll be ready to plant fresh flowers next season.
Whether you’re a gardening pro or a beginner, this process is easy and fun—so grab those pods and get growing!
Now that you’ve mastered seed collection, why not share your newfound knowledge? Tag us in your garden updates or try propagating phlox from cuttings for even more blooms! Happy gardening! 🌱