
Pruning
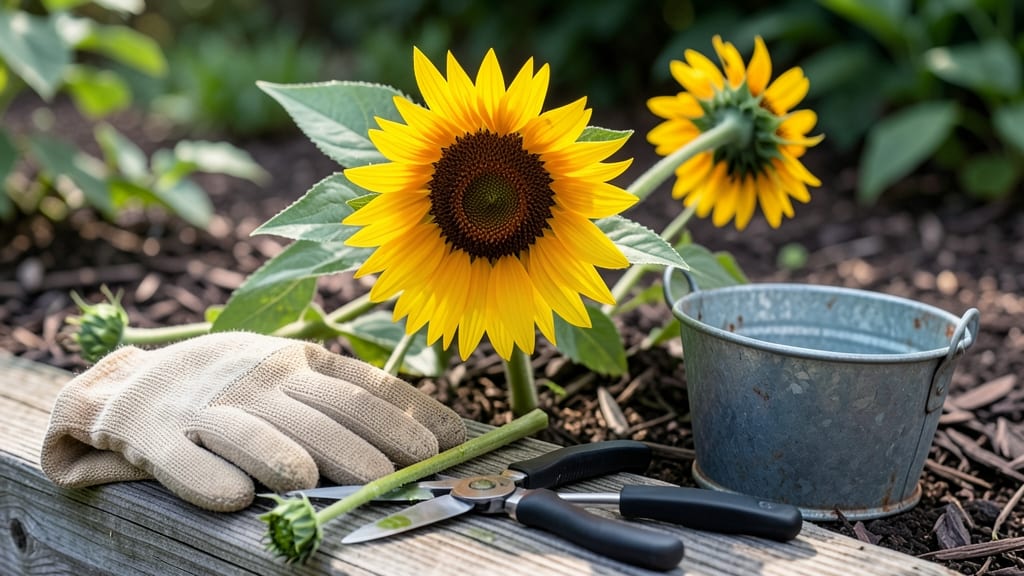
Your rudbeckia could bloom until frost—if you deadhead correctly. ✨ I’ve turned my late-summer garden from a single burst of color to a three-month showpiece by mastering this simple technique that most gardeners overlook.
Deadheading isn’t about cutting flowers—it’s about redirecting energy. When you remove spent blooms, the plant focuses on producing new flowers instead of seeds, keeping your Black-Eyed Susans looking fresh until hard frost. The best time? Right after the petals fade but before the center turns brown.
You’ll need clean pruners or your fingers (yes, really) and about 10 minutes per plant every week. The result? A bushier, longer-lasting display that makes your neighbors ask, “What’s your secret?”
Pro tip: Skip deadheading if you want seeds for next year’s garden—just let those centers mature. Otherwise, this technique works for both container and in-ground plants, no matter your yard size.
📚 In This Guide
- What you need
- Instructions
- Tips and common mistakes
- Wrapping up and next steps
What you need
- ● Pruning shears or sharp scissors – Opt for bypass pruners (clean cuts, less damage) or felco pruners (durable, ergonomic). Size: 5-7 inches, with sharp, stainless-steel blades.
- ○ Gloves (optional but recommended) – Garden gloves (nitrile-coated for grip) to protect hands from thorns or dirt. Tip: Choose lightweight, breathable ones for comfort during long sessions.
- ● Disinfectant (rubbing alcohol or 10% bleach solution) – 1 part bleach to 9 parts water to sterilize tools between cuts and prevent disease.
- ● Bucket or trash bag – For collecting spent blooms and debris. Size: At least 5 gallons to avoid overflow.
- ○ Water spray bottle (optional) – A 16-ounce misting bottle to dampen dusty stems or rinse tools quickly.
- ● Choose the right time – Deadhead on a dry, sunny morning (avoid wet stems to reduce disease risk). Best time: Early morning or late afternoon.
- ● Identify spent blooms – Look for flowers with drooping petals or brown centers (signs they’re ready for removal).
- ● Check plant health – Avoid deadheading if the plant shows signs of pests (aphids, spider mites) or disease (yellow leaves, spots). Treat first!
- ● 💡 Sharpen your tools first! Dull blades crush stems, inviting disease. Use a file or sharpening stone to keep blades razor-sharp.
- ● 🌡️ Work in stages – Tackle one section at a time (e.g., front of the bed first) to avoid overwhelming yourself.
- ● 🎯 Repurpose spent blooms – Dry them for potpourri or compost them for nutrient-rich soil!
Step-by-step instructions for deadheading rudbeckia
Here's how I keep my rudbeckia blooming until hard frost—no fancy tools, just a few simple techniques.
✂️ Step 1: Identify the Right Time to Deadhead
Wait until the flower head begins to fade but hasn't fully browned yet—that's the sweet spot. You'll see petals drooping or turning yellowish-brown at the edges while the center cone remains green. The moment you see this, grab your pruners and get to work.
If you cut too early, you'll remove healthy blooms that could have lasted longer. If you wait too long, the plant directs energy toward seed production instead of new flowers. I always check my rudbeckia in the early morning when petals are still crisp—this gives me the best light to spot fading blooms.
✂️ Step 2: Make the Clean Cut
Use clean, sharp pruners to cut the stem just above a set of leaves or a lateral bud. This encourages branching and more flowers. I like to make my cut at a 45-degree angle about ¼ inch above the leaf node—this prevents water from pooling on the cut stem and causing rot.
Don't worry about being perfect here. The goal is to remove the spent bloom while leaving healthy growth intact. If you're working with multiple plants, I recommend deadheading a few blooms at a time to avoid overwhelming yourself. You'll see new buds forming within 1-2 weeks at the cut points.
🌱 Step 3: Stimulate New Growth
After cutting, give your rudbeckia a light drink of water to help it recover. The plant will redirect energy from the fading bloom to new growth points. You'll notice fresh buds forming at the leaf axils within 7-10 days, especially if your plant gets full sun and well-draining soil.
This is where regular deadheading pays off. The more you remove spent blooms, the more your rudbeckia will focus on producing new flowers instead of seeds. I've seen some plants keep blooming until first frost when deadheaded consistently every 3-5 days during peak flowering season.
☀️ Step 4: Maintain Proper Care After Deadheading
Keep your rudbeckia in full sun (at least 6 hours daily) and water deeply once a week unless you're in a drought-prone area. The plant needs consistent moisture to support new flower production, but avoid soggy soil—rudbeckia hates wet feet.
After the first flush of blooms, I reduce my deadheading frequency to every 5-7 days as the season progresses. The plant naturally slows down in late summer, but you'll still get a few late-season blooms if you keep up with maintenance. Fertilize lightly with a balanced 10-10-10 formula every 4-6 weeks to encourage vigorous growth.
⏰ Step 5: Prepare for Next Season
Once your rudbeckia stops blooming for the season, cut back the stems to 6 inches above the ground. This prevents flopping and makes cleanup easier. The plant will still photosynthesize through its basal leaves, storing energy for next year's growth.
Leave the dead foliage over winter if you're in a cold climate—it provides insulation for the roots. In milder areas, you can remove it in late winter. I always mark my rudbeckia beds so I know where to look for early spring regrowth. With proper deadheading, you'll get stronger stems and bigger blooms next season.
Tips & tricks for perfect rudbeckia deadheading
Keeping your rudbeckia blooming all season is easier than you think—just a few simple tricks make all the difference.
The Timing Secret: I’ve learned this the hard way after ruining three batches of blooms by cutting too early. That slight droop at the petal edges—when the center cone is deep brown but petals haven’t fully dried—is your perfect window. This timing ensures you’re not removing flowers that could still open, while preventing the plant from wasting energy on spent blooms. Think of it as catching the flower at its peak maturity, not its decline.
Cutting Technique That Changed Everything: The half-inch rule above the leaf node is non-negotiable for me now. I used to cut too close to the main stem, which left no growth point, and too high, which removed potential blooms. That fingernail comparison works every time—just visualize where your nail would sit on a pencil. And here’s what nobody tells you: angle those cuts downward to prevent water pooling. It’s a tiny detail that keeps stems healthier longer.
Seasonal Strategy: In late summer when days shorten, I switch to a 5-day deadheading schedule instead of 7. The plants are working harder to produce blooms, so they need more frequent encouragement. I also leave a few stems to go to seed by early September—this attracts pollinators while still giving me a final flush of flowers before frost. It’s a win-win for both my garden and the local ecosystem.
Troubleshooting Common Mistakes: If your rudbeckia suddenly stops blooming, check two things first: sunlight and water. These plants need that full 6+ hours of sun daily, and while they’re drought-tolerant, they’ll reward you with more flowers if you give them a light drink when the top inch of soil feels dry. I’ve had plants in containers that needed moving to sunnier spots mid-season—don’t assume their original location is perfect once summer progresses.
Pro Tips for Deadhead Rudbeckia
- Keeping your rudbeckia blooming all season is easier than you think—just a few simple tricks make all the difference.
- The Timing Secret: I’ve learned this the hard way after ruining three batches of blooms by cutting too early. That sl...
- Cutting Technique That Changed Everything: The half-inch rule above the leaf node is non-negotiable for me now. I use...
Frequently asked questions
about deadheading rudbeckia—because even the pros need a little clarity! Here are answers to the most common queries to keep your black-eyed Susans thriving.When is the best time to deadhead rudbeckia?
Deadhead after the flower fades but before the seed head forms—typically mid-to-late summer. Aim for bright, sunny days to reduce stress on the plant. For prolonged blooms, repeat every 1–2 weeks until frost. Pro tip: Morning deadheading keeps plants hydrated and happy!
Do I need special tools to deadhead rudbeckia?
Not at all! Clean pruners or even your fingers work—just avoid tearing stems. For large clumps, shears make it easier. Warning: Sterilize tools with rubbing alcohol between plants to prevent disease. Bonus: A sharp blade = cleaner cuts = healthier plants!
What if my rudbeckia stops blooming after deadheading?
Don’t panic! Over-pruning or late-season cuts can signal the plant to rest. Focus on removing only spent blooms (never more than 1/3 of the plant). If blooms dwindle, check for pests, poor soil, or lack of sunlight. Fix: Feed with balanced fertilizer and trim back lightly in early spring.
Can I skip deadheading and still get flowers?
Yes, but expect fewer blooms and more seed heads. Deadheading redirects energy to new flowers, extending your season by weeks. If you’re low-maintenance, let some seed heads stay—they add winter interest! Trade-off: More deadheading = longer color bursts.
Should I deadhead rudbeckia before rain?
Avoid deadheading right before heavy rain—wet stems can rot or invite fungal issues. Wait until the plant dries out (24–48 hours post-rain). Rainy-day hack: Use a waterproof glove and trim on a dry day instead!
How do I encourage rudbeckia to rebloom after deadheading?
Combine deadheading with these tricks:
- Water deeply after trimming to reduce shock.
- Pinch back leggy stems to promote bushiness.
- Ensure 6+ hours of sunlight daily.
- Fertilize lightly with phosphorus-rich food (like 5-10-5) in early summer.
Wrapping up and next steps
Deadheading rudbeckia is your secret weapon for longer, fuller blooms—and it’s easier than you think! 🌼 With just a little time and the right tools, you’ll keep those golden-yellow petals shining until frost. Now’s the perfect moment to grab those shears and give your garden a fresh burst of life.
Ready to level up your gardening game? Next, try experimenting with rudbeckia varieties or explore companion plants to create a showstopping seasonal display. Happy pruning!