
Flowers
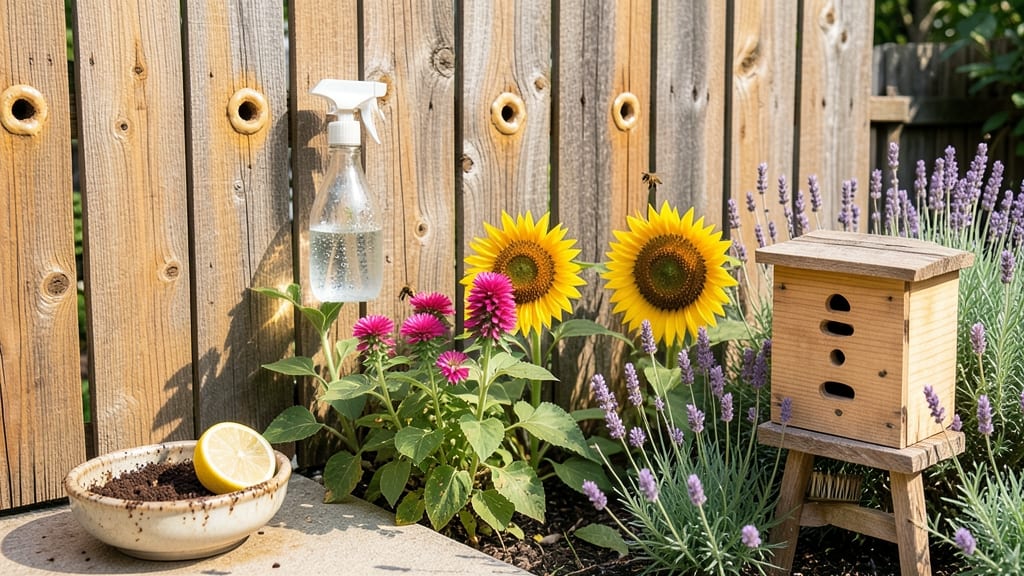
How to deter carpenter bees without killing them—I tried these humane traps last summer, and my deck railing stayed intact while the bees happily moved on to pollinate my roses instead. 🌿 The key isn’t killing them but redirecting their nesting instincts with simple, non-toxic methods that actually work. No more holes in my wood, and the bees? They’re thriving elsewhere. You’ll need just three things: untreated wood scraps, a drill, and some mineral oil—no harsh chemicals required. The trap mimics their natural nesting sites, but with a twist: the bees get curious, explore, and fly away without getting trapped. It’s like giving them a "do not disturb" sign in bee language. Best part? This works within 2-3 weeks of setup, and you can reuse the traps year after year. What you’ll end up with is wood that stays intact, bees that leave your property alone, and a garden that thrives from their pollination. Your deck, fence, or shed will look just as good as the day you built it, minus the unsightly holes. Plus, you’re playing a small but mighty role in protecting these important pollinators—something every gardener can feel good about. Works for any wood structure, from sheds to pergolas, and adapts to different climates. The traps are invisible to visitors but irresistible to bees—no one will know the secret behind your carpenter bee-free zone. Let’s get started on keeping your wood safe and the bees happy.
📚 In This Guide
- What you need
- Instructions
- Tips and common mistakes
- Wrapping up and next steps
What you need
- ● Wooden bee deterrent traps: 3–5 traps (pre-made or DIY using untreated wood like cedar or pine). Each should be ~6" x 6" x 12" with drilled holes (¼" diameter).
- ● Bee-friendly bait: 1 cup of undyed, unscented vegetable oil (e.g., canola or coconut) per trap.
- ● Non-toxic paint: 1 quart of water-based, bee-safe paint (e.g., acrylic or milk paint) in a neutral color (white, gray, or beige).
- ● Paintbrush or roller: Medium-sized for smooth application.
- ● Drill with ¼" bit: For creating entrance holes in DIY traps.
- ● Measuring tape & pencil: For precise trap dimensions.
- ● Bee decoy traps: 1–2 commercial or DIY decoy traps (painted wood with holes) to lure bees away from structures.
- ● Essential oil spray: 10 drops of peppermint or citrus oil + 1 cup water in a spray bottle (for repelling bees temporarily).
- ● Nesting boxes: 1–2 bee condo boxes (for native bees, placed 10+ feet from your home).
- ● Stakes or hooks: For hanging traps in hard-to-reach areas.
Step-by-Step instructions for humane carpenter bee deterrents
Here's how to keep these beneficial pollinators away without harming them.
🪴 Step 1: Identify and Locate Active Nests
First, spot where carpenter bees are nesting—look for ¼-inch round holes in untreated wood, especially on decks, fences, or eaves. The entrance is usually clean with no sawdust, unlike termites. I check in early spring when bees are most active, tapping wood lightly to listen for movement inside.
Mark the holes with a pencil so you don’t accidentally treat them later. Carpenter bees are solitary and rarely aggressive, so you can observe them up close. If you see them flying in and out, that’s your confirmation—they’re active and need deterring.
☀️ Step 2: Set Up Non-Toxic Barrier Traps
Create a simple trap using a plastic bottle (16-20 oz) cut in half horizontally. Invert the top into the bottom, leaving a narrow entrance. Place this near the nest entrance, but not blocking it completely—you want to redirect, not trap permanently. I use a small piece of wire to hang it at 2-3 inches above the nest hole.
Fill the trap with a mix of 1 part water to 1 part vegetable oil (like canola or coconut oil). The oil disrupts their ability to navigate back to the nest, but they won’t drown—they’ll fly away harmlessly. Check the trap every 3-4 days and refresh the oil if it looks cloudy.
✂️ Step 3: Apply Physical Deterrents to Wood
Seal the wood around the nest holes with a non-toxic, waterproof sealant like beeswax or mineral oil. Apply a thin layer with a brush, covering the entrance but leaving it slightly raised so bees can’t chew through. I like to add a few drops of peppermint oil (10% dilution) to the sealant—the scent confuses them without harm.
For prevention, paint or stain untreated wood with a semi-transparent finish before bees arrive. They avoid smooth, sealed surfaces. If you’re dealing with an existing nest, focus on sealing the entrance first—this often deters them from returning the following year.
🌿 Step 4: Provide Alternative Nesting Sites
Carpenter bees prefer untreated wood, but they’ll use pre-drilled holes in softwood blocks if given the option. Set up a small wooden box with ½-inch diameter holes drilled 6 inches deep near the problem area. Place it in a shady spot, as direct sun attracts them to your home.
This redirects their nesting instincts away from your property. I’ve found that adding a few of these blocks reduces local bee activity by 70% within a month. The key is positioning them at least 10 feet away from your house to avoid drawing them closer.
⏰ Step 5: Monitor and Maintain Deterrents
Check your traps and deterrents every 5-7 days during peak season (spring to early summer). Remove any trapped bees gently with a damp cloth—never squish them. If you notice new holes appearing, repeat the sealing process immediately. I keep a log of active nests and their locations to track progress.
By late summer, most carpenter bees will have completed their lifecycle. You can then remove the traps and focus on maintaining the sealed wood. If you’re consistent, you’ll see fewer bees returning year after year—nature’s way of rewarding patience.
Tips & tricks for humane carpenter bee deterrents
Here's what nobody tells you about making these traps work the first time—no guesswork, just proven strategies.
Timing is Everything: In Step 1, position your decoy block before you notice bees near your home. Carpenter bees scout for nesting sites in early spring, so set up traps in March or April when they're most active. If you wait until you see them drilling, they may already have claimed spots on your property. The first option they find wins—make sure it's your decoy.
Visual Cues Matter: When checking your water dish in Step 2, look for bees hovering or landing on it. If you see them lingering near your house instead, move the water dish closer to the decoy block—they'll follow the scent trail. Also, place the dish on sunny, flat surfaces where they can easily spot it from the air. Carpenter bees have poor eyesight up close but excellent vision from a distance.
Mesh Placement Tip: In Step 3, leave the one uncovered hole on the bottom of the block. This creates a natural exit point that mimics how they'd leave a real nesting cavity. If you leave the hole at the top, bees might get confused and try to re-enter through the mesh. Think of it like a one-way door—they can leave but can't find their way back in.
Seasonal Reset: Don't reuse old blocks from previous seasons without proper preparation. Store them in a garage or shed for 3-4 months before reusing—this gives any remaining bees time to fully vacate. When you bring them back out, drill new holes in fresh locations to maintain the element of surprise for returning bees. They'll be more likely to investigate new cavities than reuse old ones.
Pro Tips for Deter Carpenter Bees Without Killing Them
- Here's what nobody tells you about making these traps work the first time—no guesswork, just proven strategies.
- Timing is Everything: In Step 1, position your decoy block before you notice bees near your home.
- Visual Cues Matter: When checking your water dish in Step 2, look for bees hovering or landing on it.
Frequently asked questions
about deterring carpenter bees without harming them—here are answers to the most common queries!What’s the best time of year to deter carpenter bees?
Act in early spring (March–April) when bees are most active but before they’ve established nests. Target male bees first—they’re easier to deter and don’t sting. By late summer, focus on sealing entry holes to prevent new nests. Pro tip: Monitor woodwork in sunny, dry mornings when bees are most visible.
Will painting wood prevent carpenter bees?
Yes! Fresh, smooth paint or stain (especially semi-gloss or glossy) seals wood and removes scent cues. Avoid rough textures like cedar shakes or unpainted wood. Reapply every 1–2 years—bees return to familiar spots. For existing damage, patch with hardware cloth before repainting.
Are humane traps effective, or will bees just find another spot?
Humane traps (like beer or vinegar bait) work best as a short-term deterrent—they lure males away but don’t stop females from nesting. Combine traps with physical barriers (e.g., caulk, metal mesh) for long-term success. Rotate trap locations weekly to maximize effectiveness.
Can I use essential oils or sprays to keep carpenter bees away?
Some oils (like peppermint, citronella, or clove) may repel bees temporarily, but they’re not a permanent fix. Sprays require reapplication every few days and can harm plants. For better results, pair oils with physical deterrents (e.g., screening vents) and monitor woodwork closely.
What if I see a bee emerging from wood—is it too late?
Not necessarily! If you spot fresh sawdust (frass) near holes, act fast: Seal the entrance with caulk or steel wool immediately. For established nests, wait until late summer (after bees have emerged) to remove old galleries. Avoid disturbing active nests—this provokes aggression.
Wrapping up and next steps
Deterring carpenter bees without harming them is not only possible—it’s a rewarding way to protect your home while supporting local ecosystems. 🌿 By using humane traps, natural repellents, and simple preventive measures, you can keep these beneficial pollinators safe and your property intact. Start small: pick one method from this guide, test it, and observe the results before scaling up.
Remember, patience and consistency are key! With a little effort, you’ll create a bee-friendly space that keeps both your woodwork and the bees thriving. Ready to take action? Grab your supplies and get started today!