
Container Gardens
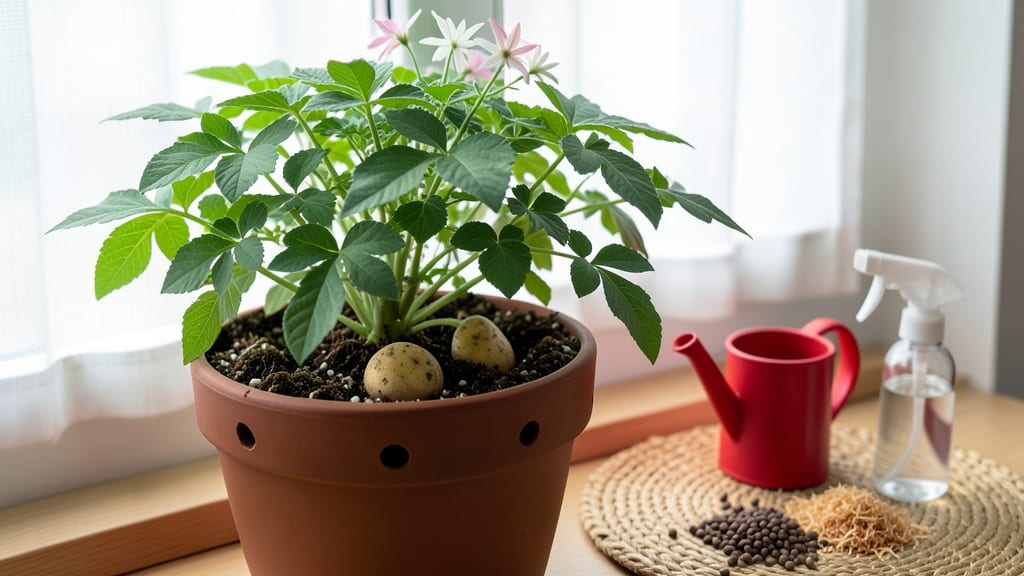
How to grow potatoes in a container indoors feels like magic—harvests from a stack of containers instead of a garden bed. 🌱 I tried it last winter after my basement got too sunny, and those fingerlings produced more potatoes than my backyard plot. The secret? Choosing the right varieties and mimicking real growing conditions in a controlled space.
You’ll need 5-gallon pots or a tower system, seed potatoes (not grocery store ones), and a sunny window or grow light. Plant your seed potatoes 4 inches deep, with eyes facing up, and watch as green shoots appear in just a few weeks.
The real trick is adding more soil as the stems grow—this encourages more tubers to form underground.
By harvest time, you’ll have piles of baby potatoes ready to roast, mash, or store. The plants stay compact, so they won’t take over your space, and you avoid the pests and diseases that plague outdoor gardens. Plus, you can grow them year-round if you have the right setup.
Perfect for small apartments, basements, or even kitchen counters. Here’s how to get started without the guesswork—no green thumb required!
📚 In This Guide
- What you need
- Instructions
- Tips and common mistakes
- Wrapping up and next steps
What you need
- ● Containers: At least 2-3 deep pots (12-18 inches deep) with drainage holes (e.g., fabric grow bags, plastic buckets, or ceramic pots). For stacked growth, use 3-4 containers (one per layer).
- ● Potato seeds: Certified disease-free seed potatoes (not grocery store spuds!). Choose early-maturing varieties like Yukon Gold or Red Pontiac (3-5 tubers per container).
- ● Potting mix: Lightweight, well-draining soil mix (avoid garden soil). A 50/50 blend of peat moss or coco coir + perlite/vermiculite works great (1 bag per 2-3 containers).
- ● Grow lights: Full-spectrum LED lights (12-16 hours/day). A 24-inch fluorescent or LED bar hung 6-12 inches above plants is ideal.
- ● Watering can or spray bottle: With a gentle nozzle to avoid disturbing soil.
- ● Pruners or scissors: For cutting seed potatoes into pieces (each with 1-2 eyes).
- ● Fertilizer: Balanced organic fertilizer (e.g., 5-5-5) or liquid seaweed extract (diluted weekly).
- ○ Thermometer (optional): To monitor soil temp (ideal: 55–75°F).
- ○ Support stakes or mesh (optional): For tall varieties to prevent flopping.
- ○ Trowel (optional): For gentle soil adjustments when layering.
Step-by-step instructions for growing potatoes in containers indoors
Here's how to turn a small corner into a potato-growing powerhouse using simple containers and layered soil.
🪴 Step 1: Choose and Prepare Your Containers
Select 5-gallon buckets or deep fabric grow bags with drainage holes (at least 4 per container). I prefer fabric because it allows roots to breathe and prevents waterlogging. Drill additional holes if needed—potatoes rot faster than they grow when roots suffocate.
Line the bottom with 1-2 inches of coarse gravel or broken pottery shards to create a drainage layer. This prevents soil from clogging the holes while letting excess water escape. Place your containers in a spot that gets 6-8 hours of indirect light daily—a sunny windowsill or under grow lights works best.
🌱 Step 2: Layer Soil and Plant Seed Potatoes
Fill each container with 4-6 inches of high-quality potting mix, leaving 2 inches of space at the top. Choose seed potatoes with 2-3 eyes (the little dimples where sprouts emerge). Cut larger potatoes into pieces, ensuring each has at least one eye, and let them dry for 1-2 days to prevent rot.
Place one seed potato on the soil surface, eyes facing up. Cover it with 2-3 inches of additional potting mix, leaving the top of the potato exposed. This initial layer gives the sprouts room to emerge without being buried too deep. Water gently until the soil feels evenly moist but not soggy.
💧 Step 3: Maintain Moisture and Add Soil Layers
Keep the soil consistently moist—never soggy—by watering whenever the top 1 inch feels dry. Overwatering causes rot, while underwatering stunts growth. As the potato sprouts grow 4-6 inches tall, add another 2-3 inches of potting mix around the stems, burying them up to the leaves. This encourages more tuber formation underground.
Repeat this layering process every 2-3 weeks until you reach the container’s rim. You’ll end up with a mound of soil and a tangle of green stems—this is normal. The key is patience; each layer adds more harvestable potatoes. Use a small hand trowel to add soil gently, avoiding damage to the stems.
☀️ Step 4: Provide Light and Monitor Growth
Potatoes need bright, indirect light to prevent leggy growth. If using natural light, rotate the containers a quarter turn weekly so stems grow straight. For indoor grow lights, position them 6-12 inches above the plants and keep them on for 12-14 hours daily. Leggy stems (thin, pale, and stretched) mean more light is needed.
Watch for yellowing leaves, which signal overwatering or poor drainage. If this happens, reduce watering slightly and check the drainage layer. Healthy plants have deep green foliage and sturdy stems. After 8-12 weeks, the tops will yellow and die back—this is your cue that the potatoes are nearly ready to harvest.
⏰ Step 5: Harvest and Cure Your Potatoes
When the foliage turns yellow and dies, stop watering and let the soil dry out for 2-3 days. Gently empty the container, brushing away excess soil to reveal the potatoes. Handle them carefully—they bruise easily. For best flavor, let them cure in a cool, dark place (like a pantry) for 1-2 weeks before storing.
If you’re growing multiple containers, harvest one at a time to stagger your harvest. Smaller, new potatoes can be eaten immediately, while larger ones store well. This method gives you 4-6 pounds of potatoes per 5-gallon container, proving that indoor growing doesn’t mean small yields—just smart layering.
Tips & tricks for perfect indoor container potatoes
Small spaces shouldn't limit your harvest—here's how to maximize your potato-growing potential indoors.
Container Selection: Fabric grow bags are my top recommendation because they prevent root circling and allow better air circulation than rigid buckets. If using buckets, drill extra drainage holes along the sides—potatoes rot faster than they grow when roots suffocate. I've found that adding a few more holes than the minimum prevents waterlogging entirely.
Seed Potato Prep: When cutting larger seed potatoes, let the pieces dry for the full 1-2 days before planting. This prevents rot by allowing the cut surfaces to form a protective callus. I've ruined batches by skipping this step—don't make my mistake! Use a sharp knife and make clean cuts to minimize tissue damage, which also reduces rot risk.
Layering Strategy: The key to high yields in containers is consistent layering. Every 2-3 weeks, add 2-3 inches of fresh potting mix when stems reach 4-6 inches. This buried stem technique encourages tuber formation at multiple points along the stem. I've seen yields double when following this method precisely—each layer creates a new set of potatoes.
Light Optimization: If your indoor space lacks natural light, invest in full-spectrum LED grow lights. Position them 6-12 inches above the plants and run them for 12-14 hours daily to prevent leggy growth. I've noticed that even slight variations in light distance (like moving from 8 to 10 inches) can dramatically affect plant health—closer means stronger but can cause burning, while farther means weaker stems.
Pro Tips for Grow Potatoes In A Container Indoors
- Small spaces shouldn't limit your harvest—here's how to maximize your potato-growing potential indoors.
- Container Selection: Fabric grow bags are my top recommendation because they prevent root circling and allow better a...
- Seed Potato Prep: When cutting larger seed potatoes, let the pieces dry for the full 1-2 days before planting. This p...
Frequently asked questions
Got questions?
Growing potatoes indoors in containers is rewarding, but it’s natural to have doubts—especially for beginners! Here are answers to the most common queries to help you grow like a pro.
Can I grow potatoes indoors year-round?
Yes, but with a few tweaks! Potatoes thrive best in cool weather (50–70°F). Use grow lights (12–16 hours/day) to supplement winter sunlight, and keep temperatures consistent. If your space gets too hot, try a cooler basement or basement-like area with good airflow.
How long does it take for container-grown potatoes to harvest?
Most varieties are ready in 2–4 months, depending on the type. New potatoes (small, tender) can be harvested as early as 10–14 weeks. For full-sized spuds, wait until the plant flowers or the foliage yellows—then dig gently after a light frost (if outdoors) or when the container feels light.
What if my potatoes sprout but don’t grow?
Check these fixes: Not enough light? Move closer to a sunny window or add LED grow lights. Overwatering? Let the top inch of soil dry out between waterings. Too cold? Keep temps above 50°F. If stems are leggy or weak, try a nutrient-rich potting mix (like compost-heavy blend) or a balanced fertilizer (diluted to half-strength).
Can I use regular potting soil for potatoes?
Regular potting soil works, but amend it for best results! Mix in 30–50% compost or well-rotted manure to boost nutrients. Avoid heavy garden soil—it compacts and drains poorly in containers. For extra growth, add a handful of worm castings or a slow-release fertilizer at planting time.
What’s the best container size for potatoes?
Aim for at least 10–12 inches deep (deeper = more harvest!). For small varieties (like ‘Yukon Gold’), a 5-gallon bucket works. Larger tubers (like ‘Russet’) need 15+ gallons or stacked containers (like grow bags). Drill drainage holes if none exist—potatoes hate soggy roots!
Are container-grown potatoes as tasty as garden-grown?
Container potatoes are often sweeter and more flavorful because they’re grown in nutrient-rich, well-drained soil with consistent care. The key is choosing the right variety (e.g., ‘Red Pontiac’ or ‘Fingerlings’ for small spaces) and harvesting at peak freshness. Store them in a cool, dark place for up to 3 months!
Wrapping up and next steps
Growing potatoes indoors in containers isn’t just clever—it’s rewarding! With the right setup, you can enjoy fresh, homegrown spuds year-round, even in tiny spaces. Start small, experiment with varieties, and soon you’ll be harvesting crisp, flavorful potatoes that taste like summer. 🌱
Ready to take the next step? Try growing a few more containers—maybe even herbs or greens—to maximize your indoor garden’s potential. Happy planting! 🌟