
Succulent
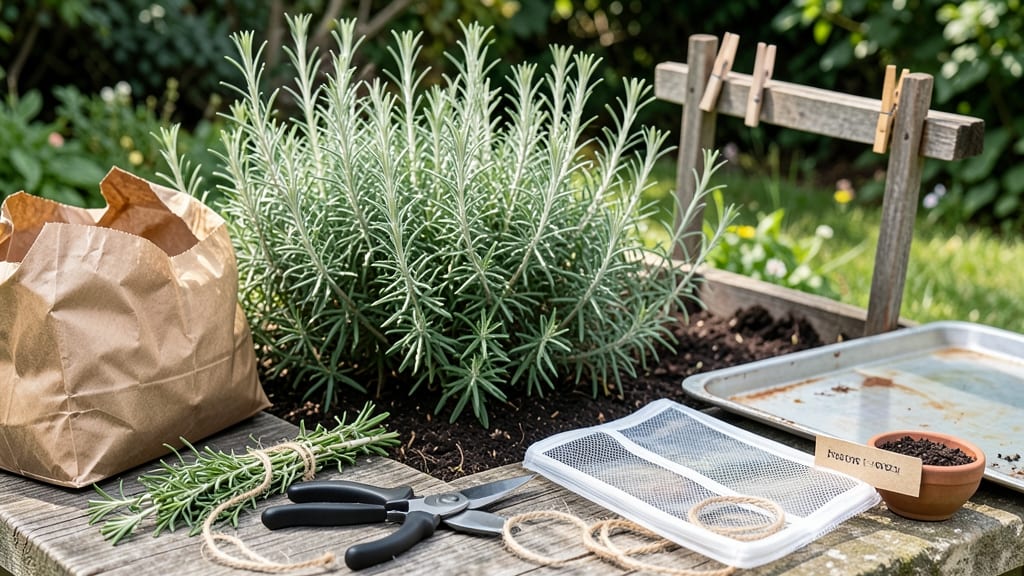
How to dry rosemary naturally and give your harvest a second life beyond the kitchen. ✨ Drying rosemary locks in that pine-fresh aroma and vibrant green color for months—no fancy equipment needed, just patience and a few simple steps.
The secret lies in slow-drying: fresh stems retain their oils and flavor when dried properly. Bundle 6-8 stems together, tie with twine, and hang upside down in a warm, dry, airy spot for 2-4 weeks.
Avoid direct sunlight—it bleaches the color and dulls the scent. A dehydrator speeds this up to 2-3 hours on low heat, but the flavor isn’t as concentrated.
When fully dry, the needles will crumble easily between your fingers. Store in an airtight jar away from light, where it’ll keep its potency for up to a year. Sprinkle over roasted meats, blend into homemade bread, or use in crafts—just crush the stems first for maximum flavor punch.
Pro tip: If you notice any mold or musty smells during drying, toss those bundles immediately. A slight brown tint is normal, but gray or fuzzy patches mean it’s time to start over. Your dried rosemary will thank you later!
📚 In This Guide
- What you need
- Instructions
- Tips and common mistakes
- Wrapping up and next steps
What you need
- ● Fresh rosemary sprigs: Harvest organic, pesticide-free stems (about 1–2 bunches, or ~1 cup loosely packed sprigs). Choose woodier, mature stems (1/8"–1/4" thick) for better drying.
- ● Clean, sharp scissors or pruning shears: Trim stems at a 45-degree angle to maximize surface area for drying.
- ○ Paper towels or clean kitchen cloth: Remove excess moisture from leaves (optional but speeds up drying).
- ● Drying method of choice: Air-drying (hanging): Twine, rubber bands, or a brown paper bag (for bundle drying).
- ● Oven or dehydrator: Baking sheet lined with parchment paper or a dehydrator tray.
- ● Microwave (quick method): Microwave-safe plate.
- ● Storage containers: Air-tight glass jars (like mason jars) or dark, opaque containers to block light.
- ● Herb drying rack or mesh bags: Elevates sprigs for even airflow (great for air-drying).
- ● Food dehydrator: Set to 95°F–115°F (35°C–46°C) for gentle drying.
- ● Desiccant packets: Tiny silica gel packs to absorb excess moisture in storage jars.
- ● Labeling supplies: Masking tape + marker to note harvest date (rosemary lasts 6–12 months when stored properly!).
Step-by-Step instructions for drying rosemary naturally
Here’s the straightforward method I’ve used for years to dry rosemary that stays fragrant and potent for months.
🌿 Step 1: Harvest at Peak Freshness
Pick rosemary stems on a dry morning after the dew has evaporated. Look for branches with fully developed leaves—these hold the most oil and flavor. Cut just above a leaf node to encourage bushier growth. Avoid woody stems; they dry poorly and crumble easily.
Trim the stems to 4-6 inches long and give them a quick rinse under cool water to remove dirt or pests. Shake off excess moisture—wet stems take longer to dry and can develop mold. Pat them dry with a clean kitchen towel or paper towels.
☀️ Step 2: Bundle and Hang in a Dry, Dark Space
Gather 4-5 stems and tie them together with twine or a rubber band, leaving a 3-inch gap between the bundle and the ceiling. Hang them upside down in a spot with good airflow—a pantry, closet, or basement works well. Avoid direct sunlight; it fades the color and flavor.
I like to use a wooden drying rack or even a simple hook in a cupboard. The key is consistency: keep the temperature between 60-70°F and humidity low. Check weekly—if the leaves feel brittle and crumble easily, they’re ready.
⏰ Step 3: Test for Dryness and Store Properly
After 2-4 weeks, gently rub a leaf between your fingers. It should crumble into a fine powder with no green streaks. If it still feels pliable or snaps cleanly, leave it another week. Over-drying turns rosemary bitter, but under-drying invites mold.
Once fully dry, strip the leaves from the stems and store them in an airtight container—glass jars or vacuum-sealed bags work best. Keep them in a cool, dark place (like a pantry) to preserve flavor for up to 6 months. For longer storage, freeze the dried leaves in ice cube trays with oil.
💧 Step 4: Revive Dried Rosemary for Cooking
Crush the dried leaves just before using to release their aromatic oils. A mortar and pestle works best, but a clean rolling pin or even a zip-top bag with a rolling motion does the trick. Add them to dishes at the last 5-10 minutes of cooking to avoid bitterness.
For soups or stews, add whole sprigs early and remove them before serving. If you notice the flavor fading after a few months, it’s time to harvest fresh again. Rosemary’s potency drops faster than most herbs, so don’t wait too long!
Tips & tricks for perfectly dried rosemary
Here's what nobody tells you—these little details make all the difference between bland dried rosemary and the fragrant treasure you'll actually want to use.
Harvesting Precision: In Step 1, focus on stems with new growth leaves—they're packed with essential oils. The older, woody stems at the base dry poorly and can make your dried rosemary taste dull. I always cut just above a leaf node where new growth is happening, and I avoid stems thicker than a pencil. The thinner the stem, the faster and more evenly it dries. For best results, harvest after morning dew has evaporated but before the afternoon heat sets in.
Airflow Strategy: When bundling in Step 2, don't just tie them randomly—leave that 3-inch gap between bundle and ceiling to ensure air circulates all around. I've learned this the hard way: bundles touching ceilings or walls trap moisture and create mold. Use a wooden drying rack if possible—wood absorbs excess moisture better than plastic. And here's a pro move: if your kitchen is particularly humid, place a small bowl of silica gel or uncooked rice near the drying area to absorb extra moisture.
Testing for Dryness: That 2-4 week range in Step 3 is crucial, but don't just guess—test properly. In Step 3, when you rub a leaf between your fingers, it should crumble like dust with no green showing. If you see any green, leave it another week. Here's my foolproof method: gently crush a leaf between your fingers. If it feels like sandpaper with no springiness, it's ready. If it still has any flexibility, it needs more time. Over-drying makes rosemary bitter, but under-drying leads to mold.
Storage Wisdom: Once you've stripped the leaves in Step 3, store them in small batches. I use 1-ounce glass jars because larger containers create air pockets that reduce shelf life. For maximum flavor retention, add a tiny piece of dried citrus peel to each jar—it preserves the rosemary's aromatic oils. And here's a trick I picked up from Italian nonnas: store a bay leaf in with your rosemary. The bay leaf's natural oils complement rosemary's flavor and help preserve it longer.
Pro Tips for Dry Rosemary Naturally
- Here's what nobody tells you—these little details make all the difference between bland dried rosemary and the fragra...
- Harvesting Precision: In Step 1, focus on stems with new growth leaves—they're packed with essential oils. The older,...
- Airflow Strategy: When bundling in Step 2, don't just tie them randomly—leave that 3-inch gap between bundle and ceil...
Frequently asked questions
Got questions about drying rosemary naturally? You’re not alone! Here are answers to the most common concerns—from timing to troubleshooting—to ensure your herbs stay flavorful and ready for use.
How long does it take to dry rosemary naturally?
With the hanging bundle method, rosemary typically takes 2–4 weeks to dry fully, depending on humidity and airflow. Check for dryness by gently rubbing stems—if they crumble easily and leaves feel brittle, they’re ready! For oven-drying, it’s just 1–3 hours at low heat (170°F/77°C).
Can I speed up the drying process?
Yes! Boost airflow with a fan or dry rosemary in a dehydrator (set to 95°F/35°C) for 2–4 hours. For oven-drying, prop the door open slightly to release moisture faster. Just avoid high heat—it burns the delicate oils and kills flavor.
Is sun-drying rosemary a good idea?
Sun-drying works in hot, dry climates (like deserts), but it’s risky in humid areas—rosemary can mold or stay damp. If you try it, place bundles in direct sunlight for 3–5 days, then finish indoors for 1–2 weeks. Always store dried rosemary in a dark, airtight container afterward.
How do I store dried rosemary to keep it fresh?
Store dried rosemary in an airtight glass jar or container away from light and heat (like a pantry). It’ll stay potent for 6–12 months. For longer shelf life, freeze sprigs in ice cube trays with oil—perfect for cooking!
Why is my dried rosemary losing flavor?
Flavor fades from moisture, light, or heat exposure. Check for:
- Condensation inside containers (transfer to a dry jar).
- Storing near spices with strong odors (rosemary absorbs smells!).
- Using rosemary more than a year old (replace it!).
Wrapping up and next steps
Drying rosemary naturally is a simple yet rewarding way to preserve its aromatic essence and extend its shelf life for months—without chemicals or fancy equipment! Whether you’re a seasoned gardener or a kitchen enthusiast, mastering this method ensures you’ll always have fresh, fragrant rosemary at your fingertips. 🌿✨
Now that you’re equipped with the best techniques, why not take it a step further? Try experimenting with infused oils, homemade herb blends, or even rosemary-infused vinegar to elevate your cooking. Your pantry—and taste buds—will thank you!