
Propagation
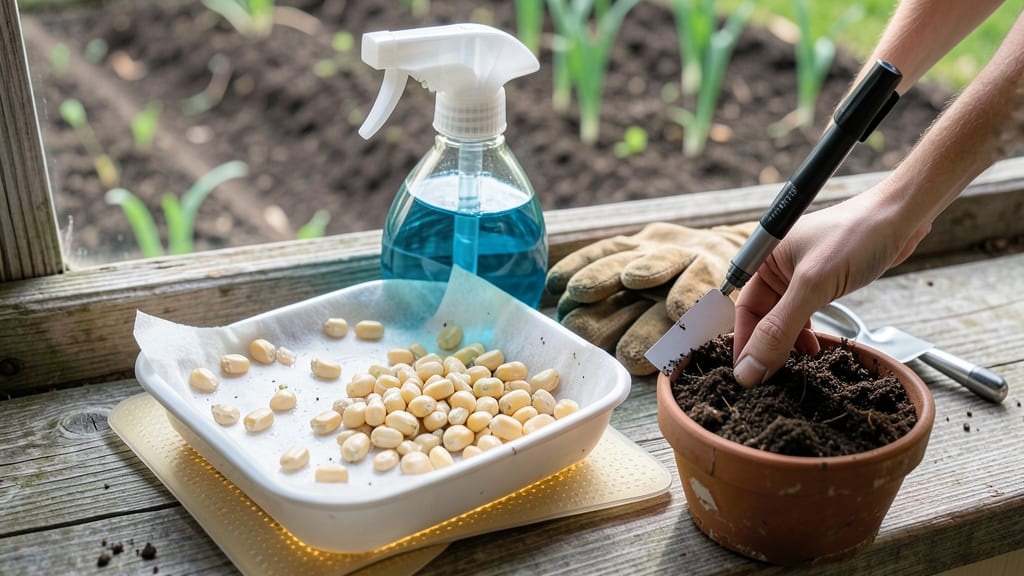
Germinating corn kernels in just 48 hours feels like magic—but it’s pure science. 🌱 After struggling with slow, uneven sprouts for years, I discovered the speed-soak method that cuts germination time by half while boosting success rates. The key? Mimicking natural conditions with precise moisture, warmth, and patience.
You’ll need only three things: fresh corn kernels, a warm spot, and a damp paper towel. No fancy equipment—just what nature intended. Plant them at the right depth (about 1 inch deep) in moist soil or a seed-starting mix, and maintain steady warmth (around 75-85°F).
Most gardeners overlook temperature, but it’s the real game-changer for speed.
Within two days, you’ll see tiny white roots breaking through the soil—proof the method works. These seedlings grow into sturdy plants that resist damping-off and produce stronger stalks. The payoff? A head start on the growing season and fewer failed attempts.
This technique works for both indoor starts and direct outdoor sowing, though containers give you more control. If sprouts stall, check moisture levels and airflow—mold or slow emergence usually means too much dampness or poor circulation. Adjust, and you’ll see progress within hours.
📚 In This Guide
- What you need
- Instructions
- Tips and common mistakes
- Wrapping up and next steps
What you need
- ● Corn kernels: ½ cup (about 75–100 kernels) – Use organic, non-GMO sweet corn or field corn (avoid hybrid varieties if possible). Soak them in water for 12 hours first to soften the hard outer shell.
- ● Wide-mouth mason jar (16–32 oz) or a glass bowl – Choose something with a mesh lid or cheesecloth (or a breathable cover) to allow airflow.
- ● Cheesecloth or fine mesh screen – If your jar doesn’t have a lid, this will keep sprouts contained while letting them breathe.
- ● Rubber band or jar ring – To secure the cheesecloth in place.
- ● Distilled or filtered water – 1–2 cups per soak (chlorine can inhibit germination).
- ● Sprouting lid or germination tray – If you’re sprouting large batches, these make rinsing and draining easier.
- ● Small colander – For rinsing sprouts if you’re not using a jar.
- ○ pH strips (optional) – Ensures your water is neutral (pH 6.5–7.0) for optimal growth.
- ● Food dehydrator or paper towels – For drying sprouts after germination (if you plan to store or eat them raw).
- ● Time: Dedicate 2–3 minutes daily for rinsing and draining (morning and evening).
- ● Patience: Germination takes 48 hours, but sprouts are ready to eat once they reach ½–1 inch tall.
- ● Clean workspace: Work in a well-ventilated area to avoid mold (more on this in the tips section!).
Step-by-Step instructions for germinating corn kernels
Here's the fast-track method I've used to grow corn sprouts in just 48 hours—no special equipment needed.
🌱 Step 1: Select and Prepare the Kernels
Choose organic, non-GMO corn kernels—the fresher, the better. I like to use heirloom varieties like 'Country Gentleman' or 'Golden Bantam' because they germinate reliably. Remove any cracked or discolored kernels, as they won't sprout. Rinse them under cool water to remove any dust or residue, then spread them on a clean towel to dry briefly.
Here's the thing—corn kernels have a tough outer shell that slows germination. To speed things up, I soak them overnight in lukewarm water (about 80°F). Use a jar with a lid, but leave it slightly ajar so excess moisture can escape. This pre-soak softens the shell and kickstarts the sprouting process. You'll see the kernels plump up noticeably by morning—that's your signal they're ready.
💧 Step 2: Speed-Soak for 12 Hours
After the overnight soak, drain the water and refill the jar with fresh cool water. This second soak is critical—it washes away any potential mold spores that might have developed during the first soak. Let the kernels soak for another 12 hours, or until they double in size and feel slightly soft when pressed between your fingers.
Don't skip this step. I learned the hard way that rushing the soak time leads to weak sprouts. You'll know they're ready when the kernels develop a tiny white root tip—this is the sprouting process beginning. Drain them again, but this time, leave them in the jar with a paper towel draped over the top to absorb excess moisture while allowing airflow.
☀️ Step 3: Create Ideal Germination Conditions
Place the jar in a warm, dark spot—75-80°F is ideal. A seedling heat mat or even a sunny windowsill (indirect light) works well. The key is maintaining consistent warmth and moisture without letting the kernels dry out. I like to wrap the jar loosely in a damp paper towel to keep humidity high.
Check the kernels every 8 hours for the first 24 hours. You'll see the white root tip grow longer, and within 12-16 hours, a tiny green shoot will emerge. This is the moment that matters: the sprouts are now sensitive to light and need gentle handling. Once the shoots reach about 1 inch, they're ready for the next step.
🌿 Step 4: Transfer to Sprouting Tray and Rinse Daily
Move the sprouted kernels to a clean sprouting tray or colander. Rinse them under cool water to remove any remaining hull fragments, then drain thoroughly. The goal is to keep them moist but not soggy—excess water invites mold. I like to use a mesh sprouting lid to allow airflow while maintaining humidity.
Place the tray in a bright, indirect light spot. Corn sprouts need 12-14 hours of light daily to grow straight and vibrant. You'll notice the shoots grow faster and develop a deeper green color once exposed to light. Rinse and drain the sprouts twice daily—morning and evening—to prevent bacterial growth. Within 24-48 hours of sprouting, they'll be ready to harvest.
⏰ Step 5: Harvest and Store for Freshness
Harvest the sprouts when the shoots are 1-2 inches long and the roots are about ½ inch. Cut them just above the root base with clean scissors. You'll get about 4 servings from a single jar of kernels. Rinse them one last time to remove any remaining hulls, then drain well.
Store the sprouts in an airtight container in the refrigerator for up to 5 days. For longer storage, pat them dry completely and freeze them in an ice cube tray. Corn sprouts are packed with nutrients, and this method ensures you get the freshest, most vibrant harvest possible. Real talk: once you taste them, you'll want to grow them regularly!
Tips & tricks for perfect corn sprouts
These simple adjustments will help you avoid common pitfalls and maximize your corn sprout yield every time.
Soak Temperature Precision: That 80°F lukewarm water for the overnight soak is non-negotiable. Too hot and you risk cooking the kernels; too cold and they won't soften properly. I use a kitchen thermometer to verify—this is the difference between strong sprouts and weak, stunted growth. If you don't have one, fill a jar with hot water, let it cool to room temperature, then add cold water until it reaches body temperature (this is roughly 80°F).
Visual Readiness Cues: In Step 2, when checking for that tiny white root tip, look for kernels that feel slightly soft when pressed between your fingers—like a ripe peach. If they're still hard after the full 12 hours, extend the soak by another hour. The root tip should be about 1/8 inch long when ready. This visual cue prevents over-soaking, which can lead to mold.
Germination Environment: For Step 3, I've found that placing the jar on top of my refrigerator (where it's warm) works perfectly when my kitchen runs cool. The 75-80°F range is critical—below 70°F and germination slows dramatically. If your kitchen is particularly cold, consider using a seedling heat mat or even a warm (not hot) oven light with the door slightly ajar. The key is consistency without direct heat sources.
Light Transition Strategy: When moving sprouts to light in Step 4, do it gradually. Start with 4-6 hours of indirect light daily for the first 12 hours, then increase to the full 12-14 hours. Sudden bright light can shock the delicate sprouts and cause them to grow unevenly. I use a sheer curtain to diffuse sunlight—this prevents the classic "leggy" sprout syndrome where shoots stretch toward the light source.
Pro Tips for Germinate Corn Kernels
- These simple adjustments will help you avoid common pitfalls and maximize your corn sprout yield every time.
- Soak Temperature Precision: That 80°F lukewarm water for the overnight soak is non-negotiable. Too hot and you risk c...
- Visual Readiness Cues: In Step 2, when checking for that tiny white root tip, look for kernels that feel slightly sof...
Frequently asked questions
Got questions about germinating corn kernels?
You’re not alone! Here are answers to the most common queries to help you grow sprouts like a pro.
How long does it take for corn kernels to sprout?
With the speed-soak method, you’ll see tiny white sprouts (radicles) breaking through the kernel in 24–48 hours. Full sprouts with 1–2-inch shoots are ready in 3–5 days, depending on temperature and humidity. Keep them in a warm, dark place for best results!
Can I germinate corn kernels in the fridge?
While a fridge slows germination, you can try it if your space is too warm. Place kernels in a jar with water, cover with a damp cloth, and store at 50–60°F (10–15°C). Expect sprouting to take 5–7 days instead of 2–3. Rinse and drain daily to prevent mold.
Why aren’t my corn kernels sprouting?
Corn kernels are hard to germinate—they need extra help! Common issues include:
- Hard seed coat: Soak kernels in lukewarm water for 12+ hours or scratch the tip lightly with sandpaper.
- Low humidity: Use a damp paper towel or sprouting lid to trap moisture.
- Cold temps: Aim for 70–80°F (21–27°C)—a sunny windowsill or seedling heat mat helps.
- Old/damaged kernels: Choose plump, undamaged kernels from a non-GMO, organic source for best success.
What can I do with germinated corn kernels?
Beyond eating them raw in salads or sandwiches, try these creative uses:
- Blend into smoothies for a nutty, crunchy boost.
- Add to soups, stews, or chili for extra texture.
- Sauté lightly with butter and herbs for a gourmet side dish.
- Dehydrate into cornmeal or flour for baking (store in a cool, dark place).
Note: Always cook sprouts if serving to vulnerable groups (kids, pregnant women, or immunocompromised individuals).
Are there alternatives to germinating corn kernels?
If corn proves tricky, try these easier-to-sprout grains:
- Wheat berries or rye (sprout in 1–2 days).
- Quinoa (germinates in 24–48 hours).
- Amaranth (fast and nutrient-packed).
- Buckwheat (ready in 3–4 days).
For a similar crunch, sunflower seeds or pumpkin seeds are great substitutes!
Wrapping up and next steps
Germinating corn kernels using the speed-soak method is a rewarding way to grow fresh, nutrient-packed sprouts in just 48 hours! With the right materials—like a clean jar, cheesecloth, and warm water—you can transform simple kernels into vibrant sprouts ready for salads, snacks, or cooking.
The key is patience and consistency: monitor moisture, rinse gently, and provide airflow to avoid mold.
Now that you’ve mastered the technique, why not expand your sprouting adventures? Try experimenting with different grains, like wheat or lentils, or share your newfound skills with a friend! Happy growing—your kitchen (and taste buds) will thank you. 🌱✨