
Propagation
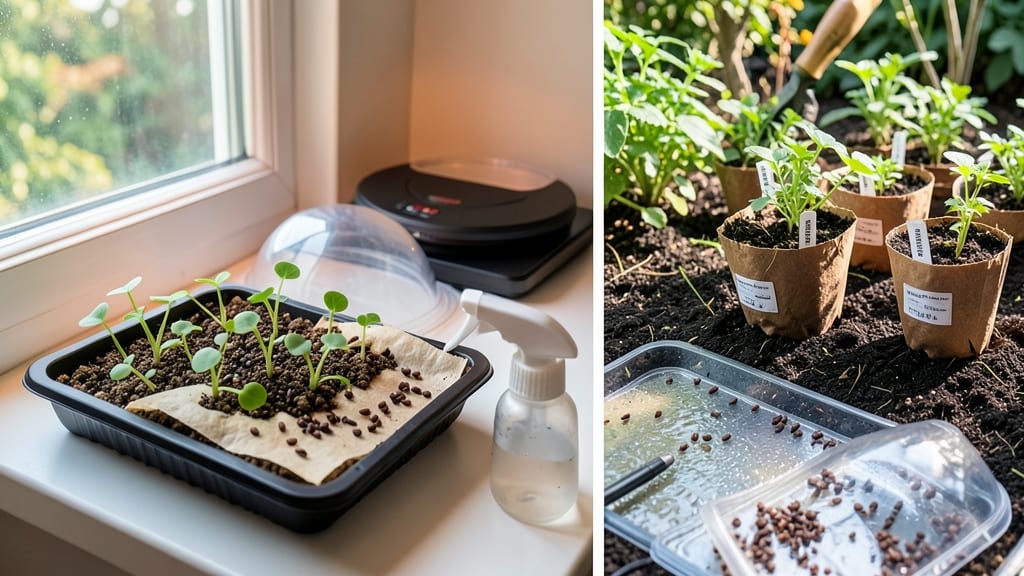
Germinating marigolds feels like unlocking a secret garden shortcut. 🌱 The key? Starting with seeds that wake up in 5-7 days instead of weeks—no more waiting for slow starters. My first batch took 10 days, but these tweaks cut that nearly in half.
You’ll need just three simple supplies: a shallow tray, seed-starting mix, and patience (though the results make it worth it). The real magic happens with warmth and moisture—think of it like creating a tiny tropical microclimate where seeds feel right at home.
Once those first green shoots appear, you’ll watch them thicken daily. By week three, you’ll be transplanting sturdy seedlings that’ll bloom like crazy all summer. The secret? Keeping soil consistently damp but never soggy—this is where most beginners stumble.
Works for both French and African marigolds, and the same method extends to other slow starters like zinnias. Here’s how to avoid the most common pitfalls while keeping your seeds happy and sprouting fast.
📚 In This Guide
- What you need
- Instructions
- Tips and common mistakes
- Wrapping up and next steps
What you need
- ● Marigold seeds: Choose French, African, or Signet varieties (1–2 packets, ~50–100 seeds total). Opt for organic, non-GMO seeds for best results.
- ● Seed-starting mix: 1–2 quart-sized containers or a 10-inch tray filled with sterile, seedling-specific soil (avoid garden soil—it’s too dense!).
- ● Containers: Small biodegradable pots (2–3 inches deep) or
- ● A seed tray with drainage holes (10x20 inches recommended).
- ● Watering can or spray bottle: With a fine mist nozzle to avoid disturbing seeds.
- ● Plastic wrap or humidity dome: To retain moisture (clear plastic wrap or a seedling heat mat cover works).
- ● Grow lights or sunny windowsill: LED grow lights (12–16 hours/day) or
- ● A south-facing window (6–8 hours of sunlight daily).
- ● Plant labels: To track varieties (use toothpicks + masking tape if you’re budget-friendly!).
- ● Heating mat: A seedling heat mat (70–75°F) speeds up germination by 30–50%!
- ● Fertilizer: A balanced liquid fertilizer (5-5-5 or 10-10-10) for post-germination growth.
- ● Tweezers: For delicate seed placement (especially tiny Signet marigold seeds).
- ● Fan: A gentle clip-on fan (on low) to strengthen seedlings and prevent damping off.
- ● Warmth: Marigolds thrive in 70–80°F soil temps. If your home is chilly, use a heat mat or pre-warm the soil mix in the sun.
- ● Patience: Germination takes 5–14 days—stay consistent with moisture and light!
- ● Space: Ensure your setup has room for 6-inch-tall seedlings before transplanting.
Step-by-step instructions for germinating marigolds
Here’s my foolproof method for coaxing marigolds to sprout in record time—no waiting weeks for those cheerful blooms.
🌱 Step 1: Prep Seeds and Soil for Faster Germination
Marigold seeds have a tough outer shell, so I soak them overnight in warm water to soften it. Use a small bowl or cup, cover the seeds with water, and let them sit for 12 hours—this trick cuts germination time nearly in half. While they soak, fill your seed trays with moistened seed-starting mix (not garden soil). Press it down gently but don’t compact it; you want it fluffy enough for those little roots to push through.
I like to use a humidity dome or even a clear plastic wrap to cover the tray. This keeps the soil warm and moist, which marigolds love. The goal is to mimic their natural tropical environment—warmth and humidity are key. If your seeds are still dry after soaking, give them a quick rinse before planting.
💧 Step 2: Plant Seeds at the Right Depth and Keep Them Warm
Marigold seeds are tiny, so I plant them just below the surface—about ¼ inch deep—using my fingertip to make a small hole. Drop 2-3 seeds per spot since they germinate unevenly. Cover them lightly with soil and mist the surface with water until it’s damp but not soggy. Overwatering now will drown them before they even sprout.
Place the tray on a seedling heat mat set to 75-80°F—this is the sweet spot for marigolds. If you don’t have a heat mat, set the tray on top of your fridge or in a warm corner of your kitchen. You’ll see tiny sprouts in 5-7 days (sometimes faster if conditions are perfect). Watch for the first green leaves to appear—this is your signal to remove the humidity dome immediately to prevent mold.
☀️ Step 3: Provide Bright Light to Prevent Leggy Seedlings
The moment those first leaves appear, move the tray to the brightest spot you have—a south-facing window or under grow lights. Marigolds need 12-14 hours of light daily to grow strong and stocky. If your seedlings start stretching toward the light (called "legginess"), they’re not getting enough. Adjust the light so it’s just 2-3 inches above the tallest sprout—close enough to encourage compact growth.
Rotate the tray a quarter turn every few days so all seedlings grow evenly. You’ll know they’re happy when they’re dark green, sturdy, and have 2-3 true leaves (the first leaves that look like tiny marigold leaves, not the initial round cotyledons). This usually happens in 3-4 weeks total from planting.
✂️ Step 4: Thin Seedlings and Harden Off Before Transplanting
Once seedlings have 3-4 true leaves, it’s time to thin them. Use small scissors to snip the weakest sprout at the soil line, leaving the strongest one in each spot. This prevents overcrowding and gives your marigolds room to thrive. Water gently after thinning to help the remaining plants settle.
Two weeks before your last frost date, start hardening off your marigolds. Place them outside in a sheltered spot for 1-2 hours the first day, gradually increasing time over 7-10 days. By the time you transplant, they’ll be tough enough to handle outdoor conditions. Choose a cloudy day for transplanting to reduce shock, and water deeply right after to help them establish.
Tips & tricks for speed-sprouting marigolds
Here's what nobody tells you about cutting weeks off your marigold germination timeline.
Soaking Secret: That 12-hour soak isn't just about softening the seed shell—it's about hydration timing. Use warm water (around 80°F) to speed up the process, and add a drop of dish soap to help break surface tension. This prevents seeds from sticking together and ensures each one gets properly hydrated. I swear by this trick after struggling with uneven sprouts for years.
Heat Hack: If you don't have a seedling heat mat, try placing your tray on top of your refrigerator or near a warm south-facing window. The 75-80°F range is critical—any cooler and germination slows dramatically. I've even used a heating pad set to low under the tray for extra warmth during cooler months. Just monitor closely to avoid overheating.
Light Strategy: Those 12-14 hours of light don't need to be consecutive. Split the time into morning and evening sessions if your natural light window is shorter. Position your grow lights 2-3 inches above the seedlings and adjust as they grow. I keep mine on a timer to automate the process—no more forgetting to turn them off at night!
Mold Prevention: Remove that humidity dome immediately when you see the first green leaves appear. I can't tell you how many batches I lost to mold because I waited too long. After removal, mist the soil lightly with water to maintain moisture without creating a damp environment. A small fan on low setting can also help circulate air around the seedlings.
Pro Tips for Germinate Marigolds
- Here's what nobody tells you about cutting weeks off your marigold germination timeline.
- Soaking Secret: That 12-hour soak isn't just about softening the seed shell—it's about hydration timing. Use warm wat...
- Heat Hack: If you don't have a seedling heat mat, try placing your tray on top of your refrigerator or near a warm so...
Frequently asked questions
Got questions about germinating marigolds?
Here are answers to the most common ones—so you can grow those vibrant blooms with confidence!
How long does it take for marigold seeds to germinate?
Marigold seeds typically sprout in 5–14 days, depending on temperature and moisture. Keep them warm (around 70–75°F) and consistently damp for the fastest results. Patience is key—some seeds may take up to 3 weeks!
Can I germinate marigold seeds indoors in winter?
Start seeds indoors 6–8 weeks before your last frost date using a seedling heat mat or warm windowsill. Use a grow light to prevent leggy seedlings. Just ensure pots have drainage holes to avoid soggy soil.
Why aren’t my marigold seeds sprouting?
Common culprits include cold soil (below 60°F), dry conditions, or seeds planted too deep (max ¼ inch). Try soaking seeds overnight in warm water or using a seed starter gel for extra moisture. If mold appears, reduce watering.
Do marigolds need light to germinate?
Nope! Seeds germinate in darkness but need light after sprouting to prevent weak seedlings. Once you see green, move them to a bright spot (or under grow lights). Too little light = tall, spindly plants.
Can I use old marigold seeds for germination?
Marigold seeds stay viable for 2–3 years if stored dry and cool. Test old seeds by soaking them in warm water—if they sink, they’re likely still good! For best results, use seeds from the current year.
Wrapping up and next steps
Germinating marigolds doesn’t have to be a gamble—with the right techniques, you’ll be watching those vibrant blooms in no time! 🌱 Whether you’re using soil, paper towels, or even a DIY heat mat, consistency is key.
Now that you’re armed with speed-sprouting secrets, it’s time to plant those seedlings and nurture them into thriving plants. Grab your gardening gloves, and let’s get growing—your future garden will thank you!
Next step: Transplant your germinated marigolds into pots or directly into your garden bed (once the soil is warm and frost-free). Happy gardening! 🌸