
Pests
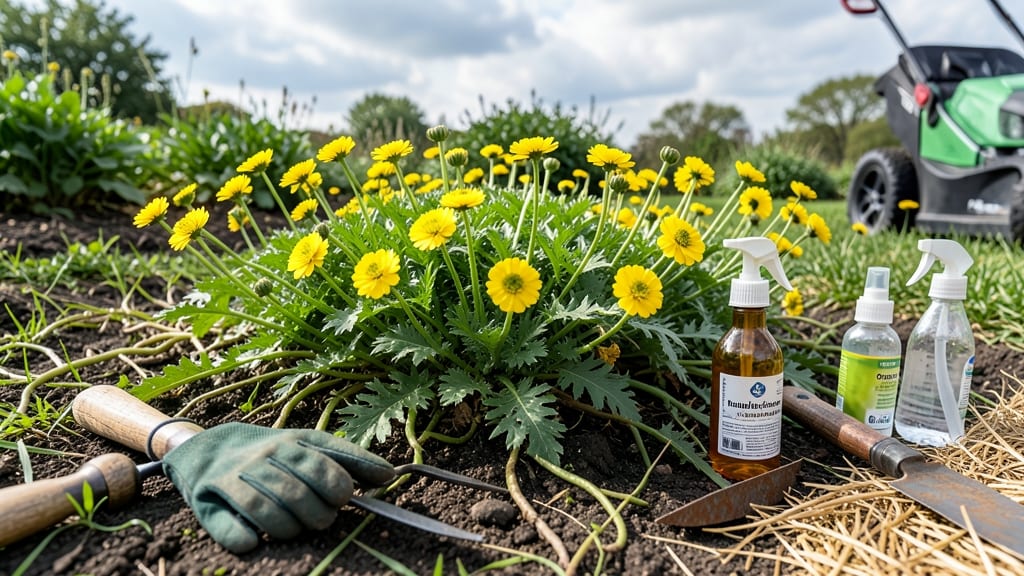
How to get rid of buttercup weeds—I learned the hard way last summer when their bright yellow blooms stole my garden’s spotlight, hiding toxic sap and stubborn roots. 🌱 The boil-and-pour method finally gave me back control, smothering those weeds in under 24 hours without harsh chemicals. It’s the secret weapon I wish I’d known sooner.
You’ll need boiling water (yes, really), a long-handled pot, dish soap, and a sunny day. The process is simple: pour boiling water mixed with a drop of soap directly over the weeds, focusing on the roots. The heat kills the plant and prevents regrowth from underground runners.
By morning, the buttercups wilt completely, and their roots blacken—no more popping up weeks later. The method works best on young weeds, but even established patches weaken after just one treatment. For stubborn clusters, repeat every 3-4 days until the area stays clear.
This technique is safe for most plants once the area cools, and it won’t harm your soil’s beneficial microbes. Just avoid pouring near desirable plants, and you’ll reclaim your garden without toxic sprays. Ready to try it?
📚 In This Guide
- What you need
- Instructions
- Tips and common mistakes
- Wrapping up and next steps
What you need
- ● Boiling water: At least 2–3 gallons (enough to cover the weed base thoroughly). Use freshly boiled water for maximum effectiveness.
- ● Heavy-duty gloves: 1 pair (nitrile or rubber) to protect your hands from heat and sap.
- ● Long-sleeve clothing: Wear long pants and sleeves to shield your skin from accidental splashes.
- ● Kitchen pot or large kettle: 1 large container (minimum 2-gallon capacity) with a spout for precise pouring.
- ○ Garden trowel or small shovel: 1 tool to loosen soil around the buttercup roots (optional but helpful for deep weeds).
- ○ Vinegar (optional but recommended): 1 cup (8 oz) white vinegar (5–20% acetic acid) mixed with boiling water for extra potency.
- ○ Salt (optional): ½ cup (for stubborn weeds; use sparingly to avoid soil damage).
- ● Plastic sheeting or cardboard: 1–2 sheets (to cover the area after treatment and block sunlight).
- ○ Watering can (optional): 1 small can to rewet the area if the soil dries out before roots die.
- ● Choose the right weather: Do this on a sunny, dry day (avoid windy conditions to prevent water splashing elsewhere).
- ● Clear the area: Remove any desired plants within 1–2 feet of the buttercups to avoid collateral damage.
- ● Work in sections: Focus on small patches (5–10 sq. ft. at a time) to ensure thorough coverage.
Step-by-step instructions for eliminating buttercup weeds
Here's the fast, effective method I swear by to kill buttercups without harsh chemicals.
🔥 Step 1: Boil Water for the Treatment
Fill a large kettle or pot with enough water to cover the affected area when poured. Bring it to a rolling boil—the hotter the better for maximum effectiveness. I like to use 2-3 gallons for a typical garden patch, as buttercups spread aggressively and need thorough coverage.
Keep the water at boil for at least 5 minutes before pouring. This ensures the temperature stays high enough to penetrate the roots. If you're working in cooler weather, pre-heat the water longer to maintain that 212°F mark—cold spots will leave roots alive to regrow.
🌱 Step 2: Pour Directly Over Buttercup Growth
Starting at the plant's base, pour the boiling water slowly and steadily over the entire buttercup plant, including the leaves and stems. The goal is to saturate the soil around the roots—don't just dribble over the top. I like to work in a slow spiral pattern, moving outward from the center of the plant.
Watch for steam rising from the soil—that's your signal the heat is penetrating. For stubborn patches, repeat the process 2-3 times with fresh boiling water. The roots will blacken within minutes, and you'll see the plant wilt dramatically. This method works best on young, actively growing buttercups—older plants may require multiple treatments.
💧 Step 3: Create a Physical Barrier to Smother Regrowth
After the plants have completely wilted (usually within 1-2 hours), cover the treated area with a thick layer of cardboard or thick newspaper—this blocks sunlight and prevents new shoots from emerging. Secure it with rocks or landscape fabric to keep it in place. The barrier should extend 6-12 inches beyond the original buttercup patch to prevent spread.
For extra insurance, I top the cardboard with 2-3 inches of mulch (like straw or wood chips) to weigh it down and maintain darkness. This smothers any remaining roots and prevents buttercups from pushing through. Check the area weekly—if you spot any green shoots, pour boiling water directly on them and reapply the barrier.
⏰ Step 4: Monitor and Retreat as Needed
Buttercups are tough, so you'll need to reapply the boiling water treatment every 7-10 days for 3-4 weeks to fully eradicate the roots. The first few weeks are critical—roots can linger underground and sprout new growth if you stop too soon. I mark treated areas with small flags to remember where I've already worked.
Once the area stays weed-free for 30 days, you can remove the barrier and replace it with desired plants or mulch. The key is persistence—this method works fast, but buttercups fight back. If you see new growth after removing the barrier, pour boiling water immediately and reapply the smothering layer for another 2 weeks.
Tips & tricks for eliminating buttercup weeds
Here's how to make this weed control method even more effective—and avoid the most common mistakes.
Heat is Your Weapon: The 212°F boiling water is non-negotiable for killing roots. If you're using a stovetop kettle, keep the water at a full rolling boil for the full 5 minutes before pouring—any less heat means incomplete root penetration. For larger patches, consider using a pressure cooker to generate larger quantities of boiling water quickly.
Timing Secret: Those 1-2 hours after pouring are critical. The plants need time to fully absorb the heat and wilt completely before adding the barrier. I've seen people skip this step and end up with regrowth because the roots weren't fully compromised. If you're working in cooler conditions, extend the waiting time to 2-3 hours to ensure maximum effectiveness.
Barrier Strategy: When creating your 6-12 inch barrier, overlap the edges of your cardboard or newspaper by at least 2 inches to prevent sunlight from sneaking through. I like to use multiple layers of newspaper for stubborn patches—it creates a more effective light block. This is where most people fail: they don't extend the barrier far enough, allowing buttercup roots to spread beyond the treated area.
Persistence Pays Off: The 3-4 week treatment schedule might seem long, but it's what makes this method work. I've seen gardeners give up after just 2 weeks and end up with more buttercups than they started with. Mark your calendar and set reminders—consistency is key. For extra insurance, I add a drop of dish soap to each boiling water treatment, which helps break down the plant cell walls even faster.
Pro Tips for Get Rid Of Buttercup Weeds
- Here's how to make this weed control method even more effective—and avoid the most common mistakes.
- Heat is Your Weapon: The 212°F boiling water is non-negotiable for killing roots.
- Timing Secret: Those 1-2 hours after pouring are critical.
Frequently asked questions
Got questions about tackling buttercup weeds?
You’re not alone—these stubborn invaders can be tricky! Here are answers to the most common concerns, from timing to troubleshooting, so you can reclaim your yard with confidence.
Q: How long does it take for the boil-and-pour method to work?
The boil-and-pour barrier typically shows results within 3–7 days for young buttercups, but older plants with deep roots may take 2–3 weeks to fully wilt. Consistency is key—reapply the boiling water if regrowth appears. For best results, treat on a dry, sunny day to maximize effectiveness.
Q: What’s the best time of year to eliminate buttercup weeds?
Target buttercups in early spring or late summer when they’re actively growing but before they seed. Avoid treating in winter (roots may be dormant) or peak summer (heat stress can harm your lawn). Pro tip: Pull weeds right after rain—soil is softer, making extraction easier!
Q: Will boiling water harm my grass or plants nearby?
Boiling water is selective—it targets buttercups’ deep roots while sparing grass if applied carefully. To protect nearby plants:
- Use a focused stream (like a turkey baster) to avoid overspray.
- Apply only to the weed’s base, not surrounding soil.
- Avoid treating shady or delicate areas (e.g., flower beds).
Q: What if buttercups keep coming back after treatment?
Persistent buttercups often mean roots or seeds remain in the soil. Try these fixes:
- Reapply boiling water to the same spot every 5–7 days for 2 weeks.
- Hand-pull any regrowth immediately (wear gloves—the sap can irritate skin!).
- Add a mulch layer (straw or cardboard) to block sunlight and prevent new sprouts.
Q: Are there natural alternatives to boiling water?
Yes! If boiling water isn’t an option, try these eco-friendly methods:
Method
How to Use
Effectiveness
Vinegar + Dish Soap
Mix 1 gallon white vinegar + 1 tbsp soap. Spray directly on leaves (avoid windy days).
(Works fast but may harm nearby plants.)
Corn Gluten Meal
Sprinkle 2–3 lbs per 100 sq ft in early spring to prevent seed germination.
(Prevents regrowth but won’t kill established weeds.)
Manual Removal
Dig out roots + 1 inch of soil (buttercups resprout from fragments!).
(Labor-intensive but chemical-free.)
Wrapping up and next steps
Say goodbye to those stubborn buttercup weeds for good! 🌱 By using a simple boil-and-pour barrier, you’re not just tackling the visible plants—you’re smothering their roots and preventing regrowth. This method is effective, chemical-free, and budget-friendly, making it a win-win for your garden and the planet.
Ready to reclaim your yard? Grab your supplies, follow the steps, and enjoy a weed-free space in no time. Start today—your future self (and your lawn) will thank you! 🌿