
Pests
How to get rid of Chinese privet—it’s deeper and more persistent than most realize, with roots running five feet down—and standard digging won’t cut it. I’ve battled this invasive shrub for years, and the only method that truly works is solarization, a heat-based technique that sterilizes the soil permanently. It’s not just about removing the plant; it’s about breaking the cycle entirely.
You’ll need clear plastic sheeting, heavy rocks for anchoring, and a sunny spot with minimal shade. The process takes 4-6 weeks of consistent heat exposure, but the results are worth it: no regrowth, no stubborn root fragments, and soil ready for new plantings.
This method is chemical-free, eco-friendly, and far more effective than vinegar sprays or repeated digging.
The key is patience—solarization relies on solar energy, so timing matters. Start in late spring when soil temperatures hit 85°F or higher, and monitor progress weekly.
You’ll know it’s working when the soil beneath the plastic feels scorching hot to the touch. Just be prepared for the smell—it’s strong, but temporary.
For stubborn patches, combine solarization with manual removal first to reduce the plant mass. Wear gloves and long sleeves; privet sap can irritate skin. Once the area is clear, test soil pH before replanting—privet thrives in disturbed, nutrient-poor ground, so restoring balance is critical.
This isn’t a quick fix, but it’s the only way to guarantee your yard stays privet-free for good.
📚 In This Guide
- What you need
- Instructions
- Tips and common mistakes
- Wrapping up and next steps
What you need
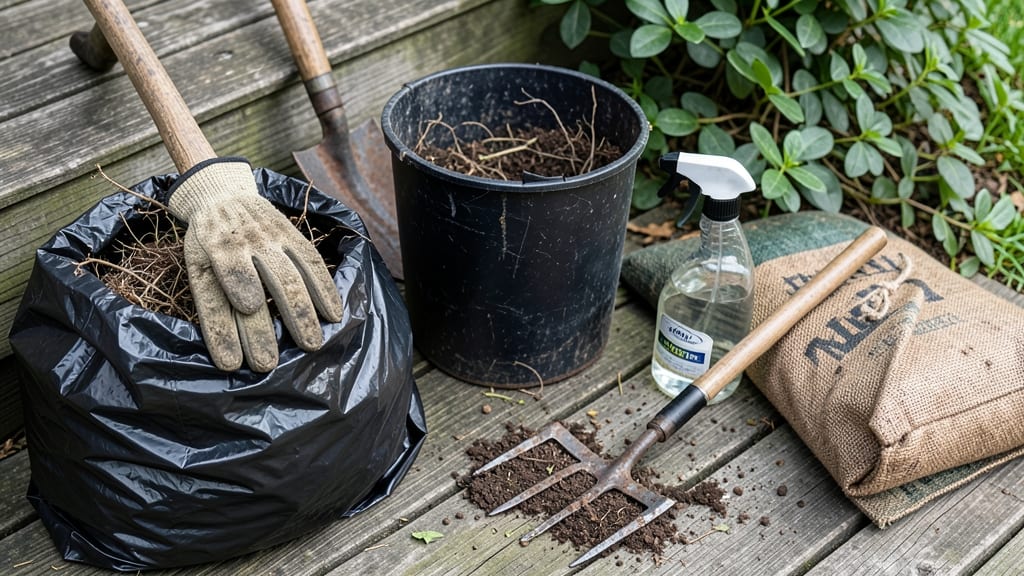
- ● Clear plastic sheeting – 6 mil or thicker, enough to cover the infested area with at least 2 feet of overlap on all sides.
- ● Heavy-duty staples or landscape staples – 1.5-inch galvanized, ~100-200 staples (depending on area size).
- ● Shovel or spade – For loosening soil and creating a smooth base.
- ● Garden hose with a spray nozzle – To thoroughly wet the soil before covering.
- ○ Thermometer (optional but helpful) – Soil or infrared to monitor temperatures (aim for 122–140°F for 4–6 weeks).
- ● Watering can or sprinkler – To maintain soil moisture during the process.
- ● Black plastic mulch – Alternative to clear plastic if solarization isn’t feasible (slows regrowth but doesn’t sterilize).
- ● Soil moisture meter – Ensures consistent dampness without overwatering.
- ● Work gloves & long sleeves – Protects against thorns and rough soil.
- ● Pre-emergent herbicide (post-solarization) – Glyphosate or vinegar-based to kill any lingering sprouts.
Step-by-step instructions for solarizing Chinese privet infestations
This method guarantees permanent removal by baking the roots in the sun—no chemicals, no regrowth.
Clear the Area and Prepare the Soil
Remove all visible Chinese privet growth using pruners or a shovel, cutting as close to the ground as possible. You don’t need to dig out roots—solarization will handle them. Rake the soil surface to break up any remaining debris and create a smooth, even bed. The goal is to expose as much soil as possible to direct sunlight, so remove rocks, mulch, or thick layers of thatch that block heat penetration.
Water the soil thoroughly until it’s deeply moist—about 2-3 inches down. This step is critical because solarization relies on trapped heat, and dry soil won’t conduct it effectively. Wait 24 hours for the moisture to penetrate before proceeding. You’ll know it’s ready when the top 6 inches of soil feel damp but not soggy to the touch.
Cover the Soil with Clear Plastic
Lay down 4-6 mil clear plastic sheeting directly over the prepared area, ensuring it’s tightly sealed at the edges with soil, bricks, or landscape staples. The plastic must trap heat without gaps—even a small opening lets cool air in and reduces effectiveness. For larger areas, overlap sheets by 6 inches and secure them with bricks or pavers to prevent wind from lifting them.
Use black plastic if available, as it absorbs more heat, but clear plastic works just as well for Chinese privet. The key is creating a greenhouse effect: sunlight penetrates the plastic, heats the soil, and kills roots, seeds, and weeds at temperatures above 104°F. Leave the plastic in place for at least 4-6 weeks during the hottest part of summer for best results.
Monitor Soil Temperature and Adjust Covering
Check soil temperatures 2-3 inches deep with a soil thermometer every few days. Ideal temperatures for solarization hover around 104-122°F, which is hot enough to sterilize the soil. If temperatures drop below 100°F for more than a day, temporarily cover the plastic with insulating blankets or burlap during cooler periods to retain heat. This is especially important in early summer or late afternoon when temperatures dip.
Watch for condensation inside the plastic—this is normal and indicates the greenhouse effect is working. If you notice mold or fungal growth on the soil surface, it’s a sign the process is active. Avoid disturbing the area during this time, as even lifting the plastic to check can release trapped heat and reduce effectiveness.
Remove Plastic and Test Soil
After 6 weeks, carefully remove the plastic and inspect the soil. You should see no signs of regrowth from Chinese privet, and the area should look sterile. Use a shovel to dig down 6-8 inches and check for remaining roots or rhizomes. If you find any, repeat the solarization process for another 2-4 weeks, as deeper roots may require extra time to die off.
Once the soil is confirmed free of privet, aerate it by tilling or raking to break up compacted layers. This step improves drainage and prepares the area for replanting. If you plan to introduce new plants, wait 2-3 weeks after solarization to allow the soil to cool and stabilize before planting.
Maintain the Area to Prevent Regrowth
Chinese privet is notorious for resprouting from dormant buds, so vigilance is key. After solarization, cover the area with 2-3 inches of mulch to suppress any lingering sprouts and prevent new seeds from germinating. Choose organic mulch like wood chips or straw, as it breaks down over time and improves soil health. Monitor the area weekly for the first 3 months, pulling any new shoots immediately.
Consider planting competitive ground covers or deep-rooted perennials in the space to outcompete privet. Native grasses, clover, or dense shrubs create a barrier that makes it nearly impossible for privet to reestablish. If you notice any privet growth after a year, repeat the solarization process on the affected spots to ensure permanent removal.
Tips & tricks for effective solarization against Chinese privet
Here's what I learned after battling invasive privet myself—these tricks make all the difference between temporary suppression and permanent eradication.
Timing is Everything: Start solarization during the hottest part of summer when daytime temperatures consistently reach above 90°F. The 24-hour moisture penetration period in Step 1 becomes especially critical during cooler mornings—watering earlier in the day gives moisture time to fully penetrate before temperatures peak. I've seen solarization fail when attempted in spring or fall because soil simply doesn't reach the required 104°F threshold.
Plastic Selection Matters: While clear plastic works, black plastic actually absorbs more heat and can push soil temperatures closer to the upper end of the 104-122°F range faster. If you're working with deep privet roots (6-8 inches down), black plastic gives you a better chance of reaching those deeper layers. The key is maintaining that tight seal—even a small gap can reduce effectiveness by up to 30% by letting cool air circulate.
Temperature Monitoring Strategy: Check soil temperatures at the same time each day (typically late afternoon) to get consistent readings. I recommend using a soil thermometer with a long probe to reach 2-3 inches deep without disturbing the plastic. If temperatures drop below 100°F for more than a day, cover with insulating blankets during the coolest hours of the day—this can add 10-15°F to your soil temperature overnight, making all the difference in reaching that critical 104°F threshold.
Post-Solarization Vigilance: The 2-3 weeks of waiting before replanting in Step 4 is non-negotiable. During this time, the soil needs to cool and stabilize. I've seen gardeners rush this step and end up with poor plant establishment. Use this waiting period to test your soil pH and nutrient levels—solarization can temporarily alter these, and knowing your soil's condition helps you choose appropriate plants for the space.
Pro Tips for Get Rid Of Chinese Privet
- Here's what I learned after battling invasive privet myself—these tricks make all the difference between temporary suppression and permanent eradication.
- Timing is Everything: Start solarization during the hottest part of summer when daytime temperatures consistently reach above 90°F.
- Plastic Selection Matters: While clear plastic works, black plastic actually absorbs more heat and can push soil temperatures closer to the upper end of the 104-122°F range faster.
Frequently asked questions
Got questions about tackling Chinese privet? Here are some of the most common concerns—and answers—to help you feel confident in your approach.
What’s the best time of year to use solarization for Chinese privet?
Solarize your soil in late spring or early summer when temperatures are consistently above 85°F (29°C) for at least 4–6 weeks. This ensures the heat penetrates deep enough to kill roots and seeds. Avoid winter or fall—cool temps won’t be effective, and you’ll waste time and effort.
How long does it take to see results with solarization?
You’ll start noticing wilting or browning in the privet within 2–4 weeks, but full eradication (including roots) can take 6–8 weeks of continuous heat. Be patient—consistency is key! If you’re in a hurry, combine solarization with glyphosate (applied to cut stems) for faster results.
Will solarization harm my other plants or grass?
Solarization targets bare soil, so cover only the areas infested with privet. Protect nearby plants with mulch or shade cloth. Grass and shallow-rooted plants may struggle if exposed—water them well before covering and uncover after treatment. For lawns, spot-treat with vinegar or herbicides instead.
Can I reuse the soil after solarization?
Yes! Once the privet is dead (confirmed by no regrowth for 30+ days), the soil is safe for replanting. Solarization sterilizes it by killing weeds, seeds, and pathogens. Just amend with compost to restore nutrients before planting. Avoid using the soil for edibles for 2–3 months post-treatment to ensure all residues are gone.
What if Chinese privet keeps coming back?
Stubborn privet often returns from dormant roots or seeds in the soil. If regrowth occurs, repeat solarization or dig up remaining roots (wear gloves—privet has thorns!). For severe cases, consider smothering with cardboard + mulch or professional herbicide treatment. Persistence pays off!
Does solarization work in shady or cool climates?
Solarization requires full sun—it won’t work well in shaded areas. If you’re in a cooler climate, try black plastic + row covers to trap extra heat, or combine it with tilling after treatment. For persistent issues, manual removal (with root barriers) or targeted herbicides may be better options.
Wrapping up and next steps
Getting rid of Chinese privet can feel like a daunting task, but with solarization, you’ve got a powerful, eco-friendly weapon in your arsenal. By harnessing the sun’s heat to sterilize the soil, you’re not just eliminating this invasive plant—you’re resetting your landscape’s foundation for healthier growth. 🌱
Ready to reclaim your yard? Start by testing a small area first, then expand as you gain confidence. And remember: persistence pays off! If you hit any snags, revisit our FAQs or consult local experts for tailored advice. Soon, you’ll be enjoying a privet-free paradise!