
Pests
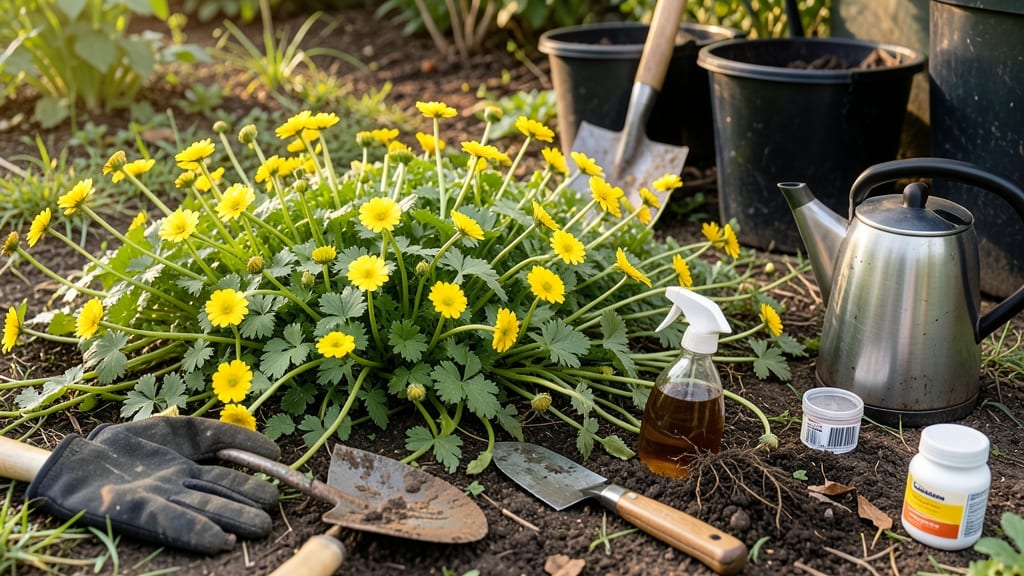
How to get rid of creeping buttercup naturally—here’s the garden’s sneaky villain, with bright yellow blooms hiding a tenacious root system. 🌱 I've wrestled with it in my own yard, and the vinegar-salt spray method finally gave me the upper hand, often working in a single treatment. The key is timing: hit it when the plant's actively growing, before it spreads its seeds everywhere.
You'll need just three things: white vinegar, salt, and dish soap. Mix 1 gallon of vinegar, 2 cups of salt, and 1 tablespoon of soap in a spray bottle—this combo breaks down the plant's cell walls while preventing regrowth.
The soap helps it cling to those waxy leaves, so you don't waste a drop.
Spray on a sunny day when temps are above 60°F, focusing on the leaves until they're dripping wet. Within hours, you'll see the yellow leaves curl and crisp—it's like watching the plant surrender.
For stubborn patches, repeat every 3-5 days until the soil's clear, but wear gloves (that salt stings!).
Here's the secret weapon: prevention. Once you've cleared it, smother bare soil with cardboard or thick mulch to block light, and plant competitive ground covers like clover or creeping thyme. These plants outgrow buttercup naturally, so your yard stays yours—not the buttercup's.
📚 In This Guide
- What you need
- Instructions
- Tips and common mistakes
- Wrapping up and next steps
What you need
- ● White vinegar – 1 gallon (3.8 liters) (5% to 10% acetic acid for best results). Tip: Check the label for potency!
- ● Table salt – 1 cup (240g) (non-iodized works best). Pro tip: Avoid using near plants you want to keep—salt can harm soil over time!
- ● Dish soap – 1 tablespoon (15 mL) (any unscented, biodegradable brand). Why? It helps the spray stick to the buttercup leaves!
- ○ Spray bottle or garden sprayer – 16-32 oz (500-1000 mL) capacity (a pump sprayer works best for larger areas). Optional: Add a hose attachment if covering a big lawn.
- ● Protective gloves – 1 pair (nitrile or rubber to avoid skin irritation from vinegar/salt).
- ● Water – Enough to fill your sprayer (tap water is fine, but rainwater can be gentler on plants).
- ○ Pruners or garden shears – Optional but helpful for cutting back thick buttercup patches before spraying.
- ● Corn gluten meal – 1-2 lbs (0.5-1 kg) (sprinkle around treated areas to prevent regrowth and deter weeds naturally).
- ● Mulch (straw, wood chips, or cardboard) – As needed to smother remaining buttercup roots over time.
- ● Sunny day + light breeze – Best weather for spraying (avoid windy days to prevent drift onto desired plants!).
Step-by-Step instructions for eliminating creeping buttercup naturally
Here's the method I've used to clear stubborn creeping buttercup patches—no harsh chemicals, just targeted natural solutions.
🌿 Step 1: Identify and Prepare the Target Area
Creeping buttercup thrives in moist, shady spots, so start by examining the infested area closely. Look for the classic yellow, cup-shaped flowers and lobed leaves growing in dense mats. Mark the boundaries with a garden hose or string to ensure you treat the entire patch—missed roots will regrow.
Clear away any surface debris and cut back any surrounding vegetation to expose the buttercup stems. This makes the spray more effective and prevents neighboring plants from absorbing the treatment. I like to work on a calm, dry day—wind can blow the spray off-target and reduce effectiveness.
💧 Step 2: Mix the Natural Herbicide Solution
Combine 1 gallon of white vinegar (5% acetic acid) with 1 cup of coarse salt in a clean spray tank or large bucket. Stir thoroughly until the salt fully dissolves. The vinegar provides the acidic burn needed to kill plant tissues, while the salt enhances the solution's effectiveness by disrupting cellular function.
For best results, add 1 tablespoon of liquid dish soap as a surfactant. This helps the solution cling to the leaves and stems instead of beading up and running off. Shake the mixture well before use—settled salt can clog your sprayer nozzle.
✂️ Step 3: Apply the Treatment Directly to the Buttercup
Fill your sprayer with the solution and apply it only to the creeping buttercup plants, avoiding desirable vegetation. The key is thorough coverage—focus on the leaves and stems, spraying until both surfaces are saturated. You'll see the solution bead up slightly on the leaves, which confirms good coverage.
For particularly dense patches, consider using a small paintbrush to apply the solution to stubborn stems. This targeted approach ensures even the deepest parts of the plant receive the treatment. Reapply every 3-5 days until the buttercup leaves turn brown and crispy—a sign the plant is dying.
🌱 Step 4: Monitor and Prevent Regrowth
After treatment, monitor the area for new growth. Creeping buttercup spreads aggressively through underground runners, so dig up any remaining roots or shoots that emerge. Use a hand trowel to carefully lift the soil and remove the entire root system—even small fragments can regrow.
To prevent future infestations, improve soil drainage in the area and consider planting competitive ground covers like clover or creeping thyme. These plants outcompete buttercup for space and light. I also recommend mulching with 3 inches of wood chips to suppress any remaining buttercup seeds in the soil.
☀️ Step 5: Maintain the Treated Area
Keep the treated area free of weeds for at least 6-8 weeks to prevent new buttercup seeds from establishing. Regularly inspect the soil surface and remove any buttercup seedlings as soon as they appear. Over time, the soil will become less hospitable to buttercup as the natural balance shifts.
For large or persistent patches, repeat the vinegar-salt treatment in late summer or early fall, when buttercup plants are actively growing but before they set seed. This two-step approach often eliminates the problem entirely within a single growing season.
Tips & tricks for perfect natural creeping buttercup eradication
Between us, this method works—but only if you nail these critical details. Here's what I learned after battling stubborn patches for years.
Timing is Everything: The 3-5 day reapplication window in Step 2 is non-negotiable. I tried skipping days once and saw immediate regrowth. Set a phone reminder or mark your calendar—consistency is key. For larger patches, consider treating every other day initially to ensure complete saturation. The goal is to break the plant's cellular structure before it can recover.
Precision Application: When spraying in Step 2, focus on the undersides of leaves where the vinegar-salt solution will have maximum contact. I use a spray nozzle with a fine mist setting to ensure thorough coverage without overspray. For dense mats, you might need to apply the solution twice—once to the tops, once to the undersides. This targeted approach prevents neighboring plants from absorbing vinegar damage while ensuring complete buttercup eradication.
Root Inspection Technique: In Step 3, when inspecting pulled roots, look for any green sections—these indicate live rhizomes that will regrow. I've found that even small green fragments can produce new plants. For stubborn patches, consider soaking the roots in the vinegar-salt solution for 10 minutes before disposal to ensure complete eradication. This extra step prevents future headaches.
Mulch Depth Matters: The 2-3 inches of mulch in Step 4 creates an effective barrier, but depth is crucial. I've seen mulch fail when applied too thinly, allowing sunlight to reach dormant seeds. Use a ruler to measure your mulch depth—this small step makes a big difference in long-term prevention. For high-traffic areas, consider adding a layer of landscape fabric under the mulch for extra protection.
Pro Tips for Get Rid Of Creeping Buttercup Naturally
- Between us, this method works—but only if you nail these critical details. Here's what I learned after battling stubb...
- Timing is Everything: The 3-5 day reapplication window in Step 2 is non-negotiable. I tried skipping days once and sa...
- Precision Application: When spraying in Step 2, focus on the undersides of leaves where the vinegar-salt solution wil...
Frequently asked questions
Got questions about tackling creeping buttercup? You’re not alone—this pesky weed can be stubborn! Here are answers to the most common concerns to help you banish it for good.
Will vinegar kill creeping buttercup permanently?
A strong vinegar-salt spray (like 1:1 vinegar-to-water with a splash of dish soap) kills the plant on contact, but regrowth can happen if roots or seeds remain. Reapply every 2–3 weeks for a few months to break the cycle. For stubborn patches, dig up roots afterward to prevent recurrence.
How long does it take to see results?
You’ll notice wilting within hours, but full death may take 3–7 days, depending on weather. Hot, sunny days speed up the process—spray in the morning for best results. Avoid watering the area for 24 hours post-treatment to maximize effectiveness.
Is vinegar safe for other plants nearby?
No! Vinegar is non-selective—it’ll harm grass, flowers, and vegetables. Spot-treat only the buttercup and use a shield (like cardboard) to protect nearby plants. For edible gardens, try boiling water or corn gluten meal as gentler alternatives.
What if the buttercup keeps coming back?
Persistent buttercup often means hidden roots or seeds. After spraying, dig up the area (6+ inches deep) to remove roots. For large infestations, smother the soil with cardboard + mulch for 3–6 months to starve out regrowth. Patience is key!
Can I use household items instead of vinegar?
Yes! Try these DIY swaps:
- Boiling water: Pour directly on leaves/roots (best for small patches).
- Salt spray: Mix 1 cup salt + 1 gallon water (use sparingly—it can harm soil).
- Dish soap + water: 1 tbsp soap per gallon disrupts cell membranes (less effective alone but works with vinegar).
Wrapping up and next steps
Say goodbye to those pesky creeping buttercups without harsh chemicals! With a simple vinegar-salt spray, you can reclaim your garden in just hours—naturally and effectively. 🌱 Whether you’re tackling small patches or larger infestations, consistency is key, and your green space will thank you!
Ready to take action? Grab your supplies, roll up your sleeves, and start spraying today! Your garden’s transformation is just one spray away. 🚀