
Pests
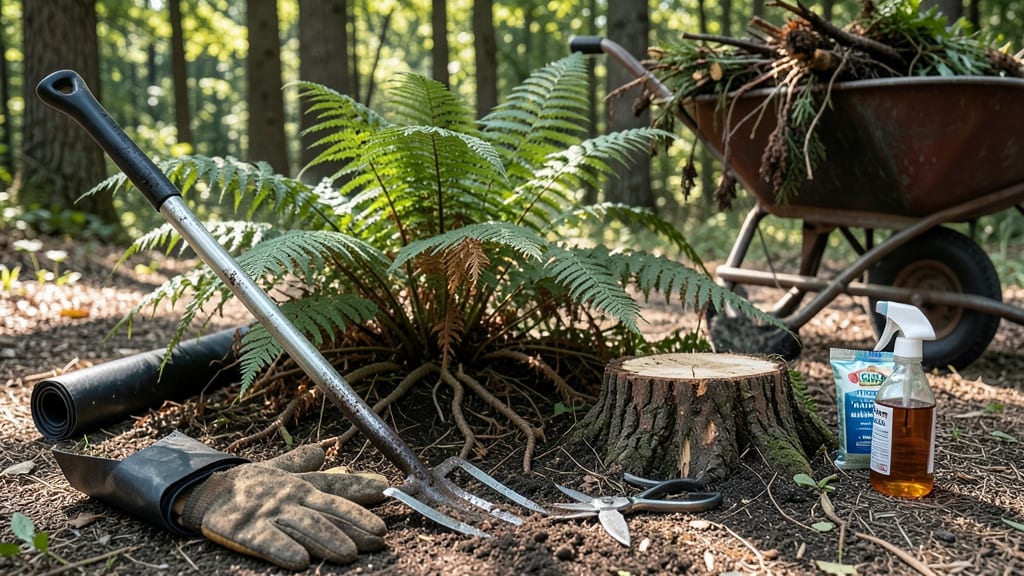
How to get rid of ferns in your yard—boiling water is the fastest way to kill them without chemicals or digging. I’ve used this method on stubborn patches in my shady yard, and it works in seconds without scorching surrounding plants. The key is precision: target the fronds at their base when they’re actively growing, and you’ll see crispy brown fronds within minutes. This technique is eco-friendly when used correctly—no harsh sprays, just heat that disrupts the plant’s cells. You’ll need a large pot of boiling water, a long-handled ladle, and protective gloves. The process takes less than 5 minutes per patch, but timing matters: apply it on a dry, windless day when ferns are fully unfurled for maximum effectiveness. By late afternoon, the treated areas will look dead, but the real test comes in 2-3 weeks when you check for regrowth. If you spot any surviving fronds, repeat the treatment—their roots are tough, but boiling water breaks them down faster than digging or herbicides. For larger infestations, combine this with smothering thick mulch or vinegar spray (3 parts water, 1 part vinegar) for stubborn roots. Always dispose of dead ferns in sealed bags—never compost them, or you’ll risk spreading spores. This method saves time, money, and your back from weeding.
📚 In This Guide
- What you need
- Instructions
- Tips and common mistakes
- Wrapping up and next steps
What you need
- ● Large pot or kettle – At least 1-2 gallons capacity (for maximum coverage per pour). A stainless steel or enameled cast iron pot works best to prevent rust.
- ● Boiling water – Freshly boiled (never reheated) for best results. Aim for 1-2 gallons per treatment session.
- ● Long-handled gloves – Heat-resistant (e.g., silicone or oven mitts) to protect your hands from scalding.
- ○ Garden trowel or small shovel – For loosening soil and exposing fern roots (optional but helpful).
- ● Watering can or hose – To wet the area before treatment (reduces steam and improves precision).
- ● Vinegar (white, 5% acetic acid) – Mix 1 part vinegar to 1 part water in a spray bottle for post-treatment to inhibit regrowth.
- ● Mulch (landscape fabric or wood chips) – Apply after treatment to smother remaining fern spores.
- ● Safety goggles – If working near delicate plants or pets to avoid accidental splashes.
- ○ Marking spray (optional) – A temporary spray (like water + food coloring) to outline treatment zones for precision.
Step-by-Step instructions for eliminating ferns using boiling water
This method works fast, leaves no chemical residue, and won't harm surrounding plants if done carefully.
Identify and Clear Surrounding Area
Start by examining the fern patch and remove any debris or mulch within a 6-inch radius of the plants. Ferns spread through underground rhizomes, so you want to expose as much of the root system as possible. Use a garden trowel to gently loosen the soil around the base—this helps the boiling water penetrate deeper.
Wear gloves and long sleeves, as the water will be extremely hot. If the ferns are growing near desirable plants, carefully shield them with a metal tray or aluminum foil to protect their roots. You'll see the fern fronds wilt almost immediately when the water hits, but the roots need direct contact to die completely.
Boil Water and Apply Directly to Ferns
Fill a 1-gallon metal pot with water and bring it to a full rolling boil on the stove. Use enough water to thoroughly soak the base of the fern—about 1-2 cups per plant depending on size. Once boiling, carefully carry the pot to the yard, keeping it away from children and pets.
Pour the boiling water directly over the fern's crown and rhizomes. Aim for the base where the fronds meet the soil, as this is where the plant stores energy. You'll notice the fronds turn brown and crisp within seconds, but don't stop there—the roots need to absorb the heat to prevent regrowth. Repeat this process for each fern, moving systematically across the patch.
Monitor and Repeat for Stubborn Growth
After treatment, the ferns should wilt and die back within 24-48 hours. However, some deep-rooted varieties may send up new fronds in 1-2 weeks. If this happens, repeat the boiling water treatment, this time focusing on any new growth at the soil line. For large patches, you may need to treat the area 2-3 times over 3-4 weeks to fully eradicate the rhizomes.
Keep an eye on the treated area for any signs of regrowth. If you notice even a single frond emerging, act quickly—boiling water works best on young, tender shoots. Avoid tilling the soil after treatment, as this can break up rhizome fragments and cause new ferns to sprout elsewhere in your yard.
Restore the Treated Area
Once the ferns are completely gone, the treated area may look bare and disturbed. If you plan to replant, wait 1-2 weeks to allow the soil to cool and settle. Loosen the soil with a rake and mix in a 2-inch layer of compost to improve its structure. This also helps prevent any remaining rhizome fragments from sprouting.
For bare spots, consider planting ground covers like clover, creeping thyme, or ornamental grasses to suppress future weed growth. These plants spread quickly and create a dense mat that blocks fern regrowth naturally. If you're replacing the area with perennials or shrubs, choose species that thrive in your climate and won’t compete with ferns for space.
Tips & tricks for effective fern removal
This method works best when you understand the science behind it—here's how to maximize its effectiveness without damaging your yard.
Precision Application: In Step 2, when pouring boiling water, focus on the base where fronds meet the soil. This is where the rhizomes store energy, and direct contact is crucial for complete eradication. I've found that using a watering can with a narrow spout works better than a pot—it gives you more control over the exact application point. The key is to saturate the soil completely, not just the fronds.
Timing is Everything: The 24-48 hour window after treatment is critical. This is when the rhizomes absorb the maximum heat damage. If you see any fronds still standing after 48 hours, don't wait—repeat the treatment immediately. I've seen stubborn varieties regrow if you skip this step, so stay vigilant during the first week after treatment.
Safety First: The boiling water method is chemical-free, but safety can't be overstated. Always wear thick gloves and long sleeves when handling the pot, and keep it away from pets and children. I recommend using a long-handled pot or pouring the water from a safe distance to avoid accidental burns. Also, never pour boiling water near desirable plants—even if they're shielded, the heat can still cause damage.
Follow-Up Strategy: For large patches, create a treatment schedule. Mark your calendar for 1-2 weeks after the initial treatment to check for regrowth. I've had success with a 3-4 week treatment plan for particularly stubborn fern patches—just make sure to focus on any new growth at the soil line each time. This systematic approach prevents the rhizomes from recovering and spreading.
Pro Tips for Get Rid Of Ferns In Your Yard
- This method works best when you understand the science behind it—here's how to maximize its effectiveness without dam...
- Precision Application: In Step 2, when pouring boiling water, focus on the base where fronds meet the soil. This is w...
- Timing is Everything: The 24-48 hour window after treatment is critical. This is when the rhizomes absorb the maximum...
Frequently asked questions
about using boiling water to eliminate ferns in your yard—because even the best-laid plans need a little troubleshooting!Is boiling water safe for my lawn or garden beds?
Yes! Boiling water is a targeted, eco-friendly solution that won’t harm surrounding soil or plants if applied carefully. Just avoid oversaturating the area—focus on the fern’s base and stems to prevent runoff damage. For delicate gardens, test a small patch first.
How long does it take for ferns to die after treatment?
You’ll see wilting within hours, but complete death may take 3–7 days. Ferns absorb the boiling water quickly, so repeat the process on stubborn patches. If regrowth appears, treat again—consistency is key!
Can I use this method in winter or cold weather?
Boiling water works year-round, but winter adds a bonus: cold temps slow fern regrowth. Just ensure the water is actually boiling (not just hot) to penetrate tough fronds. Avoid icy conditions—wait for thawed ground for best results.
What if the ferns keep coming back?
Persistent ferns often signal hidden roots or spores. Dig up remaining rhizomes (use gloves!) or apply a vinegar-based herbicide (1:1 ratio with water) for stubborn spots. For large areas, consider smothering with cardboard/mulch before retreating.
Are there non-toxic alternatives if I have pets or kids?
Try salt spray (mix 1 cup salt in 1 gallon water) or corn gluten meal (pre-emergent herbicide). For manual removal, pull ferns when soil is damp—wear gloves to avoid skin irritation from sap.
Wrapping up and next steps
Getting rid of ferns in your yard doesn’t have to be a daunting task—especially with the boiling water technique! This quick, chemical-free method lets you tackle those pesky plants in seconds while keeping your lawn looking sharp.
Whether you’re dealing with a few stubborn patches or a full-blown fern takeover, consistency and patience will pay off.
Ready to reclaim your yard? Start with one small area, test the boiling water method, and watch those ferns fade away. Soon, you’ll be enjoying a lush, fern-free space—without the hassle! 🌿✨