
Lawn
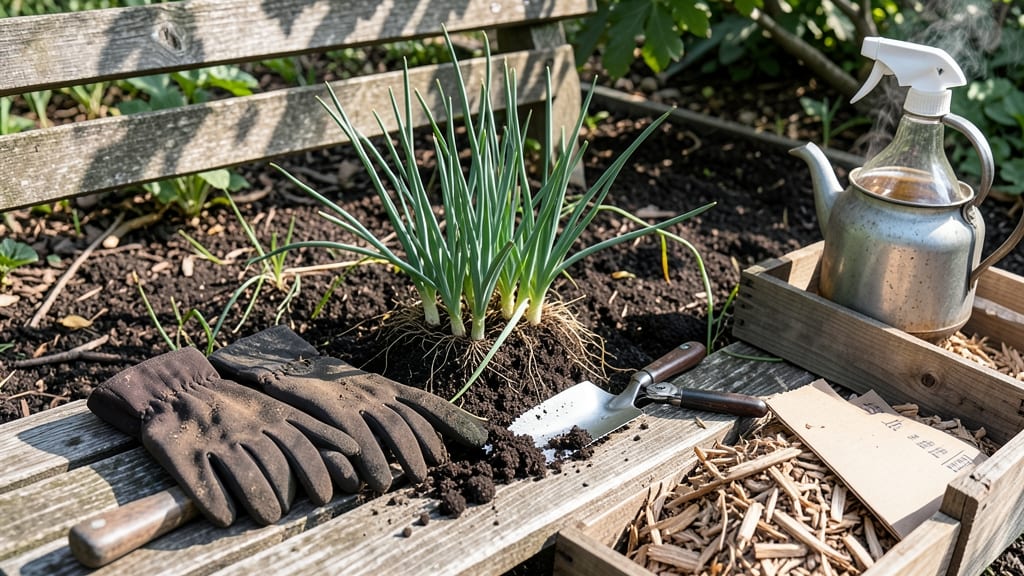
Here’s how to get rid of onion grass naturally—that sharp, pungent smell means it’s already taken root in your lawn. 🌱 I’ve battled this stubborn weed for years, and the boiling water barrier method finally gave me lasting results—no chemicals, just heat and persistence.
The trick is simple: boiling water kills onion grass roots on contact, but you need to be thorough. Grab a kettle or watering can, and pour the water directly over the weeds, focusing on the base where they meet the soil.
Repeat every few days until the grass turns brown and crispy. It’s labor-intensive but worth it for a chemical-free yard.
You’ll see results within a week if you’re consistent, with the area looking completely dead in about 10-14 days. The key is patience—don’t rush, or you’ll leave behind stubborn roots that sprout back. For stubborn patches, mulch afterward to smother any remaining growth.
Prevention is easier than eradication: keep your lawn healthy with regular mowing, proper watering, and overseeding. A thick, vibrant lawn leaves little room for onion grass to take hold. Here’s how to make it work for your yard!
📚 In This Guide
- What you need
- Instructions
- Tips and common mistakes
- Wrapping up and next steps
What you need
- ● Boiling water: At least 1–2 gallons per section (enough to saturate the area where onion grass grows). Use freshly boiled water for maximum effectiveness.
- ● Kettle or large pot: A 5–10 gallon capacity (e.g., a stockpot or electric kettle with a pour spout). Avoid small teapots—they’ll take forever!
- ● Protective gear: Heavy-duty gardening gloves (to shield hands from heat and sharp grass blades).
- ● Long sleeves and closed-toe shoes (boiling water is no joke!).
- ○ Watering can (optional but helpful): A 1–2 gallon capacity with a narrow spout for precision pouring. Skip this if you’re comfortable free-pouring from the kettle.
- ● Garden trowel or hoe: For scraping up dead grass and loosening soil before treatment. A stainless steel or heavy-duty plastic tool works best.
- ● Measuring tape or ruler: To mark a 1–2 inch wide barrier around plants, driveways, or garden beds (where you don’t want onion grass to spread).
- ● Stakes or chalk: For marking the barrier line if you’re treating a large area.
- ● Vinegar (white, 5–10% acetic acid): Mix 1 part vinegar to 1 part boiling water for an extra boost against roots. Note: Test on a small area first—vinegar can harm some plants.
- ● Salt (non-iodized): Sprinkle a thin layer along the barrier after boiling water treatment (use sparingly—it can harm soil health long-term).
- ● Mulch (straw, wood chips, or cardboard): Apply a 2–3 inch layer after treatment to smother regrowth and prevent new sprouts.
- ● Spray bottle with soapy water: For spot-treating small patches if boiling water isn’t practical.
Step-by-step instructions for eliminating onion grass naturally
Here's how I remove onion grass permanently using a simple, chemical-free boiling water method.
💧 Step 1: Identify and Mark the Onion Grass Patch
First, walk your yard and locate all onion grass clusters. I pull up a few to confirm—onion grass has long, flat leaves with a hollow stem and a bulb at the base, unlike grass which has round stems. Mark the area with small flags or chalk (I use a spray bottle with diluted food coloring) to outline the patch clearly.
This ensures you don't miss any hidden shoots and prevents accidental damage to surrounding plants. Onion grass spreads aggressively through underground bulbs, so even a small patch can regrow if left untreated. After marking, measure the area—you'll need enough boiling water to cover it thoroughly.
✂️ Step 2: Clear the Surface Debris
Remove any rocks, mulch, or loose soil from the marked area. I use a small hand rake to clear a 1-inch deep zone around the onion grass. This step is critical because debris can insulate the soil, reducing the effectiveness of the boiling water treatment.
Pay special attention to the edges of the patch—onion grass often grows in thin lines along pathways or garden beds. If you spot any stray shoots outside the main patch, mark them too and treat them separately. Once cleared, the area should look like bare soil with no obstructions.
🔥 Step 3: Apply Boiling Water in a Continuous Barrier
Fill a large watering can or kettle with freshly boiled water. Pour it directly onto the onion grass patch, starting at one edge and working your way inward. I aim for a 1-inch deep soak—enough to saturate the soil and smother the roots without scorching nearby plants.
Here's the key: create a 3-4 inch wide barrier around the entire patch. The heat kills the underground bulbs and prevents regrowth. For large patches, work in sections to ensure even coverage. Avoid pouring on windy days—the steam can drift and damage other plants.
🌱 Step 4: Monitor and Repeat as Needed
After treatment, wait 3-5 days before checking for new growth. If you see any green shoots, repeat the boiling water process. Onion grass is resilient, so persistence is key. I usually need 2-3 treatments spaced 1 week apart to fully eliminate it.
Watch for signs of success: the soil should look dry and free of sprouts. If the area stays clear for 4-6 weeks, the onion grass is likely gone. For stubborn patches, I add a layer of cardboard or thick mulch afterward to block sunlight and prevent regrowth.
☀️ Step 5: Prevent Future Onion Grass Growth
Once the patch is clear, maintain the area by keeping it weed-free. I plant dense ground covers like clover or creeping thyme in treated spots—they outcompete onion grass naturally. For pathways, apply a pre-emergent herbicide made from corn gluten meal in early spring.
Regularly inspect your yard for new onion grass shoots, especially after rain or when soil is disturbed. Early intervention makes treatment easier. If you notice onion grass near flower beds, I recommend installing edging to create a physical barrier against its spread.
Tips & tricks for eliminating onion grass permanently
Real talk: This method works, but only if you nail these key details. Here's what I learned after dealing with stubborn patches for years.
Precision Marking: Don't just eyeball that onion grass patch! Use a tape measure to create a clear boundary—especially important for patches along pathways or near flower beds. I mark with bright chalk or diluted food coloring because onion grass spreads through underground bulbs, and even a missed inch can mean regrowth. For large areas, divide into sections and treat systematically to avoid missing spots.
Heat Application Technique: The boiling water must penetrate 1 inch deep to kill those stubborn bulbs. Use a watering can with a narrow spout for better control—pour slowly in a zigzag pattern starting from the outer edges and working inward. For stubborn patches, I double up by pouring in two passes. And here's a pro move: work on a calm day so steam doesn't drift onto your lawn or garden beds.
Monitoring Strategy: That 3-5 day wait between treatments is crucial—don't rush it! Onion grass bulbs can survive partial heat exposure. I check for regrowth by running my fingers lightly over the soil surface. If you see any green shoots after the first treatment, repeat immediately. For really tough patches, I add a layer of thick cardboard after the final treatment to block sunlight and prevent any dormant bulbs from sprouting.
Preventive Planting: Once you've cleared the area, don't just leave bare soil! Plant dense ground covers like creeping thyme or clover—they'll outcompete any remaining onion grass bulbs naturally. For pathways, I swear by corn gluten meal as a pre-emergent herbicide in early spring. It's organic and prevents weed seeds from germinating while letting existing plants thrive.
Pro Tips for Get Rid Of Onion Grass Naturally
- Real talk: This method works, but only if you nail these key details.
- Precision Marking: Don't just eyeball that onion grass patch!
- Heat Application Technique: The boiling water must penetrate 1 inch deep to kill those stubborn bulbs.
Frequently asked questions
How long does it take for boiling water to kill onion grass?
Onion grass typically dies within 1-3 days after applying boiling water, but full decomposition of the roots may take 1-2 weeks. Reapply boiling water if regrowth appears, as roots can be stubborn. For best results, treat on dry, sunny days to maximize effectiveness.
Is boiling water safe for my lawn or garden?
Boiling water is selective—it targets onion grass without harming most grass types (like Bermuda or Kentucky bluegrass) if applied carefully. However, avoid nearby plants (like flowers or veggies) since the heat can damage them. Test a small area first to check for sensitivity.
How often should I reapply boiling water for stubborn onion grass?
Reapply boiling water every 7-10 days for 2-3 weeks if the grass keeps returning. Focus on the entire root system, especially along sidewalks or driveways where it’s persistent. For heavy infestations, combine with vinegar or salt (diluted) for faster results.
What’s a natural alternative if boiling water isn’t working?
Try these non-boiling methods:
- Vinegar solution: Mix 1 gallon white vinegar + 1 cup salt + 1 tbsp dish soap. Spray directly on leaves (avoid desirable plants).
- Corn gluten meal: Apply as a pre-emergent in early spring to prevent seeds from sprouting.
- Manual removal: Dig out roots with a trowel—wear gloves! Check soil depth (roots can go 6+ inches deep).
Will onion grass grow back after treatment?
Yes, but not if you’re thorough! Onion grass spreads via rhizomes (underground stems), so you must kill all roots. After treatment, monitor the area for 3-6 months—dig up any new shoots immediately. For long-term prevention, improve soil health with compost to discourage regrowth.
Wrapping up and next steps
Getting rid of onion grass naturally doesn’t have to be a chore—just a few simple steps can restore your lawn to its full glory! 🌱 By using a boiling water barrier, you’re not only smothering those pesky roots but also keeping your yard chemical-free and eco-friendly.
Stay consistent, and soon, your lawn will be the envy of the neighborhood.
Ready to take action? Start by marking the affected areas and apply your DIY solution today. Your future self (and your lawn) will thank you!