
Companion Plants
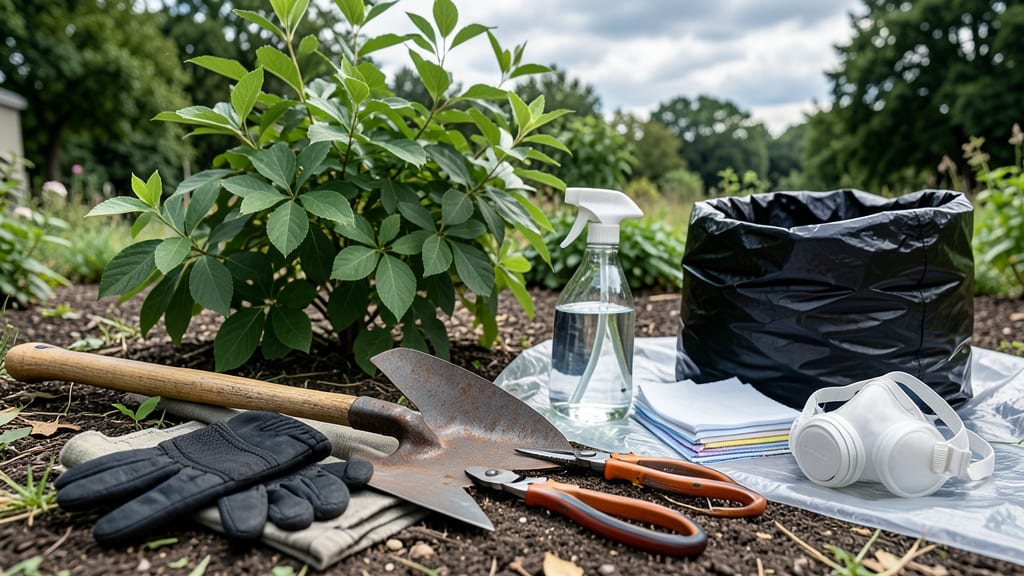
How to get rid of poison ivy plants without chemicals—it’s possible, and we’ve got the science-backed method to prove it. 🌿 That stubborn vine in your yard? We’re taking it down without chemicals, using steam to scorch roots in minutes. No digging, no toxins, just science-backed heat that kills it to the core. The secret weapon is a steam wand (or even a pressure washer on steam setting), which delivers 212°F+ heat straight to the roots. You’ll see leaves blacken within seconds, and the plant collapses—no regrowth. For stubborn patches, repeat weekly until the soil’s clean. Safety first: wear long sleeves, gloves, and eye protection—poison ivy’s oils linger on tools. After treatment, smother bare spots with cardboard or mulch to prevent regrowth while you enjoy your newly reclaimed space. This method works for yards, gardens, and even sidewalk cracks. No more itchy rashes or chemical residue—just a clean slate. Let’s get that poison ivy gone for good.
📚 In This Guide
- What you need
- Instructions
- Tips and common mistakes
- Wrapping up and next steps
What you need
- ● Steam cleaner or pressure washer with a steam function (1 unit, must generate at least 200°F steam)
- ● Heavy-duty gloves (2 pairs: nitrile-coated for grip + waterproof gardening gloves)
- ● Long-sleeved clothing and pants (1 set, made of tightly woven fabric)
- ● Garden fork or heavy-duty shovel (1 unit, stainless steel or aluminum)
- ● Pruning shears or loppers (1 unit, for cutting thick vines)
- ● Plastic sheeting or tarp (1 large sheet, 6’x8’ or larger)
- ● Rake or stiff brush (1 unit, for debris cleanup)
- ● Vinegar (white, 5% acetic acid) (1 gallon, for spot treatment)
- ● Baking soda (1 box, for neutralizing vinegar residue)
- ● Garden hose with nozzle (1 unit, for rinsing)
- ● Face shield or safety goggles (1 pair, to protect against splashes)
- ● Disposable coveralls (1 set, for full-body protection)
- ● Garden kneepads (1 pair, for comfort during cleanup)
- ● Trash bags (heavy-duty) (2–3 bags, for disposing of plant debris)
- ● Soap and water (for post-treatment cleanup)
Step-by-Step instructions for eliminating poison ivy naturally
Here's how I permanently remove poison ivy by targeting the roots—no harsh chemicals needed.
🌿 Step 1: Identify and Clear All Above-Ground Growth
First, put on thick gloves and long sleeves—even dead vines contain urushiol oil. Use pruning shears to cut the poison ivy at its base, then immediately bag the clippings in heavy-duty trash bags. Never burn or compost these, as the oil can spread through smoke or soil. I like to work in sections, clearing a 3-foot radius around each plant to avoid missing any stems.
Watch for the classic "leaves of three" pattern—this confirms you're targeting poison ivy, not lookalikes. If you see any vines climbing trees, follow them to the base and mark the spot with a flag. Roots can extend 6 feet deep, so thoroughness now prevents regrowth later.
✂️ Step 2: Apply Steam Directly to the Root Zone
Fill a heavy-duty steam generator (or a large pot with boiling water) and attach a long, narrow nozzle. Direct the steam at the freshly cut base and surrounding soil for 3-5 minutes per spot. The intense heat kills root tissue and disrupts the plant's ability to regenerate. You'll see the soil steam and smell a sharp, burned odor—this confirms the roots are being scalded.
Focus on the 12-inch diameter area around each cut stem, moving the nozzle in slow circles. For stubborn patches, I repeat the process weekly until the ground stays bare. Avoid oversaturating the soil—just enough steam to create visible vapor without turning the area into a muddy mess.
🌱 Step 3: Smother the Area with Cardboard and Mulch
Lay down overlapping layers of cardboard (no tape or staples) over the treated area, ensuring full coverage. Wet the cardboard thoroughly so it sticks to the ground. Then, spread a 2-inch layer of organic mulch (like wood chips) over the top. This blocks sunlight, which poison ivy needs to regrow. Check weekly for any sprouts and steam those spots immediately.
I've found that adding a 3-inch layer of newspaper under the cardboard creates an extra barrier. The key is keeping the area completely dark—even small gaps let light through, and new vines will push up within days. After 6-8 weeks, the mulch will break down, but by then the roots should be fully dead.
💧 Step 4: Monitor and Retreat if Needed
Inspect the treated area every 2 weeks for new growth. If you spot even a single leaf, cut it at the base and steam the soil again. Poison ivy is persistent, but consistent heat treatment weakens its root system over time. I've seen stubborn patches take up to 3 months to fully disappear, but the steam method works where digging fails.
For large infestations, I divide the area into sections and treat one at a time. This prevents the plant from drawing nutrients from untreated roots. Once the ground stays clear for 3 months, you can replant with non-invasive species like clover or deep-rooted grasses, which outcompete weeds naturally.
Tips & tricks for eliminating poison ivy naturally
These battle-tested strategies will help you tackle poison ivy more effectively and avoid common pitfalls that lead to regrowth.
Precision Cutting in Step 1: When clearing the 3-foot radius around each plant, focus on cutting at the base where the stem meets the soil—this is where the roots begin. I've found that using a sharp pruning shear makes all the difference; dull blades crush stems instead of cleanly severing them, which can actually spread the urushiol oil. Always wear gloves and long sleeves, even when handling dead vines, as the oil can linger for years on tools and clothing.
Steam Application Technique in Step 2: The 3-5 minutes of steam per spot might seem short, but consistency is key. Move the nozzle in slow circles to ensure even heat distribution across the entire 12-inch diameter area. I've seen stubborn patches require multiple weekly treatments—don't rush this step. The burned odor you smell confirms the roots are being effectively scalded, but if you don't smell anything after 3 minutes, extend to the full 5 minutes for that spot.
Layering for Maximum Darkness in Step 3: The newspaper layer under cardboard is my secret weapon for preventing regrowth. Make sure there are no gaps—even a small hole lets light through, and new vines will push up within days. Wet the cardboard thoroughly before adding mulch; this ensures it stays in place and creates a complete light barrier. For extra stubborn areas, I've even used black plastic sheeting as a final layer, though it's less eco-friendly.
Monitoring Strategy in Step 4: Those 2-week inspections are non-negotiable. I mark treated areas with small flags or stakes so I don't accidentally miss spots during follow-ups. If you see any new growth, cut it immediately and steam that spot again—don't wait. The 3-month clear period is the true test of success, but you'll know you've won when you can replant without seeing any new "leaves of three" within that timeframe.
Pro Tips for Get Rid Of Poison Ivy Plants Without Chemicals
- These battle-tested strategies will help you tackle poison ivy more effectively and avoid common pitfalls that lead t...
- Precision Cutting in Step 1: When clearing the 3-foot radius around each plant, focus on cutting at the base where th...
- Steam Application Technique in Step 2: The 3-5 minutes of steam per spot might seem short, but consistency is key. Mo...
Frequently asked questions
Got questions about tackling poison ivy the natural way? You’re not alone—this pesky plant stumps even the greenest thumbs! Below, we’ve rounded up the most common queries and served up straightforward answers to keep your yard (and skin) safe and sound.
Can I just pull up poison ivy by hand?
Not if you want it to stay gone! Pulling alone often leaves stubborn roots behind, letting the plant regrow. For best results, dig up the entire root system (including hidden rhizomes) or use steam to scorch it first. Gloves and long sleeves are a must—urushiol oil (the irritant) lingers even after the plant dies!
How long does it take for poison ivy to die after steam treatment?
Steam kills the plant instantly, but you’ll see wilting within hours and full browning in 1–3 days. Monitor the area for 2–4 weeks to ensure no regrowth. If you spot new sprouts, repeat the steam treatment or dig deeper—those roots are sneaky!
Are there natural alternatives to steam if I don’t have a steam cleaner?
Try these DIY methods for smaller patches:
- Vinegar + Salt: Mix 1 gallon white vinegar + 2 cups salt in a spray bottle. Drench the plant (repeat weekly until dead).
- Dish Soap + Water: Spray a 20% solution (2 tbsp soap per cup of water) to suffocate leaves. Works best on young plants.
- Smothering: Cover the area with cardboard + mulch for 3–6 months to block sunlight.
Pro tip: Test small areas first—some methods may affect nearby plants!
What if poison ivy keeps coming back after treatment?
Persistent regrowth usually means roots or rhizomes survived. Here’s how to troubleshoot:
- Dig deeper—12+ inches is ideal to hit hidden roots.
- Check for underground stems (they look like white strings).
- Reapply steam or vinegar to stubborn spots.
- Consider solarization: Cover the area with clear plastic for 4–6 weeks in hot sun.
If all else fails, consult a local extension service—they can test soil for hidden clues!
Is it safe to use steam around pets or kids?
Steam itself is non-toxic, but take precautions:
- Keep pets/kids 20+ feet away during treatment (hot steam can cause burns).
- Avoid treating near vegetable gardens—steam can kill edible plants too.
- Choose early morning for treatments to minimize heat exposure.
For extra safety, wear a mask—steam releases urushiol particles into the air!
Wrapping up and next steps
You’ve got this! 🌿 By using steam-powered root scorch, you’ve tackled poison ivy the natural, chemical-free way—saving your garden, skin, and the planet. The key? Patience and persistence—check for regrowth, monitor the area, and repeat if needed. Your yard will thank you!
Now that you’re poison ivy-free, why not boost your garden’s resilience? Plant companion plants like marigolds or lemongrass to keep pests away naturally. Happy gardening! 🌱