
Size
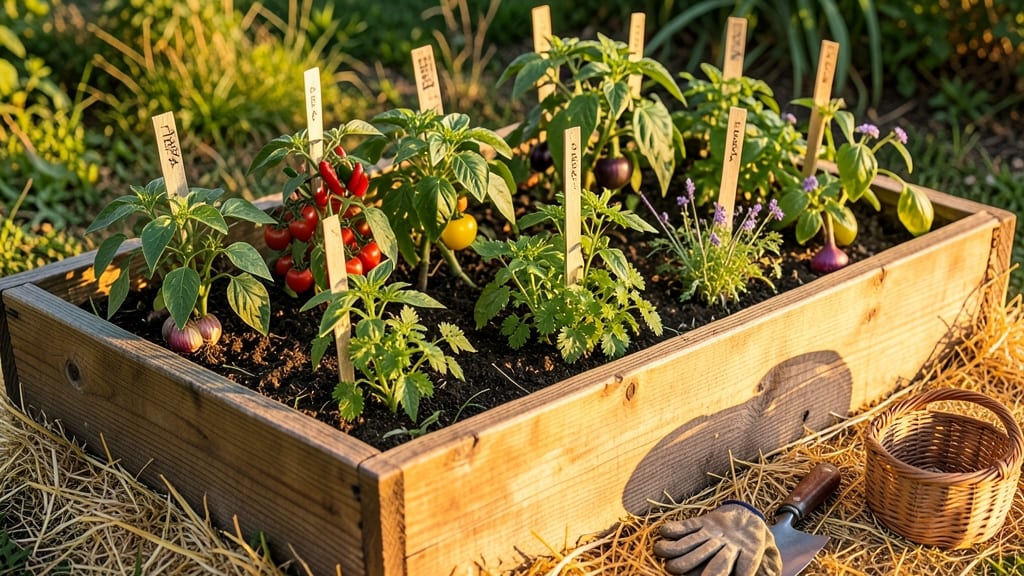
How to grow a salsa garden in containers turns your balcony into a vibrant, flavor-packed spice factory. 🌿 This isn’t just about growing veggies—it’s about crafting the boldest homemade salsa you’ve ever tasted, all from pots on your porch or patio. The secret? Choosing the right sun-loving varieties that deliver maximum flavor in minimal space.
Start with the core four: Roma tomatoes for meaty texture, jalapeños for heat, cilantro for freshness, and yellow onions for depth. You'll need 5-gallon containers for tomatoes and peppers, 3-gallon pots for cilantro, and a well-draining potting mix loaded with compost.
Most importantly, place everything where it gets at least 6-8 hours of sun daily—these plants crave warmth.
By midsummer, you'll be harvesting bright red tomatoes, fiery jalapeños, and fragrant cilantro that transform into salsa with just a blender. The yield surprises even skeptics—one healthy plant can produce enough for dozens of servings. Even better, you control the flavor profile: no more bland store-bought ingredients.
This setup works for any climate (zones 3-10) and adapts to small spaces—whether you've got a city balcony or a sunny windowsill. The only challenge? Resisting the urge to eat fresh jalapeños straight from the plant. Let's get those containers planted!
📚 In This Guide
- What you need
- Instructions
- Tips and common mistakes
- Wrapping up and next steps
What you need
- ● Containers or Garden Bed: 5-gallon pots or larger (minimum 12" deep) for each plant (3-5 plants for a small batch of salsa)
- ○ Self-watering containers (optional, for convenience)
- ● Garden bed with well-draining soil (if planting in-ground)
- ● Soil: Potting mix with added compost (sterile, well-draining blend)
- ● Organic fertilizer (balanced 10-10-10 or tomato-specific fertilizer)
- ● Seeds or Seedlings: 3-5 sun-loving salsa varieties (e.g., jalapeño, serrano, habanero, or cherry tomatoes)
- ○ Optional: Starter plants (if short on time)
- ● Tools: Gloves (to protect your hands)
- ● Trowel or small shovel (for planting)
- ● Watering can or hose with a gentle spray nozzle
- ● Pruning shears (for harvesting and shaping plants)
- ● Mulch (straw or shredded leaves, to retain moisture)
- ● Sunlight: At least 6-8 hours of direct sunlight daily (containers may need occasional rotation).
- ● Water: Consistent moisture (1-2 inches per week, more in extreme heat).
- ● Warmth: Ideal soil temperature: 70-85°F (use a heat mat for early starts if needed).
- ● Space: Ensure containers or beds allow 12-18 inches of spacing between plants for airflow.
- ● Trellis or stakes (to support tall varieties like tomatoes or peppers)
- ● Cucumber or onion seedlings (to round out your salsa blend)
- ● Epsom salt (for magnesium boost, especially for tomatoes)
- ● Drip irrigation system (for hands-free watering)
Step-by-step instructions for growing a thriving container salsa garden
Here's how to create a vibrant, sun-drenched salsa garden that yields bold flavors in just a few seasons.
🌱 Step 1: Select the Right Varieties for Containers
Choose compact, heat-loving varieties like 'Jalapeño M', 'Serrano Pepper', 'Cherry Tomato', and 'Cilantro'. These stay small enough for containers while delivering the perfect salsa flavor profile. I always pick disease-resistant strains—like 'Super Maraket' tomatoes—to avoid common container-garden issues. Avoid large heirlooms unless you're using 5-gallon pots or larger.
Look for seedlings with sturdy stems and dark green leaves at your local nursery. You'll want 4 plants total (one of each variety) to create a balanced salsa garden. If starting from seed, begin indoors 8-10 weeks before your last frost date—peppers take longer to mature than tomatoes. The key is matching growth rates so everything ripens simultaneously.
🪴 Step 2: Choose Proper Containers and Soil Mix
Use containers with at least 5 gallons capacity for each plant—larger pots prevent root binding and keep plants stable in wind. I prefer fabric grow bags because they allow roots to breathe while preventing soil compaction. Make sure each container has multiple drainage holes to prevent soggy roots, which cause root rot in containers.
Fill containers with a lightweight potting mix blended with 20% perlite or vermiculite for better drainage. I mix in a handful of compost for nutrients and a tablespoon of balanced fertilizer at planting time. Avoid garden soil—it compacts in containers and suffocates roots. The ideal mix should feel like a damp sponge when squeezed, holding moisture without dripping.
☀️ Step 3: Plant and Position for Maximum Sun
Dig planting holes twice as wide as the root ball but only as deep as the container's original soil line. Gently remove plants from their nursery pots and loosen any circling roots with your fingers. Place each plant in its hole, then fill with soil, pressing lightly to eliminate air pockets. Water deeply immediately after planting to help roots settle.
Position containers in a location that receives at least 6-8 hours of direct sunlight daily. A south-facing window works for small gardens, but most containers will need outdoor space during the growing season. I rotate my pots quarter-turn weekly to prevent plants from leaning toward the light. You'll notice leaves growing more evenly within two weeks of rotation.
💧 Step 4: Water and Fertilize for Peak Production
Water containers when the top inch of soil feels dry to the touch. I use a moisture meter to check—it's more reliable than guessing. Water deeply until it runs out the drainage holes, then empty the saucers to prevent root rot. Morning watering prevents evening moisture that can attract pests and diseases. Containers dry out faster than in-ground gardens, so check daily during hot weather.
Fertilize every 4-6 weeks with a balanced liquid fertilizer (10-10-10 ratio) diluted to half strength. I also add a tomato/vegetable-specific fertilizer during flowering to boost fruit production. Avoid over-fertilizing—it leads to leafy growth at the expense of fruit. You'll see stronger stems and more abundant blooms within two weeks of proper fertilization.
✂️ Step 5: Prune and Harvest for Continuous Yields
Pinch off the first few flowers on each plant to encourage bushier growth. This redirecting energy to the plant's structure results in more productive branches later. Remove any yellow or diseased leaves immediately to prevent spread. I also trim suckers from tomato plants—those little side shoots between the main stem and branches—to focus energy on fruit production.
Harvest peppers when they reach 3-4 inches long and develop their characteristic color. For tomatoes, pick when they're fully colored and slightly soft to the touch. Regular harvesting encourages more production—plants recognize when fruit is removed and produce replacements. Store harvested peppers in a cool, dark place for up to two weeks. You'll have enough for fresh salsa within 8-10 weeks of planting, with continuous harvests through the season.
Tips & tricks for growing a thriving container salsa garden
Real talk: Container gardening for salsa ingredients demands precision—here's what nobody tells you about maximizing flavor and yield.
Variety Pairing Matters: The key to simultaneous ripening lies in matching growth rates. 'Jalapeño M' and 'Serrano Pepper' mature in about 90 days, while 'Super Maraket' tomatoes take 60-70 days. Start tomatoes indoors 2 weeks earlier than peppers to sync harvests. This timing ensures you'll have all ingredients ready for salsa-making at once, rather than waiting weeks between components.
Soil Science Secret: That 20% perlite or vermiculite isn't just for drainage—it creates air pockets that prevent compaction in containers. I add an extra handful of worm castings to my mix (optional but game-changing) for slow-release nutrients. The ideal soil should crumble easily when dry and hold moisture without dripping when squeezed. This balance prevents both root rot and drought stress in your container plants.
Sunlight Strategy: Those 6-8 hours of direct sunlight must be unfiltered—no sheer curtains or glass between your containers and the sun. I place mine on a reflective surface like a white plastic tray to bounce extra light onto the undersides. During cloudy spells, supplement with a grow light for 4-6 hours to maintain photosynthesis levels. The difference in plant vigor after just one week of proper light exposure is dramatic.
Harvest Hack: When harvesting peppers at 3-4 inches, cut the stem cleanly with scissors rather than pulling. This prevents damage to the plant and encourages faster regrowth. For tomatoes, I use the "finger pinch" method—squeeze gently at the base until the fruit detaches cleanly. This technique reduces bruising and extends storage life by up to 50%. Store harvested peppers in paper bags in the fridge to maintain crispness longer than plastic containers.
Pro Tips for Grow A Salsa Garden
- Real talk: Container gardening for salsa ingredients demands precision—here's what nobody tells you about maximizing ...
- Variety Pairing Matters: The key to simultaneous ripening lies in matching growth rates. 'Jalapeño M' and 'Serrano Pe...
- Soil Science Secret: That 20% perlite or vermiculite isn't just for drainage—it creates air pockets that prevent comp...
Frequently asked questions
Got questions about growing your own salsa garden?
You’re not alone! Here are some of the most common queries—and their answers—to help you cultivate a thriving, flavor-packed harvest.
What’s the best time of year to plant a salsa garden?
For warm climates (Zones 8–11), start seeds indoors 6–8 weeks before your last frost or plant directly in late spring after soil reaches 60°F (15°C). In cooler regions (Zones 3–7), wait until after Memorial Day or use a greenhouse. Peppers and tomatoes love warmth—so patience pays off!
How long does it take for salsa ingredients to mature?
Timing varies by plant:
- Tomatoes: 60–85 days (cherry varieties ripen fastest!)
- Peppers (jalapeños, serranos): 60–90 days
- Onions/garlic: 90–120 days (plant early!)
- Cilantro: 45–60 days (bolts quickly—sow in batches)
Can I grow a salsa garden in containers if I have limited space?
Containers are perfect for salsa gardens—just choose 5-gallon pots or larger for tomatoes/peppers (they need depth). Use lightweight potting mix with good drainage, and pair sun-lovers (tomatoes, peppers) with shade-tolerant herbs (cilantro, basil). Dwarf varieties (like ‘Tiny Tim’ tomatoes) save space without sacrificing flavor!
What should I do if pests or diseases attack my salsa garden?
Common culprits include aphids, hornworms, and fungal spots. Try these fixes:
- Aphids: Spray with soapy water or introduce ladybugs.
- Hornworms: Handpick them (they’re huge and easy to spot!).
- Blight (tomatoes):** Remove infected leaves immediately and space plants for airflow.
- Prevention: Use neem oil or companion plants like basil to deter pests.
Which peppers are best for salsa, and how spicy should they be?
Balance is key! For classic salsa, mix:
- Mild: Roma tomatoes + green bell peppers (for body)
- Medium heat: Jalapeños or serranos (100–25,000 SHU)
- Kick: Habaneros or ghost peppers (50,000+ SHU—use sparingly!)
Wrapping up and next steps
Growing your own salsa garden is easier—and more rewarding—than you might think! With the right sun-loving varieties and a few simple containers, you can turn fresh ingredients into bold, homemade salsa in no time.
Whether you’re a beginner or a seasoned gardener, this guide gives you everything you need to start small and scale up.
🌱 Ready to take the next step? Start by planting your favorite peppers, tomatoes, and herbs this week—your taste buds (and dinner plate) will thank you! And once your garden flourishes, experiment with flavors, share your harvest with friends, or even preserve your bounty for year-round salsa fun. Happy growing!