
Size
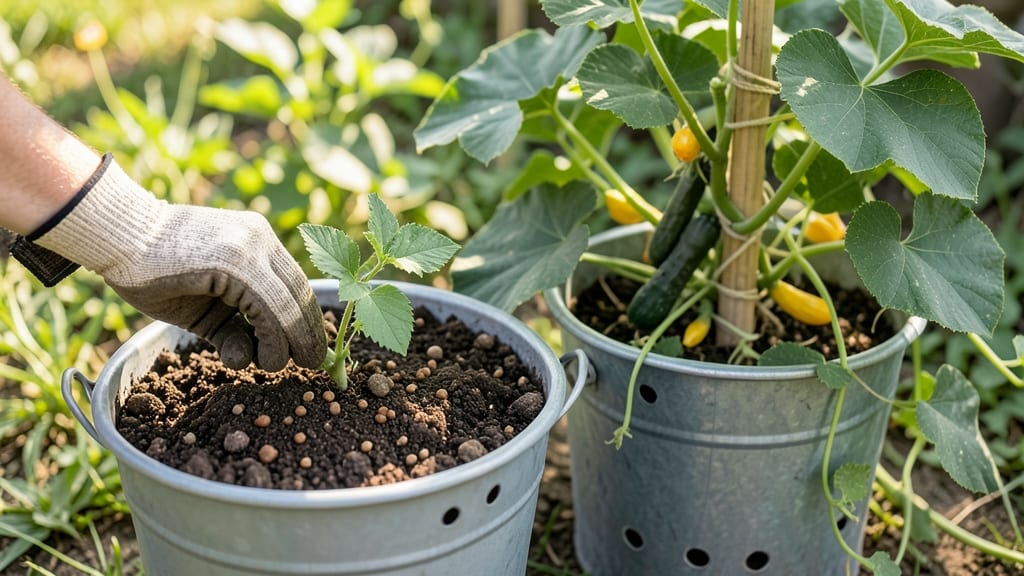
How to grow cucumbers in a 5-gallon bucket in minutes? 🌱 I’ve grown them this way for three summers straight, and the secret isn’t fancy equipment—it’s matching the plant’s needs to its tiny space. Most people assume cucumbers need room to sprawl, but with the right setup, you’ll get 10-15 pounds of harvests from a single container.
The trick starts with fast-draining soil (mix potting mix with perlite) and a sturdy trellis to keep vines climbing upward. You’ll need a bucket with drainage holes, a watering can with a narrow spout, and one bushy cucumber plant—no overcrowding here.
Sunlight is non-negotiable: place it where it gets 6+ hours of direct light daily, or supplement with a grow light for 4-6 hours.
By mid-summer, you’ll be snipping fresh cucumbers straight from your balcony or patio. The plants stay compact, productive, and pest-resistant when given proper airflow, and the vertical growth keeps them out of sight (and out of reach of critters). Plus, no more bending over—just reach up and pick!
This method works in any climate (just adjust watering for heat/drought) and scales to multiple buckets for bigger harvests. The only downside? You might forget to save a few for salads after seeing how easy it is. Let’s get those buckets prepped!
📚 In This Guide
- What you need
- Instructions
- Tips and common mistakes
- Wrapping up and next steps
What you need
- ● 5-gallon bucket – Drill drainage holes in the bottom (¼-inch diameter, ~6-8 holes). Pro tip: Use a food-grade bucket for safety!
- ● Potting mix – 3-4 gallons of high-quality, well-draining soil (look for a mix labeled for containers or vegetables).
- ● Cucumber seeds or seedling – Choose a compact variety like ‘Bush Champion’ or ‘Spacemaster’ (1-2 seeds or 1 seedling per bucket).
- ● Drainage tray or saucer – To catch excess water and prevent messes.
- ● Watering can or hose with a gentle nozzle – For consistent moisture without overwatering.
- ● Fertilizer – A balanced, water-soluble fertilizer (e.g., 10-10-10) or compost tea for organic growth.
- ○ Support structure – A small trellis, cage, or stakes (optional but recommended for vining varieties to save space!).
- ● Mulch – Straw or shredded leaves to retain moisture and regulate soil temperature.
- ● Slow-release fertilizer granules – Mix into the soil at planting for steady nutrition.
- ● pH test kit – Ensure your soil is slightly acidic to neutral (6.0–7.0 pH).
- ● Grow lights or sunny windowsill – If your bucket won’t get 6+ hours of sunlight daily.
- ● Pruning shears – For trimming excess leaves or vines to encourage productivity.
Step-by-Step instructions for growing cucumbers in a 5-Gallon bucket
Here's my foolproof method for growing vigorous, productive cucumber vines in just a few square feet of space.
🪴 Step 1: Prepare Your Container and Drainage System
Start with a clean, 5-gallon bucket—I prefer those with sturdy handles for easy moving. Drill four 1-inch drainage holes near the bottom if they don't exist. Line the bottom with 2 inches of gravel to create an air gap and prevent root rot. This ensures excess water drains freely while keeping roots oxygenated.
Next, add 1 inch of coarse perlite on top of the gravel. This layer improves drainage and prevents soil compaction. The perlite will look like tiny white pebbles—it's lightweight but creates crucial air pockets. Don't skip this step; cucumbers despise soggy roots and will wilt or develop fungal diseases if water pools at the base.
🌱 Step 2: Fill With Lightweight, Fertile Soil Mix
Use 3 gallons of high-quality potting mix designed for vegetables—never garden soil. I blend mine with ½ cup of compost and ¼ cup of balanced 10-10-10 fertilizer to give the cucumbers a nutrient boost from day one. Fill the bucket to 1 inch below the rim, leaving room for watering.
Press the soil down gently but firmly—just enough to remove air pockets without compacting it. The surface should feel like a well-tended garden bed: firm to the touch but still crumbly. Tap the sides of the bucket once or twice to settle everything evenly. This ensures roots have immediate access to moisture and nutrients.
☀️ Step 3: Plant Your Cucumber and Provide Support
Dig a 2-inch deep hole in the center of the bucket and place one cucumber seedling (or 2-3 seeds if starting from scratch) about 1 inch deep. If using seeds, plant them ½ inch deep and space them 2 inches apart. Cover with soil and water gently until it's evenly moist. Cucumbers germinate best in 70-85°F soil, so if your climate runs cooler, consider using a seedling heat mat.
Immediately install a 5-foot tall trellis or sturdy stake in the bucket. Cucumbers are vining plants that need vertical support to save space and improve air circulation. I use a 3-inch wide mesh trellis that wraps around the bucket—it's sturdy enough to handle heavy vines and fruit. Gently tie the main stem to the trellis as it grows using soft plant ties.
💧 Step 4: Water and Fertilize for Maximum Production
Water the cucumber deeply every morning—about 1 cup of water—until it drains freely from the bottom holes. The soil should stay consistently moist but not waterlogged. Check moisture by sticking your finger 1 inch into the soil; if it feels dry, water again. Overwatering is the fastest way to invite pests and diseases in a container setup.
Feed your cucumber with liquid fertilizer every 2 weeks once vines start climbing. I use a fish emulsion or seaweed extract for organic growth—it's gentle but packed with micronutrients. Dilute it to half-strength to avoid burning the roots. You'll notice new leaves emerging within 3-5 days after fertilizing; that's your cue everything's working.
✂️ Step 5: Prune and Harvest for Continuous Yield
Once the main vine reaches the top of the trellis, pinch off the growing tip to encourage bushier growth. This redirects energy into producing more side shoots, each of which will bear fruit. Remove any yellow or diseased leaves immediately—they harbor pests and diseases that spread rapidly in confined spaces. Use clean, sharp pruners and sterilize them with rubbing alcohol between cuts.
Harvest cucumbers when they're 6-8 inches long and still firm to the touch. Pick in the morning when fruits are cool and crisp. Regular harvesting—every 2-3 days—triggers more production. If you leave cucumbers on the vine too long, they'll turn bitter and the plant will stop flowering. I promise, the first harvest will taste sweeter than anything from the store.
Tips & tricks for growing cucumbers in a 5-Gallon bucket
Here's what I learned after growing cucumbers in containers for years—these tricks make all the difference between a struggling plant and a thriving vine.
Container Selection: Choose a bucket with sturdy handles and thick walls to prevent cracking under the plant's weight as it grows. I've found that plastic buckets with ribs hold up better than thin metal ones, especially when fully watered. If your bucket doesn't have handles, wrap sturdy rope around the sides for easy moving—you'll need to reposition it for optimal sunlight as the season progresses.
Soil Preparation: In Step 2, when mixing your 3 gallons of potting soil, consider adding a handful of worm castings along with the compost. These microscopic nutrient powerhouses create an ideal environment for root development. I also recommend mixing in a tablespoon of mycorrhizal fungi—it helps roots absorb nutrients more efficiently. The key is to create a soil mix that's airy yet moisture-retentive, exactly what cucumbers crave in containers.
Temperature Management: The 70-85°F soil temperature range mentioned in Step 3 is crucial for germination. To ensure consistent warmth, place your bucket on a heat mat during cool evenings or in chilly climates. I've even used a black plastic bucket wrapped around the outside to absorb and radiate heat during the day. Monitor soil temperature with a small thermometer—cucumbers won't germinate well below 65°F, and temperatures above 90°F can stress young seedlings.
Harvesting Strategy: When harvesting every 2-3 days as suggested in Step 5, use a sharp pair of pruning shears instead of pulling cucumbers by hand. This prevents damaging the vine and allows for cleaner cuts. I also recommend harvesting first thing in the morning when cucumbers are at their crispest. Store them in the refrigerator's crisper drawer to maintain freshness for up to 5 days—this gives you time to enjoy your harvest before needing to pick again.
Pro Tips for Grow Cucumbers In A 5 Gallon Bucket
- Here's what I learned after growing cucumbers in containers for years—these tricks make all the difference between a struggling plant and a thriving vine.
- Container Selection: Choose a bucket with sturdy handles and thick walls to prevent cracking under the plant's weight as it grows.
- Soil Preparation: In Step 2, when mixing your 3 gallons of potting soil, consider adding a handful of worm castings along with the compost.
Frequently asked questions
Got questions about growing cucumbers in a 5-gallon bucket?
You’re not alone! Here are answers to the most common queries to help you crush your container gardening game.
Can I grow cucumbers in a 5-gallon bucket year-round?
Cucumbers thrive in warm weather (60–90°F) and need at least 6–8 hours of sunlight daily. In cooler climates, grow them in spring/summer or use a greenhouse. If you’re in a warm zone, extend the season with shade cloth during extreme heat or cold snaps.
What’s the best cucumber variety for a 5-gallon bucket?
Opt for compact, bush-type varieties like ‘Bush Champion,’ ‘Spacemaster,’ or ‘Straight Eight.’ These stay small, produce prolifically, and avoid overcrowding. Avoid vining types like ‘Marketmore’—they’ll outgrow the space fast!
Why are my cucumber leaves turning yellow?
Yellow leaves usually signal overwatering, nutrient deficiency, or poor drainage. Check your bucket’s drainage holes first! If the soil is soggy, let it dry out slightly. Add a balanced fertilizer (like 10-10-10) every 2–3 weeks if leaves look pale or stunted.
Do I need to prune cucumbers in a bucket?
Pruning keeps your plants healthy and boosts airflow. Pinch off yellow leaves or weak vines regularly. For bush types, trim side shoots to encourage fruit production. For vining varieties (if space allows), train vines upward with a trellis to save space and improve harvests.
Can I reuse the same 5-gallon bucket for another crop?
After harvesting, clean the bucket with a 10% bleach solution (or vinegar) to kill pests/diseases. Let it dry completely before replanting. Buckets are great for peppers, herbs, or lettuce next—just adjust drainage and sunlight needs per plant.
Wrapping up and next steps
Growing cucumbers in a 5-gallon bucket proves that small spaces don’t mean small harvests—just a little creativity! With the right setup, sunlight, and care, you’ll enjoy fresh, crisp cucumbers in no time. 🌱
Ready to take the next step? Start with one bucket, experiment with varieties, and soon you’ll be expanding your urban garden like a pro. Happy growing—and may your vines always run wild (but neatly)!