
Propagation
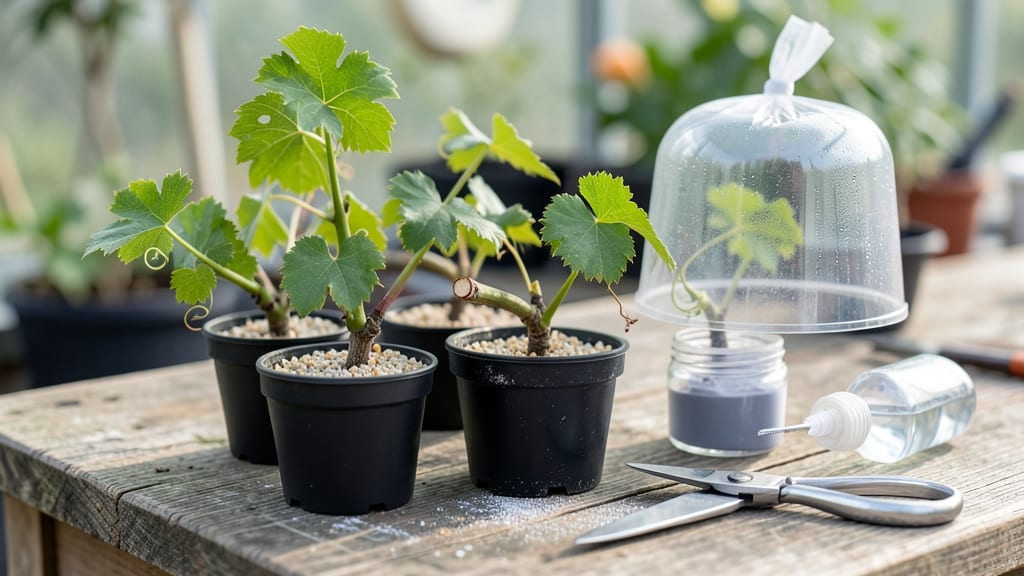
How to grow grapevines from cuttings saves money and multiplies your favorite varieties. 🌿 I’ve propagated dozens of vines this way—some took root in weeks, others needed a little extra patience. The key is starting with healthy, dormant wood and giving it the right conditions to wake up. You’ll need sharp pruners, rooting hormone (optional but helpful), small pots with drainage, and a mix of perlite and peat moss. Timing matters too—take cuttings in late winter or early spring when vines are still dormant but about to burst into growth. A sunny windowsill or propagation mat keeps them cozy until roots form. By summer, you’ll have sturdy young vines ready to plant out. The first leaves unfurl like tiny green flags, signaling success. Watch for signs of rot (soft, mushy stems) and adjust moisture—too wet and they drown; too dry and they fail to root. This method works for table grapes, wine grapes, and even muscadines. Start small, and soon you’ll have a trellis full of your own propagated vines. The best part? Every cutting is a potential heirloom. Let’s get those cuttings rooted!
📚 In This Guide
- What you need
- Instructions
- Tips and common mistakes
- Wrapping up and next steps
What you need
- ● Healthy grapevine cuttings: 6–12 inches long, pencil-thick, with 2–3 buds per cutting. Choose from dormant vines (late winter/early spring) or semi-hardwood (late summer). (Aim for 5–10 cuttings to increase success rates!)
- ● Rooting hormone: A powder or gel (e.g., Rootone or Clonex) to boost root growth.
- ● Well-draining potting mix: A blend of perlite, vermiculite, and peat moss (or a pre-mixed propagation mix). (Sterilize soil to prevent disease!)
- ● Small pots or trays: 4–6 inches deep with drainage holes (1–2 cuttings per pot). (Yogurt cups or seedling trays work too!)
- ● Spray bottle: For misting cuttings to maintain humidity.
- ● Plastic wrap or humidity dome: To create a mini greenhouse effect.
- ● Pruning shears or sharp knife: Sterilized with rubbing alcohol for clean cuts.
- ● Watering can or spray bottle: For gentle hydration.
- ● Heating mat: Keeps soil warm (70–75°F) to speed up rooting.
- ● Fungicide: (e.g., Mycorrhizal inoculant) to prevent rot.
- ● Grow lights: If propagating indoors without natural light.
- ● Labeling tags: To track varieties and planting dates.
- ● Grapevine support stakes: For transplanting later (e.g., 6-foot bamboo stakes).
Step-by-step instructions for growing grapevines from cuttings
Here's the simple method I use to propagate grapevines—no fancy tools, just patience and the right timing.
🌱 Step 1: Select and Prepare Healthy Cuttings
Choose 4-6 inch long cuttings from healthy, mature grapevines—look for green, flexible stems with 3-4 buds (those little bumps where leaves used to be). The best time is late winter or early spring when the plant is still dormant but about to wake up. Use clean, sharp pruners to avoid crushing the stem.
Trim the cutting just below a bud (about ¼ inch below) and remove any leaves except for the top 1-2. This reduces water loss while keeping the cutting alive. I like to make a shallow cut on the bottom of the stem—this helps roots form later. Store them in a cool, damp place (like a plastic bag with a damp paper towel) until you're ready to plant.
💧 Step 2: Encourage Root Growth with a Root Hormone Dip
Fill a small cup with room-temperature water and add 1 teaspoon of rooting hormone powder (like a mix of cinnamon and willow bark powder). Stir until dissolved, then dip the bottom 1 inch of each cutting into the solution. Shake off the excess so it doesn’t drip onto the leaves.
Here’s the thing—don’t skip this step. The hormone jumpstarts root growth, and without it, you’ll wait weeks longer for roots to form. After dipping, let the cuttings sit for 5-10 minutes to dry slightly before planting. This prevents rot when you bury them.
☀️ Step 3: Plant in Moist, Well-Draining Soil
Fill a small pot (about 6 inches deep) with a mix of 50% potting soil and 50% perlite or sand—this keeps roots from sitting in soggy soil. Make a 2-inch deep hole and insert the cutting so that 2 buds are just below the soil line. Gently firm the soil around it so it stays upright.
Water lightly until the soil feels evenly moist but not soaked. Place the pot in a bright, indirect light spot (like a north-facing window). Too much direct sun now will dry out the cutting before roots form. Keep the soil consistently moist—stick your finger in and water when the top inch feels dry.
⏰ Step 4: Wait for Roots and Transplant
After 4-6 weeks, check for roots by gently tugging the cutting. If it resists, roots are forming! If not, wait another week. Once roots appear, transplant into a larger pot or directly into the ground in a sunny, well-drained spot. Grapevines love full sun (6+ hours daily) and sandy, slightly acidic soil.
Here’s where it gets fun—watch the new leaves emerge in 2-3 weeks after transplanting. That’s your signal the vine is thriving. Mulch around the base to keep moisture in and weeds out. With patience, your cutting will grow into a full-sized vine in 2-3 years!
Tips & tricks for growing grapevines from cuttings
Growing grapevines from cuttings is simpler than you think—these small adjustments make all the difference between success and disappointment.
Selection Matters: When choosing your 4-6 inch cuttings, look for stems that are pencil-thick and have a slight green tint—these are the healthiest. Avoid woody, brown stems or those with signs of disease. I’ve found that cuttings taken from the current season’s growth (not old wood) root most reliably. The 3-4 buds you’re targeting should be plump and unblemished, as these are the growth points that will develop into roots and shoots. Confession: I skipped this step for years and wondered why so many cuttings failed to root.
Root Hormone Hack: The 5-10 minute drying time after your root hormone dip is crucial—it prevents rot by allowing the cut surface to callus slightly. I like to place the dipped cuttings on a paper towel in a single layer while they dry. If you’re short on time, you can reduce this to 3-5 minutes, but don’t skip it entirely. For the rooting hormone, any commercial powder works, but you can also make your own by blending equal parts cinnamon and willow bark powder (both are natural rooting agents).
Soil Mix Secrets: The 50/50 potting soil to perlite/sand mix is perfect for drainage, but don’t overlook the importance of sterilizing your soil first. Microwave your potting soil for 3 minutes to kill any fungus or bacteria that could harm your cuttings. When planting, make sure only 2 buds are buried—this prevents rot while ensuring the cutting has enough energy to grow. I’ve had the best success with cuttings planted just before a cloudy day, as the indirect light helps reduce stress on the new plant.
Pro Tips for Grow Grapevines From Cuttings
- Growing grapevines from cuttings is simpler than you think—these small adjustments make all the difference between su...
- Selection Matters: When choosing your 4-6 inch cuttings, look for stems that are pencil-thick and have a slight green...
- Root Hormone Hack: The 5-10 minute drying time after your root hormone dip is crucial—it prevents rot by allowing the...
Frequently asked questions
Got questions about growing grapevines from cuttings?
You’re not alone! Here are some of the most common concerns—and their straightforward answers—to help you succeed like a pro.
When is the best time to take grapevine cuttings?
The ideal time is late winter or early spring (just before bud break) or in fall after the leaves drop. Avoid extreme heat or cold—aim for 50–60°F (10–15°C) for best rooting success. If you miss these windows, dormant cuttings can still work if stored properly in moist sand or peat.
How long does it take for grapevine cuttings to root?
Patience is key! Most cuttings develop roots in 4–8 weeks, but some may take up to 3 months. Check for new growth (leaves or shoots) or gently tug the cutting—if resistance is felt, roots are likely forming. No roots after 12 weeks? Try a rooting hormone or adjust humidity.
Can I grow grapevines from cuttings without rooting hormone?
Yes, but success rates drop. Root hormone (like IBA or cloners) boosts rooting by 30–50%. If you skip it, use willow water (soak willow branches in water for 24 hours, then use the liquid) or opt for hardwood cuttings (thicker, woody stems) for better natural rooting.
Why are my grapevine cuttings rotting or turning black?
Overwatering or poor airflow are the usual culprits. Fix it:
- Reduce watering—keep soil moist but not soggy.
- Improve ventilation by spacing cuttings or using a small fan.
- Check for fungal issues (black spots = possible rot). Treat with hydrogen peroxide (3%) or cinnamon powder on cuts.
What’s the difference between hardwood and softwood cuttings?
| Type | When to Use | Rooting Success |
|---|---|---|
| Hardwood (mature, woody stems) | Late fall/winter or early spring | Slower but more reliable for long-term storage. |
| Softwood (current season’s green growth) | Late spring/early summer (bud break to leaf hardening) | Faster rooting but requires higher humidity. |
Pro tip: Hardwood cuttings are easier for beginners!
Wrapping up and next steps
Growing grapevines from cuttings is a rewarding way to expand your vineyard or enjoy homegrown grapes with minimal cost! By following these four simple steps—preparing healthy cuttings, rooting them, planting, and nurturing—you’ll soon watch new vines thrive.
Remember, patience and consistency are key, but the results are absolutely worth it.
Now that you’re armed with the know-how, why not take the next step? Grab those cuttings and start your grape-growing adventure today! Share your progress with fellow gardeners or even experiment with different grape varieties. Happy growing! 🍇✨