
Size
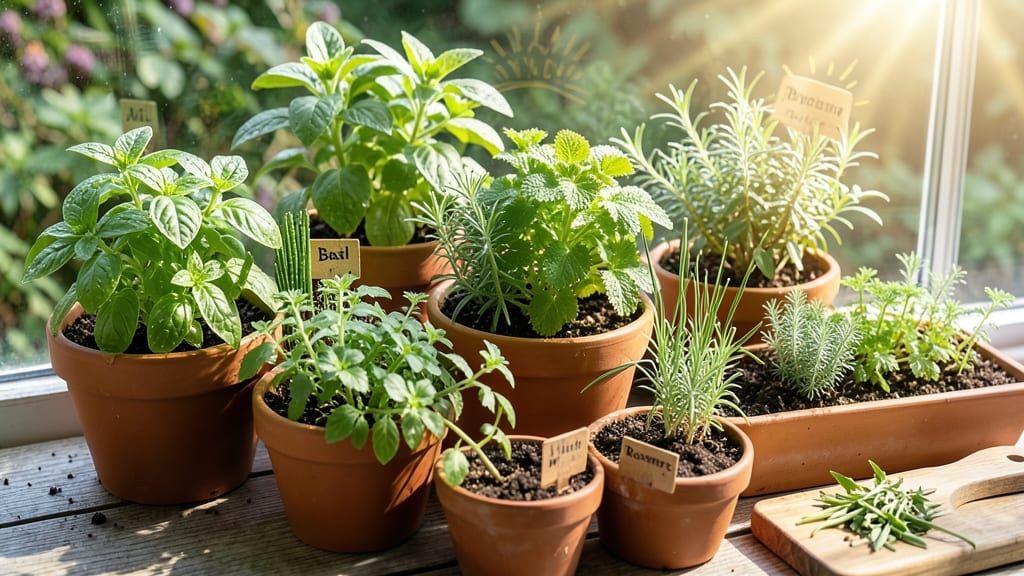
How to grow spices at home means fresh basil, mint, and rosemary anytime—no grocery store trip required. 🌿 I’ve turned my kitchen windowsill into a fragrant herb garden that saves money and adds flavor to every meal. The secret? Matching each spice to its ideal light, soil, and care routine. You’ll need just a few basics: pots with drainage, well-draining soil, and a sunny spot (or grow lights). Herbs like basil thrive in bright light, while mint tolerates shade better. Start with seeds or seedlings—either works, but seedlings give you an instant head start. Water consistently but avoid soggy soil, and fertilize lightly every few weeks. By summer, you’ll be snipping fresh cilantro for tacos and rosemary for roasts straight from your garden. The harvest doesn’t stop there—dry or freeze extras for year-round use. Even small spaces can produce enough to stock your pantry. This method works for both beginners and seasoned gardeners. Whether you’re growing in pots or garden beds, the key is consistency. Let’s get those flavors growing!
📚 In This Guide
- What you need
- Instructions
- Tips and common mistakes
- Wrapping up and next steps
What you need
- ● Spice Seeds or Plants: Choose organic, non-hybrid seeds (e.g., cilantro, dill, oregano, thyme, basil) or young plants from a nursery.
- ● Quantity: 1–5 plants per variety (depending on space).
- ● Containers or Garden Beds: For containers: 5–10 gallon pots (with drainage holes) for herbs like basil or mint.
- ● For in-ground: A sunny spot (6+ hours/day) with well-draining soil.
- ● Potting Soil: High-quality, organic potting mix (avoid garden soil—it compacts).
- ● Quantity: 1–2 bags (1–2 cubic feet each).
- ● Watering Can or Hose: With a gentle spray nozzle for even moisture.
- ● Fertilizer: Balanced, organic fertilizer (e.g., 10-10-10 or compost tea).
- ● Quantity: Follow package instructions (typically 1 tbsp per plant monthly).
- ● Pruning Shears: For trimming herbs to encourage bushier growth.
- ● Gloves: Protect your hands from prickly plants (e.g., rosemary or thyme).
- ● Trellis or Cage: Supports tall herbs like dill or cilantro.
- ● pH Test Kit: Ensures soil pH is ideal (most herbs prefer 6.0–7.0).
- ● Shade Cloth: Protects seedlings from harsh afternoon sun (especially in hot climates).
Step-by-Step instructions for cultivating homegrown spices
Here's how to turn your kitchen garden into a fragrant spice factory—no greenhouse required.
🌱 Step 1: Select the Right Spices for Your Climate
Start with easy-to-grow annuals and perennials that thrive in your zone. Basil, cilantro, and dill grow quickly from seed and handle cooler temperatures well, while rosemary, thyme, and oregano prefer full sun and dry soil. I always begin with 3-4 varieties to test what grows best in my space—overcrowding leads to competition for light and nutrients.
Check your last frost date and plant heat-lovers like basil 2-3 weeks after frost, while hardy herbs like mint and chives can go in as soon as soil is workable. Containers give you flexibility to move tender plants indoors before cold snaps. Watch for new leaf growth after planting—that’s your signal roots are establishing.
☀️ Step 2: Provide the Perfect Growing Conditions
Most spices need 6+ hours of sunlight daily, but some like parsley and chives tolerate partial shade. Place pots near a south-facing window or use a grow light for 14-16 hours/day if indoors. I’ve seen leggy basil stretch toward weak light—move it closer until leaves are dark green and compact, not pale and sparse.
Soil should drain well but retain moisture. Mix equal parts potting mix and perlite for containers, or amend garden beds with compost for perennials. Keep soil consistently moist but not soggy—stick your finger 1 inch deep; if dry, water until moisture reaches 2-3 inches down. Overwatering causes root rot, which kills plants faster than you can harvest.
✂️ Step 3: Prune and Harvest for Maximum Flavor
Pinch back new growth when plants are 6-8 inches tall to encourage bushier, leafier plants. For herbs like basil, snip just above a leaf pair to stimulate branching. Harvest regularly—morning sun produces the most potent oils. You’ll notice stronger aromas when leaves are fully mature but before flowers form (that’s when flavor peaks).
Dry leaves between paper towels for 1-2 hours to remove excess moisture before storing. I bundle stems with rubber bands and hang upside down in a dark, dry place for 1-2 weeks. Crumble dried leaves into jars for shelf-stable spice blends. Never harvest more than 1/3 of a plant at once—you’ll stunt growth and reduce future yields.
🪴 Step 4: Overwinter Tender Plants for Year-Round Harvests
Bring potted basil, cilantro, and dill indoors before temperatures dip below 40°F. Place them near a bright window or under grow lights for 12 hours/day. Reduce watering—let soil dry slightly between waterings—to prevent fungal issues. You’ll see slower growth in winter, but consistent light keeps plants alive for spring.
Perennials like rosemary and thyme handle frost better. Mulch garden beds with 2-3 inches of straw to insulate roots. In Zone 7 and warmer, these herbs often regrow in spring. If you’re in a colder zone, dig up pots and store in a garage where temps stay above freezing. Check roots monthly—wilting means you’re overwatering.
⏰ Step 5: Renew Soil and Rotate Crops Annually
After harvest, remove spent plants and replace soil in containers with fresh potting mix. For garden beds, amend with compost and rotate herbs to prevent disease. I swap basil where parsley grew last year—crop rotation keeps soil healthy and pests away. Test soil pH every 2-3 years; most herbs prefer 6.0-7.0. Adjust with lime (to raise pH) or sulfur (to lower pH) if needed.
Label plants with variety and planting date—you’ll forget which is which by summer! Take photos monthly to track growth. By next season, you’ll have a custom spice blend tailored to your climate. The first time you taste homegrown basil straight from the pot, you’ll never buy it again.
Tips & tricks for perfect homegrown spices
Here's what nobody tells you about growing spices that actually thrive and taste amazing.
Light Location Matters: In Step 2, when positioning your herbs, watch for yellowing leaves or elongated stems—these are signs of insufficient light. Move containers to a sunnier spot immediately. For indoor grow lights, position them 6-12 inches above plants for the 14-16 hours/day they need. I've seen basil grow toward light so aggressively it falls over—rotate pots weekly to ensure even growth.
Harvesting Timing Secret: The morning sun mentioned in Step 3 is crucial because that's when essential oils are at their peak potency. Harvest just before flowers form—once buds appear, the plant shifts energy to reproduction, and flavor diminishes. For basil, I harvest stems with 4-6 leaves to encourage bushier growth, always cutting just above a leaf pair as instructed.
Overwintering Strategy: When bringing tender plants indoors before 40°F temperatures (Step 4), place them in a cool, bright spot like a north-facing window. Reduce watering significantly—soil should dry 1 inch deep between waterings. I've found that 12 hours/day of grow light prevents leggy growth during winter's shorter days, keeping plants productive until spring.
Pro Tips for Grow Spices
- Here's what nobody tells you about growing spices that actually thrive and taste amazing.
- Light Location Matters: In Step 2, when positioning your herbs, watch for yellowing leaves or elongated stems—these a...
- Harvesting Timing Secret: The morning sun mentioned in Step 3 is crucial because that's when essential oils are at th...
Frequently asked questions
Got questions about growing your own spices?
You’re not alone! Here are answers to the most common concerns—so you can confidently start your kitchen-garden spice adventure.
Can I grow spices indoors, or do they need outdoor space?
Many spices thrive indoors with bright, southern-facing light (or a grow light). Herbs like basil, mint, and chives are perfect for windowsills, while root spices (ginger, turmeric) need pots with good drainage. For outdoor-loving spices (cilantro, dill), a sunny balcony or container garden works too!
How long does it take for spices to mature and be harvest-ready?
Timing varies! Leafy herbs (cilantro, parsley) may be ready in 4–6 weeks, while root spices (ginger, galangal) take 8–12 months. Dried spices like culinary thyme or rosemary need 1–2 years for full flavor. Check plant tags or harvest when leaves/buds are vibrant and fragrant.
What’s the best way to dry homegrown spices for long-term storage?
Bundle stems (like oregano or lavender) and hang upside-down in a warm, dry, dark spot for 2–4 weeks. For leaves (basil, mint), spread thinly on a tray and dry at 95°F (35°C) for 1–2 hours. Store in airtight jars away from light—most spices keep flavor for 6–12 months!
Why are my spice plants wilting or attracting pests?
Wilting often means overwatering (most spices hate soggy soil) or underwatering. Pests like aphids or spider mites love tender herbs—spray with neem oil or introduce ladybugs. Yellow leaves? Check for nutrient deficiencies (use a balanced fertilizer) or fungus (improve airflow).
Can I substitute store-bought spices if I can’t grow them yet?
For fresh flavors, try freeze-dried herbs (like cilantro or basil) or organic powdered spices (turmeric, cinnamon). Pro tip: Toast whole spices (cumin, coriander) in a dry pan for 30 seconds to boost flavor before grinding. Growing your own is worth the wait—fresh spices taste 10x better!
Wrapping up and next steps
Growing your own spices is a rewarding journey that brings flavor, savings, and freshness right to your kitchen! Whether you’re cultivating basil, mint, or chili peppers, the key lies in patience, the right conditions, and a little green thumb love.
Start small, experiment with containers, and soon you’ll be harvesting vibrant, aromatic spices all year round.
Now that you’re armed with tips and tricks, why not pick one spice to grow this week? 🌱 Grab your seeds, a sunny spot, and let your kitchen garden flourish—your taste buds will thank you!