
How To
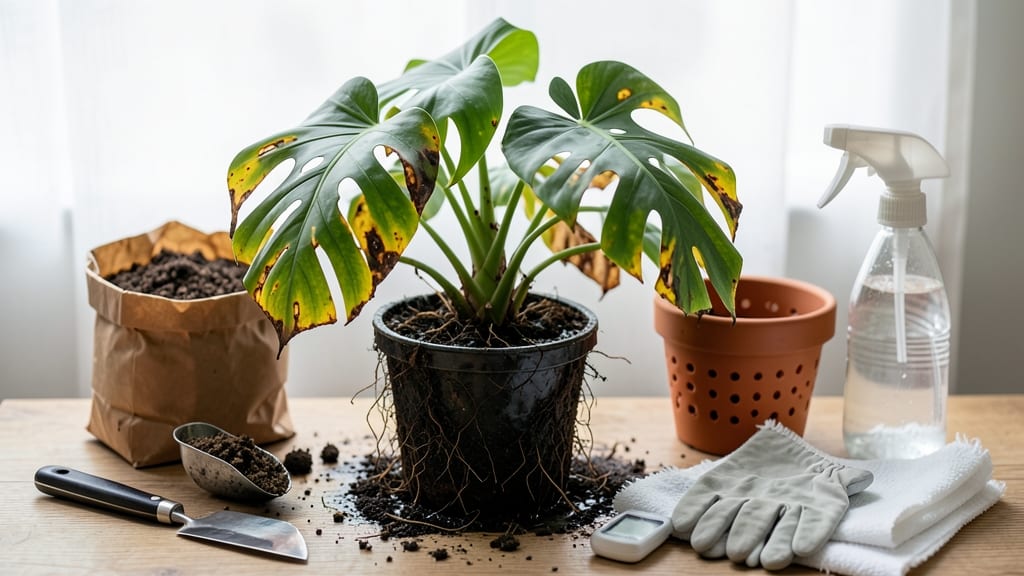
Your plant’s drooping leaves and yellowing stems are screaming for help. 🌱 Honestly, I’ve drowned more houseplants than I’d like to admit, but I’ve cracked the code on reviving overwatered plants—even when the roots look like mushy spaghetti. The key is acting fast before root rot takes over completely.
First, stop watering entirely and check the roots—healthy roots should be firm and white, while rotten ones smell foul and turn brown or black. Gently remove the plant from its pot, trim away the mushy roots with clean scissors, and rinse the remaining roots in water to remove excess soil.
This might feel brutal, but it’s the only way to stop the rot from spreading.
After trimming, repot the plant in fresh, well-draining soil and a container with drainage holes. Water lightly only when the top inch of soil feels dry, and place the plant in bright, indirect light. Within a few weeks, you’ll see new growth pushing through—proof that your plant is fighting back.
Prevention is easier than revival: stick your finger in the soil before watering, and always use pots with drainage. Overwatering happens when we love our plants too much—now you’ll know exactly how to rescue them and keep them thriving for seasons to come.
📚 In This Guide
- What you need
- Instructions
- Tips and common mistakes
- Wrapping up and next steps
What you need
- ● Well-draining potting mix: 1–2 bags (1–2 cubic feet) of a fast-draining blend like cactus/succulent mix or perlite-heavy soil (avoid peat-based mixes).
- ● Pot with drainage holes: 1–2 containers (1–2 sizes larger than the current pot) made of terracotta, ceramic, or fabric (avoid plastic if possible).
- ● Pruning shears or sharp scissors: 1 pair (sterilized with rubbing alcohol to prevent disease).
- ● Paper towels or clean cloth: 2–3 sheets (for blotting excess water).
- ○ Rooting hormone (optional): 1 small bottle (to boost recovery if roots are severely damaged).
- ● Fungicide spray: 1 bottle (e.g., neem oil or hydrogen peroxide solution) to prevent root rot.
- ● Moisture meter: 1 device (to monitor soil moisture accurately).
- ● Heat mat (for tropical plants): 1 small unit (to encourage root regrowth in cooler climates).
- ● New fertilizer: 1 bottle of balanced, water-soluble fertilizer (diluted to half-strength for recovery).
Step-by-Step instructions for reviving overwatered plants
Here's how I rescue plants from soggy soil and restore their health—no matter how far gone they seem.
🌱 Step 1: Stop Watering and Assess the Damage
First, halt all watering immediately. Even if the plant looks droopy, giving it more water will only worsen root rot. Instead, gently remove the plant from its pot to check the roots. Healthy roots are firm and white, while overwatered roots turn mushy, brown, or black. I like to run my fingers through the root ball—if it smells foul or feels slimy, the roots are already compromised.
If the plant is still in the ground, use a trowel to carefully loosen the soil around the base and inspect the roots. You'll often see a clear boundary where healthy roots end and rotted ones begin. This helps you determine how much of the plant you may need to trim back. Remember, it's better to remove too much than too little—overwatered plants can't recover if the rot spreads.
💧 Step 2: Remove Excess Water and Trim Damaged Roots
Place the plant in a shallow container or sink and rinse the root ball gently under lukewarm water to remove excess soil. This helps you spot any rotten areas more easily. Use clean, sharp scissors or pruning shears to trim away all mushy, discolored roots. Cut back to firm, white tissue—this is your signal that you've reached healthy root. I always sanitize my tools with rubbing alcohol between cuts to prevent spreading disease.
For plants in pots, empty the excess water from the drainage holes and let the root ball air-dry for about 10-15 minutes. This reduces further rot while you prepare to repot. If the plant is in the ground, you can't remove it, so focus on improving drainage instead. Mix 2-3 inches of coarse sand or perlite into the top layer of soil around the base to help excess water drain away faster.
☀️ Step 3: Repot with Fresh, Well-Draining Soil
Choose a clean pot with drainage holes if you're repotting, or amend the in-ground soil with 20-30% perlite or coarse sand to improve drainage. Fill the bottom of the pot with a layer of gravel or broken pottery pieces to create a drainage barrier. This prevents water from pooling at the bottom and suffocating the roots. Fill the pot halfway with fresh, well-draining potting mix—avoid garden soil, which compacts and holds too much moisture.
Position the plant in the pot so the base of the stem sits just above the soil line. Fill in around the roots with more potting mix, pressing gently to secure the plant but not compacting the soil. Leave about 1 inch of space between the soil surface and the pot rim to allow for watering. For in-ground plants, mound soil slightly around the base to encourage new root growth outward rather than downward.
🪴 Step 4: Adjust Watering and Light Conditions
Wait 3-5 days before watering again, even if the plant looks wilted. This gives the roots time to recover and prevents further rot. When you do water, use the finger test: stick your finger about 1 inch into the soil. If it feels dry, water thoroughly until water runs out the drainage holes. If it's still damp, wait another day. Overwatered plants need time to adjust to a drier environment.
Move the plant to a location with bright, indirect light for at least 1-2 weeks. Direct sunlight can stress the plant further, while too little light slows recovery. You'll notice new growth in 2-4 weeks if the roots are healing—look for fresh, green leaves emerging from the stem. If no new growth appears after 6 weeks, the plant may not recover, and it's time to consider replacing it.
⏰ Step 5: Monitor and Maintain Recovery Conditions
Check the soil moisture every 2-3 days and water only when the top 1-2 inches feel dry. Use a spray bottle to mist the leaves lightly if they appear crispy, but avoid soaking the foliage. Overwatered plants often lose their ability to regulate moisture, so gentle care is key. Place a humidity tray filled with water and pebbles under the pot to raise humidity slightly—this helps the plant rehydrate without overdoing it.
Fertilize only after you see new growth, and then use a diluted, balanced fertilizer at half strength. Overwatered plants are stressed and can't handle full-strength nutrients. I wait until the plant has 3-4 new leaves before introducing fertilizer. Keep an eye out for pests like fungus gnats, which thrive in damp soil. If you see them, treat with a small amount of hydrogen peroxide mixed with water or introduce beneficial nematodes.
Tips & tricks for reviving an overwatered plant
Real talk: I’ve lost count of how many plants I’ve saved from soggy soil, and these tricks have become my go-to for root recovery every time.
Root Inspection Tip: When checking roots in Step 1, look for the "snap test" – healthy roots should bend slightly before snapping cleanly. If they break easily or smell foul, that’s your cue to trim aggressively. I’ve seen plants with only 20% healthy roots still make a full recovery when given proper care.
Soil Rescue Strategy: For Step 2, if you don’t have perlite, crushed gravel or even coarse sand from a clean construction site works in a pinch. The key is creating that 1-inch drainage layer at the bottom – this prevents future waterlogging better than any fancy soil mix. I keep a bag of perlite specifically for this purpose.
Light Transition Tip: During the first week after repotting (Step 3), I place plants under a sheer curtain or in an east-facing window. This gives them bright but indirect light while they recover. Direct sunlight can actually burn stressed leaves during this critical recovery period.
Fertilizer Timing: The 3-4 week wait before fertilizing in Step 4 is crucial – new roots are fragile and can’t handle nutrients yet. I’ve seen plants shocked by early fertilization, so resist the urge to rush this step even if you’re eager to see growth.
Pro Tips for Help Overwatered Plant
- Real talk: I’ve lost count of how many plants I’ve saved from soggy soil, and these tricks have become my go-to for root recovery every time.
- Root Inspection Tip: When checking roots in Step 1, look for the "snap test" – healthy roots should bend slightly before snapping cleanly.
- Soil Rescue Strategy: For Step 2, if you don’t have perlite, crushed gravel or even coarse sand from a clean construction site works in a pinch.
Frequently asked questions
Got questions about saving your soggy plant? You’re not alone! Here are answers to the most common concerns—so you can act fast and give your green friend a fighting chance.
How quickly can I tell if my plant is overwatered?
Check for these signs within 24–48 hours of overwatering: yellowing leaves (especially lower ones), mushy stems, or a foul, rotten smell from the soil. If the leaves feel squishy or fall off with gentle tugging, your plant is in distress. Act immediately!
How long does it take for an overwatered plant to recover?
Recovery time varies by plant type, but most show improvement in 3–7 days if you adjust care. Roots may take 2–4 weeks to heal fully. Monitor soil moisture daily—if it stays damp longer than expected, repot with fresh, well-draining soil.
Can I use hydrogen peroxide to save an overwatered plant?
Yes! Mix 1 teaspoon of 3% hydrogen peroxide per cup of water to disinfect roots and boost oxygen. Soak the roots for 10–15 minutes, then replant in dry, sterile soil. This helps prevent fungal/bacterial infections while reviving stressed roots. Test on a small area first!
What if my plant has mold or fungus after overwatering?
Scrub affected roots with a 1:10 bleach-water solution (rinse thoroughly), then treat with neem oil or copper fungicide. Repot in sterile, fast-draining soil and avoid watering for 5–7 days. Keep humidity low to prevent recurrence.
Should I move my plant to a shadier spot while recovering?
Yes! Reduce light exposure for 1–2 weeks to minimize stress. Overwatered plants struggle to photosynthesize efficiently. Place it in bright, indirect light (e.g., east-facing window) and avoid direct sun until new growth appears.
Wrapping up and next steps
Reviving an overwatered plant doesn’t have to be stressful—with the right steps, you can bring it back to life and even strengthen its resilience for the future. 🌱 Remember, patience and consistency are key, so don’t rush the process.
Once you’ve followed these steps, monitor your plant closely and adjust your watering habits to prevent future mishaps.
Now that you’re equipped with the knowledge, take action today! Start by assessing your plant’s condition and follow the recovery plan. Your green friend will thank you with vibrant growth in no time. Happy gardening! 🌿