
Container Gardens
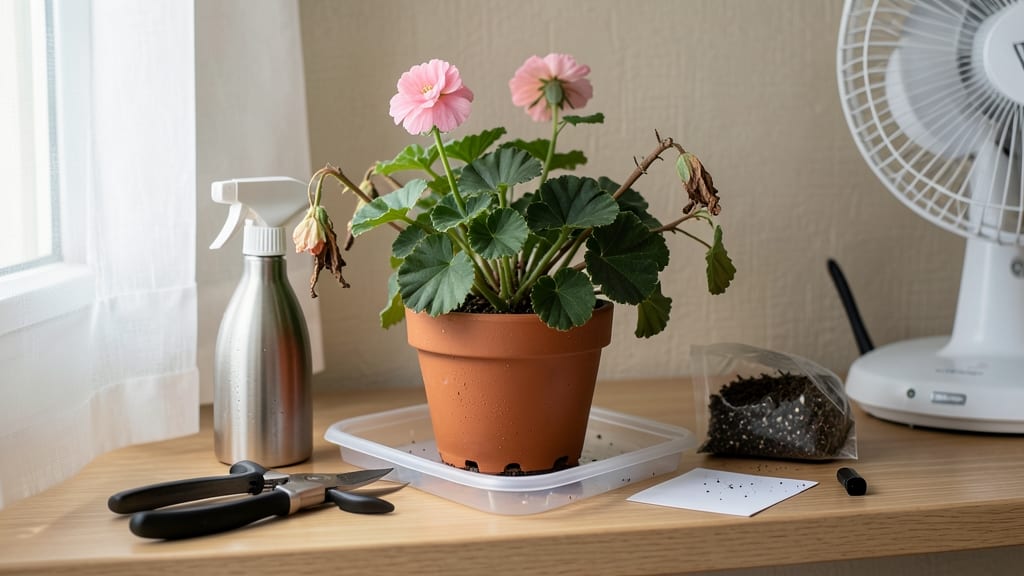
How to keep geraniums over winter indoors without turning them into winter casualties is easier than you’d think. 🌿 After years of losing beloved plants to cold drafts and overwatering, I finally cracked the code for keeping them thriving indoors through the dark months—and it’s simpler than you’d think.
The key is mimicking their natural dormancy cycle: less water, cooler temps, and bright light to prevent that dreaded leggy growth. Most people overwater in winter, thinking plants need more moisture, but geraniums actually slow down and need far less.
A sunny windowsill or grow light becomes their lifeline during these months.
By spring, you’ll have bushy, vibrant plants ready to burst back into bloom outdoors. The secret lies in the transition—gradually reintroducing them to sunlight and outdoor conditions over 2-3 weeks to avoid shock. No more replacing dead plants every year!
Even if you’ve struggled before, this method works for balcony geraniums, hanging baskets, or potted varieties. Let’s bring those colors back next season—without the guilt of tossing them out.
📚 In This Guide
- What you need
- Instructions
- Tips and common mistakes
- Wrapping up and next steps
What you need
- ● Healthy geranium plants: Choose thriving, pest-free geraniums (like Pelargonium varieties) with no signs of disease.
- ● Pruning shears or clean scissors: Sharp, sterilized tools to trim stems (avoid dull blades that crush stems).
- ● Well-draining potting mix: A lightweight, airy blend (e.g., 50% peat moss, 30% perlite, 20% vermiculite). 1-2 gallons per plant (adjust for pot size).
- ● Containers with drainage holes: Terracotta or plastic pots (6-8 inches in diameter for standard geraniums). 1 per plant.
- ● Saucer or tray: To catch excess water and prevent root rot.
- ● Bright, indirect light source: A south- or west-facing window or grow lights (12-14 hours/day).
- ● Watering can with a fine rose: For gentle, bottom-watering to avoid soggy soil.
- ● Fertilizer (low-nitrogen): A balanced 10-10-10 or 5-10-10 formula (use sparingly—¼-strength every 4-6 weeks).
- ○ Humidity tray or pebble tray: Optional but helpful for dry indoor air (fill with water and pebbles).
- ● Grow lights (LED or fluorescent): If natural light is limited (12-14 hours/day).
- ● Hydrogen peroxide (3% solution): For sterilizing pruning tools or treating root rot.
- ● Misting bottle: To increase humidity around leaves (use room-temperature water).
- ● Insecticidal soap or neem oil: Preemptive pest control for spider mites or aphids.
- ● Thermometer/hygrometer: To monitor ideal temps (60-65°F) and humidity (40-50%).
- ● Decorative labels: To track varieties and care notes!
Step-by-Step instructions for wintering geraniums indoors
Here's how I've kept my geraniums thriving year after year—no fancy equipment, just smart dormancy tricks.
🪴 Step 1: Prune and Prepare for Dormancy
Start by cutting back each plant to about 3-4 inches from the base. I use clean, sharp scissors to make clean cuts just above a leaf node. This encourages new growth in spring and reduces moisture loss during dormancy. Remove any yellow or damaged leaves completely—they'll only invite pests or rot.
Real talk: Don't go too short. If you cut too aggressively, you risk killing the plant entirely. Think of it like a haircut—you want to shape it, not shave it bald. After pruning, place the plants in a cool, dry spot out of direct light for 2-3 days to let the cuts heal slightly.
☀️ Step 2: Reduce Water and Light Gradually
Over the next 2 weeks, slowly reduce watering until you're only keeping the soil barely moist. I check by sticking my finger 1 inch deep—if it feels dry, that's when I water lightly. Geraniums in dormancy need very little moisture, so overwatering is the #1 killer here.
Move them to a location with bright, indirect light—a north-facing window or under a grow light on the lowest setting. You'll notice the leaves start to yellow and drop naturally. This is normal! It's the plant's way of conserving energy for spring. Don't rush to remove these leaves—they'll fall on their own when ready.
⏰ Step 3: Establish Consistent Cool Conditions
Once the plants have mostly lost their leaves, it's time to create proper dormancy conditions. Keep them in a spot where temperatures stay between 40-50°F. A basement, unheated garage, or even a sunny windowsill away from heating vents works perfectly. I've even used the back of a refrigerator (not the cold part!) in a pinch.
Here's the thing—geraniums need this cool period to reset. If you keep them too warm, they'll stay semi-dormant and may rot. Water only when the soil feels completely dry to the touch, which might be every 4-6 weeks. I label each pot with the date to track watering—it's easy to forget when they're not actively growing.
🌱 Step 4: Monitor and Prepare for Spring Growth
Starting in late winter (around February), begin checking your geraniums weekly for signs of new growth. You'll see tiny buds or new leaves emerging from the base. This is your cue that dormancy is over. Gradually increase watering and move them to a brighter location, like a south-facing window.
Don't fertilize just yet—wait until you see consistent new growth before adding any nutrients. I like to wait until the plants have 3-4 new leaves before giving them a light feeding with half-strength fertilizer. This prevents burning tender new growth. Once they're actively growing, you can resume normal care.
Tips & tricks for perfect winter geranium care
Here's what I've learned after keeping geraniums dormant for years—these tricks make all the difference between survival and thriving.
Pruning Precision: When you're cutting back to 3-4 inches in Step 1, focus on making clean cuts just above a leaf node. This is where new growth will emerge in spring. I always use sterilized scissors to avoid introducing diseases—just wipe them with rubbing alcohol between plants. The 2-3 day healing period is crucial; it lets the cuts form a protective layer before dormancy begins.
Dormancy Lighting Secret: The bright, indirect light in Step 2 isn't just about visibility—it's about maintaining minimal photosynthesis. I've found that placing plants under a grow light on the lowest setting (about 2-3 inches away) works even better than windows in dim winter months. Too little light means the plant won't have energy reserves for spring, while too much can stress it during dormancy.
Temperature Troubleshooting: That 40-50°F range in Step 3 is non-negotiable for proper dormancy. If your home stays warmer than 50°F, consider moving plants to an unheated garage or even the back of your refrigerator (not the cold part!). I've had success using a small fan to circulate air around the plants—this prevents mold growth while maintaining the cool environment they need to reset.
Spring Growth Cues: In Step 4, those tiny buds you'll see in February are your first sign of success. I keep a small notebook to track when each plant shows new growth—it helps me remember which ones need more care. The 3-4 new leaves rule is especially important; waiting this long before fertilizing prevents burning those delicate new shoots that are just getting started.
Pro Tips for Keep Geraniums Over Winter Indoors
- Here's what I've learned after keeping geraniums dormant for years—these tricks make all the difference between survi...
- Pruning Precision: When you're cutting back to 3-4 inches in Step 1, focus on making clean cuts just above a leaf nod...
- Dormancy Lighting Secret: The bright, indirect light in Step 2 isn't just about visibility—it's about maintaining min...
Frequently asked questions
about overwintering geraniums indoors—because even the toughest gardeners have questions! Here are the most common ones, answered in a pinch.When should I start preparing my geraniums for winter?
Start 8–10 weeks before your first frost (usually late summer). This gives your plants time to adjust to indoor conditions, reduce watering, and enter dormancy gradually. If you wait until frost hits, they’ll shock and struggle to recover.
Can I just leave my geraniums outside all winter?
Nope! Most geraniums (especially zonal or scented types) aren’t cold-hardy—they’ll die in freezing temps. Even hardy varieties need protection like thick mulch or a greenhouse. Indoor overwintering is the safest bet for tender varieties.
What if my geraniums look sad or leggy after bringing them inside?
Don’t panic! Leggy growth is normal due to low light. Prune back by ⅓ to encourage bushier growth, then move them to the brightest spot (south-facing window or grow lights). Yellow leaves? Trim those too—they’re just adjusting!
How often should I water overwintering geraniums?
Water only when the top inch of soil is dry—usually every 2–3 weeks. Overwatering is the #1 killer! Use well-draining soil and a pot with drainage holes to prevent root rot. A moisture meter helps if you’re unsure.
Can I overwinter geraniums in water instead of soil?
Yes, but it’s trickier! Root cuttings in water (like pelargoniums) can survive winter, but they won’t bloom as well. If you try this, change the water weekly and provide bright light. For best results, stick with soil—it’s more stable for dormancy.
What if my geraniums don’t bloom next spring?
First year back? Don’t worry—they’re recovering! Geraniums often take a year to bounce back after dormancy. Pinch back leggy stems in early spring, fertilize lightly, and give them patience. By summer, you’ll see those familiar blooms again!
Wrapping up and next steps
Keeping your geraniums alive through winter indoors is totally doable with the right care—pruning, proper dormancy, and bright light are your secret weapons! 🌱 By following these steps, you’ll wake up to vibrant blooms come spring, proving your green thumb shines even in colder months.
Now that you’re armed with dormancy tricks, why not take it a step further? Try experimenting with container swaps or propagating cuttings to expand your geranium family. Happy gardening—your future spring blooms will thank you! 🌸