
Landscaping
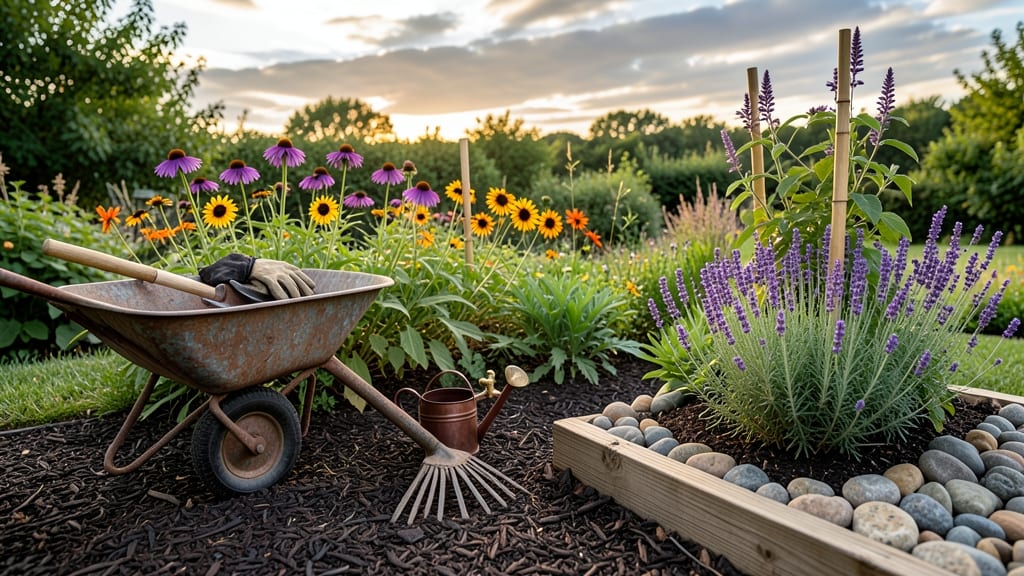
Landscaping a flower garden isn't about planting pretty flowers—it's about creating a living tapestry that changes with each season. 🌸 I've designed gardens that burst with color from spring tulips through winter holly berries, and the secret lies in strategic layering that keeps interest high year-round.
Start with your site's sunlight and soil conditions—they dictate what will thrive. Most beginners overlook soil prep, but amending with compost and choosing the right plants for your light conditions makes all the difference.
A 3-inch layer of mulch after planting retains moisture and keeps weeds at bay while protecting roots. The magic happens in the layers: tall perennials at the back, mid-height shrubs in the middle, and spillers like ferns or ornamental grasses at the front.
Add seasonal accents like bulbs for spring and annuals for summer bursts of color. Your garden will feel like a curated masterpiece, not just a random collection. This approach works for any size space, from small urban yards to large rural plots.
The key is starting small—one section at a time—and letting each layer reveal itself over time. Let's get your design on paper first!
📚 In This Guide
- What you need
- Instructions
- Tips and common mistakes
- Wrapping up and next steps
What you need
- ● Topsoil or garden soil: 1–2 cubic yards (depending on garden size). Opt for a mix with good drainage and organic matter.
- ● Compost or organic fertilizer: 1–2 bags (5–10 lbs each) to enrich the soil and promote healthy growth.
- ● Mulch: 2–3 bags (2–3 cubic feet each) of shredded bark, pine straw, or wood chips to retain moisture and suppress weeds.
- ● Flower bulbs, perennials, and annuals: Bulbs: 50–100 (e.g., tulips, daffodils, crocuses for early spring color).
- ● Perennials: 20–30 plants (e.g., coneflowers, black-eyed Susans, hostas for mid-season blooms).
- ● Annuals: 30–50 plants (e.g., petunias, marigolds, impatiens for summer-long color).
- ● Ground cover plants: 10–20 plants (e.g., creeping thyme, ajuga, or clover to fill gaps and prevent erosion).
- ● Garden shovel or spade: For digging and moving soil.
- ● Garden trowel: For planting smaller bulbs and perennials.
- ● Pruners or shears: Sharp, clean pair for trimming and shaping plants.
- ● Rake: For leveling soil and spreading mulch.
- ● Wheelbarrow: To haul soil, mulch, and plants around easily.
- ● Measuring tape: For marking out garden beds and spacing plants.
- ● Garden hose with spray nozzle: For watering (or a watering can for precision).
- ● Gloves: A sturdy pair to protect your hands from thorns and dirt.
- ● Knee pads or a small stool: For comfort during long planting sessions.
- ● Required: A sunlight assessment of your garden (note hours of sun/shade per day).
- ● A sketch or layout plan (even a rough one!) to visualize layers and plant placements.
- ○ Optional (but helpful!): Edging tools: To create clean borders around your garden beds.
- ● Garden stakes or labels: For marking plant locations (especially useful for perennials).
- ● Drip irrigation system: For efficient watering (invest in a basic kit if DIY isn’t your thing).
- ● Decorative stones or borders: For adding structure and visual appeal.
Instructions for designing a layered flower garden
Here’s how to create a garden that blooms from spring through fall with minimal effort.
🌱 Step 1: Plan Your Garden Layers
Start by sketching your space and dividing it into three horizontal layers: tall back plants (3-6 feet), mid-height plants (1-3 feet), and short ground covers or edging plants (under 1 foot). Tall plants like delphiniums or hollyhocks anchor the back, while mid-height perennials like coneflowers or black-eyed Susans fill the middle. Low-growing plants like ajuga or creeping thyme edge the front.
I like to group plants by color families—purples and blues together, reds and oranges together—to create visual harmony. Place taller plants toward the center or back of a curved bed so they don’t block sunlight for shorter varieties. A simple rule: never let one plant tower over another by more than 3 feet—it creates awkward gaps.
☀️ Step 2: Assess Sunlight and Soil Conditions
Observe your garden’s sun patterns for at least a week. Note which areas get full sun (6+ hours), partial shade (3-6 hours), or full shade (under 3 hours). Most flowers thrive in full sun, but shade-loving plants like hostas or impatiens will wilt in hot spots. Adjust your plant choices based on these observations—no plant performs well outside its light requirements.
Test your soil’s drainage by digging a hole, filling it with water, and timing how long it takes to drain. If water pools after 30+ minutes, amend the soil with compost or sand to improve drainage. If it drains too quickly (under 5 minutes), mix in peat moss or coconut coir to retain moisture. Healthy soil holds water like a damp sponge—not a puddle, not bone-dry.
🪴 Step 3: Choose Plants for Seasonal Interest
Select a mix of spring bloomers (tulips, daffodils), summer stars (daylilies, zinnias), and fall/winter structure (ornamental grasses, hellebores). I aim for at least 3 plants per season to ensure continuous color. For example, pair early spring crocuses with late-season asters so the garden never looks bare. Evergreens like boxwood or hemlock add year-round texture, too.
Stagger bloom times by choosing varieties with different maturity dates—early, mid, and late season—so your garden never hits a blank slate. Check plant tags for bloom periods, and group them accordingly. For instance, plant early blooming peonies near late-season chrysanthemums to extend the show.
✂️ Step 4: Space Plants for Future Growth
Read the mature width of each plant on the tag and space them at least 6 inches wider than their final spread. Crowding leads to competition for sunlight and nutrients, which stunts growth. For example, if a coneflower matures at 2 feet wide, plant it 2.5 feet apart. This ensures air circulates, reducing disease risk.
Arrange plants in odd-numbered groups (3, 5, or 7) for a natural, balanced look. Avoid single plants—they look lonely. Start with a focal point (like a large shrub or trellis) and build outward. Step back every few plants to check the visual flow—if one section feels empty, add a filler like ornamental grasses or ferns.
💧 Step 5: Mulch and Water for Establishment
Spread 2-3 inches of mulch (wood chips, shredded bark, or straw) over the soil surface to suppress weeds and retain moisture. Keep mulch 2 inches away from plant stems to prevent rot. Water deeply once a week for the first month, soaking the soil to 12 inches deep. You’ll know it’s enough when water runs out the drainage holes if potted, or when the top 6 inches of soil feel damp.
After establishment, water 1-2 times per week, depending on rainfall. Most flowers hate soggy roots, so always let the top inch dry out between waterings. Use a soaker hose or drip irrigation to deliver water at the base—avoid overhead sprinklers, which can spread fungal diseases. A slow, deep drink encourages strong root growth.
Tips & tricks for perfect layered flower gardens
Common pitfalls—and how to sidestep every one—when creating a garden that stays vibrant all year.
Layering Like a Pro: In Step 1, when sketching your layers, use a simple grid system to visualize spacing. Draw your garden outline, then mark vertical lines every 2 feet to represent mature plant widths. This visual trick helps prevent awkward gaps when taller plants eventually outgrow their neighbors. I always sketch at least three different layouts before deciding—it saves time and frustration later.
Sunlight Mapping: For Step 2, take your sunlight observations one step further by marking your garden with colored chalk or flags. Use yellow for full sun areas, blue for partial shade, and green for full shade. This color-coded system makes it instantly clear where each plant should go. I've found this prevents the common mistake of placing sun-loving plants in shady spots where they'll struggle to bloom.
Seasonal Staggering: When selecting plants in Step 3, create a simple chart with columns for spring, summer, fall, and winter. Fill in each row with plants that bloom during those seasons, then group them together in your garden layout. This ensures you'll have continuous color without gaps. For example, I pair early spring daffodils with late-season chrysanthemums to create a seamless transition.
Mulch Magic: In Step 5, don't just spread mulch—create a visual pattern. Use two different mulch types (like wood chips and straw) to separate plant layers. This not only improves drainage but also adds visual interest to your garden design. I always keep mulch 2 inches away from stems to prevent rot, and refresh it annually to maintain its weed-suppressing benefits.
Pro Tips for Landscape A Flower Garden
- Common pitfalls—and how to sidestep every one—when creating a garden that stays vibrant all year.
- Layering Like a Pro: In Step 1, when sketching your layers, use a simple grid system to visualize spacing. Draw your ...
- Sunlight Mapping: For Step 2, take your sunlight observations one step further by marking your garden with colored ch...
Frequently asked questions
Got questions about transforming your space into a blooming paradise?
Here are answers to the most common queries about landscaping a flower garden—so you can dive in with confidence!
When is the best time to start landscaping a flower garden?
The ideal time depends on your climate! In mild regions, plan in early spring or fall to avoid extreme heat or frost. In hotter areas, start in late winter or early spring for summer blooms. Fall planting (6-8 weeks before frost) gives roots time to establish before winter. Pro tip: Test your soil first—amend it 4-6 weeks before planting for best results!
How do I keep my flower garden looking fresh all year?
Layered planting is key! Combine spring bulbs (tulips, daffodils), summer annuals (petunias, zinnias), fall bloomers (mums, asters), and winter interest plants (evergreens, hellebores). Add mulch (2-3 inches) to retain moisture, suppress weeds, and regulate soil temperature. Deadhead spent blooms regularly to encourage reblooming!
What are some budget-friendly alternatives to expensive plants?
Skip pricy nursery plants—try these cost-effective swaps:
- Seeds over seedlings: Grow sunflowers, marigolds, or cosmos from seed (cheaper + more variety!).
- Cutting propagation: Root free cuttings from friends’ plants (e.g., coleus, mint, or hydrangeas).
- Local wildflowers: Collect seeds from native plants (like black-eyed Susans) for a low-maintenance, pollinator-friendly garden.
- Dollar-store plants: Check discount racks for underpriced perennials or annuals (inspect for pests first!).
How do I prevent pests and diseases in my flower garden?
Start with healthy soil (rich in compost) and proper spacing (3-6 inches between plants for airflow). Use organic pest controls like:
- Neem oil (for aphids, whiteflies).
- Diatomaceous earth (for slugs/snails—reapply after rain).
- Companion planting (e.g., marigolds deter nematodes; basil repels flies).
Can I landscape a small flower garden in containers or raised beds?
Containers and raised beds are perfect for urban spaces, patios, or poor soil. Choose:
- Large pots (12"+ diameter) for small trees (e.g., dwarf fruit trees) or shrubs.
- Window boxes for trailing plants (petunias, fuchsias).
- Raised beds (4x8 ft) for perennials—fill with a mix of topsoil, compost, and perlite for drainage.
Wrapping up and next steps
Landscaping a flower garden with year-round color is all about planning, layers, and seasonal harmony—but the real magic happens when you dive in and let your creativity bloom! 🌸 By choosing the right plants, designing for depth, and maintaining your space with care, you’ll create a vibrant retreat that thrives in every season. Remember: progress over perfection!
Ready to take the next step? Start small—sketch a quick layout, pick a few showstopper plants, or even just pull up a weed (we won’t judge 😉). Then, grab your tools and watch your garden transform into a living masterpiece. Happy planting!