
Flowers
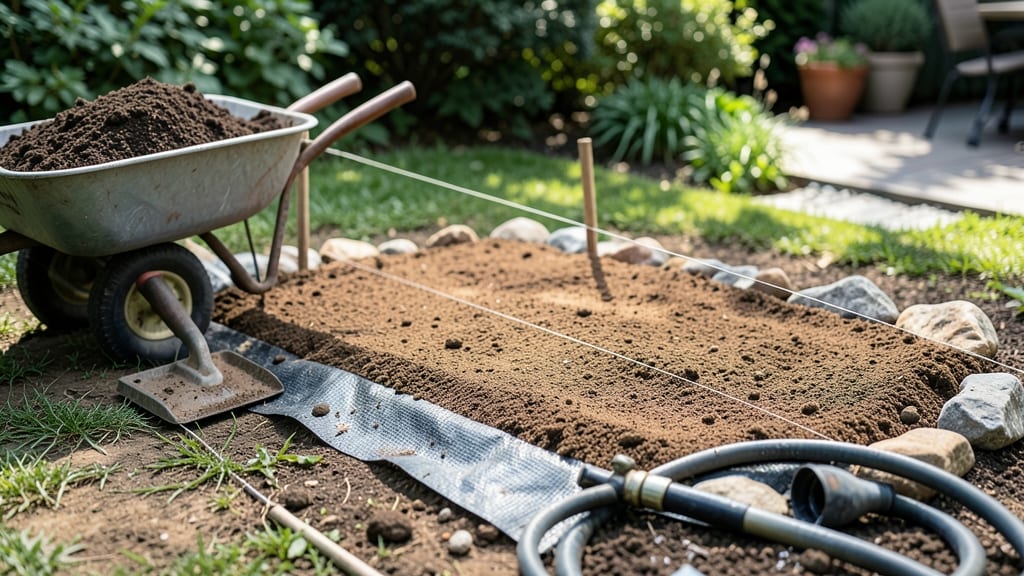
That first flat, even surface makes all the difference. ✨ A properly leveled flower bed isn't just about looks—it ensures proper drainage, prevents water pooling, and gives your plants the stable foundation they need to thrive.
I've leveled dozens of beds over the years, and the difference between a struggling garden and one that pops with color always comes down to this one step.
The tools you need are simple: a sturdy shovel, a rake, a 4-foot level, and some stakes to mark your layout. Start by removing existing plants, rocks, and debris, then dig down about 6-12 inches to break up compacted soil.
The key is working in small sections—never try to level the whole bed at once, or you'll end up with an uneven mess. For slopes, consider building terraces or creating a gentle grade away from your house to prevent erosion.
Once you've got the soil prepped, the real magic happens with the level. Place it across the bed and adjust the soil until it's perfectly flat—no dips, no humps. This might take time, but trust me, your plants will thank you later with stronger roots and bigger blooms.
The finished bed should feel smooth under your hands, like a freshly paved path. For extra protection, top with 2-3 inches of mulch to lock in moisture and keep weeds at bay.
This method works for any size bed, whether you're fixing a small border or transforming a large landscape feature. The payoff? Plants that grow evenly, flowers that stand upright, and a garden that looks like it belongs in a magazine.
No more waterlogged spots or plants struggling to take root—just a perfectly leveled foundation for your dream garden.
The Hidden Causes Behind Uneven Soil
If your flower bed looks more like a rollercoaster than a polished garden plot, you’re not alone. Uneven soil isn’t just an aesthetic nuisance—it can stifle plant growth, create drainage nightmares, and even lead to erosion over time.
But why does this happen in the first place? Let’s dig into the science (and sometimes, the sneaky human habits) behind lumpy, sloped, or sunken flower beds.
Soil isn’t always created equal. Some areas are naturally dense with clay, while others are loose and sandy. Here’s how nature plays a role:
- Clay-heavy soil: When wet, clay particles expand and swell, creating uneven surfaces as they dry and shrink. Over time, this cycle can leave depressions or raised ridges. Actionable fix: Amend with organic matter (like compost) to improve drainage and reduce swelling.
- Sandy soil: Light and airy, but prone to settling unevenly under foot traffic or plant roots. Heavy rainfall can wash away finer particles, leaving low spots. Actionable fix: Add a layer of topsoil or mulch to stabilize the structure.
- Rocky subsoil: If your bed sits atop a layer of rocks or bedrock, the topsoil may thin out in some areas, creating dips. Actionable fix: Test soil depth with a trowel—if it’s inconsistent, add a uniform layer of amended soil.
Pro tip: 🌡️ Use a soil test kit to identify your soil type. Knowing whether you’ve got clay, sand, or loam helps you target the right amendments.
Water is both a gardener’s best friend and worst enemy when it comes to leveling. Here’s how it sabotages your flower bed:
- Poor drainage: If water pools in low spots, it can erode soil over time, deepening depressions. Heavy clay soils are especially guilty of holding water, leading to soggy, sunken areas. Actionable fix: Improve drainage with sand or gravel layers before planting, or install a French drain if needed.
- Rainfall runoff: Sloped beds direct water toward one side, washing away soil and creating a cascading effect. Over years, this can turn a gentle slope into a dramatic hill. Actionable fix: Build a slight berm (raised edge) around the perimeter to slow water flow.
- Irrigation mishaps: Overhead sprinklers or hose streams can dislodge soil, especially on steep slopes. Actionable fix: Use drip irrigation or soaker hoses to deliver water evenly without disturbing the soil.
Pro tip: ✨ After heavy rain, check your bed for new low spots. If you spot erosion, address it immediately with a topsoil top dressing or mulch to protect the soil.
Sometimes, the problem isn’t nature—it’s us. Common gardening habits can unintentionally create uneven terrain:
- Over-tilling: Aggressive tilling can break down soil structure, causing it to settle unevenly. Actionable fix: Till only the top 6–8 inches and avoid compacting the soil with heavy equipment.
- Improper mulching: Piling mulch too thickly in one spot can decompose and create low areas, while thin layers leave soil exposed to erosion. Actionable fix: Spread mulch evenly (2–3 inches deep) and avoid mounding it.
- Foot traffic & pets: Walking, playing, or letting pets dig can compact soil in high-traffic areas, while leaving other spots untouched. Actionable fix: Use stepping stones or paths to direct foot traffic away from planting areas.
- Plant root growth: Some plants (like trees or shrubs) have aggressive root systems that lift or sink the soil as they expand. Actionable fix: Monitor young plants and add soil or mulch to balance uneven areas.
Pro tip: 💡 If you’ve recently added large plants, check the soil around their bases every few months. Roots can shift soil dramatically in the first year!
Even the most carefully leveled flower bed can shift over time due to:
- Organic matter decomposition: Compost, mulch, and plant debris break down, reducing soil volume and creating gradual sinkholes. Actionable fix: Refresh mulch annually and top-dress with compost to maintain elevation.
- Freeze-thaw cycles: In cold climates, water in soil expands when it freezes and contracts when it thaws, causing the ground to heave and settle unpredictably. Actionable fix: Add a layer of straw mulch in winter to insulate the soil and reduce movement.
- Shrinking foundations: If your bed sits on a slab, patio, or retaining wall, soil beneath it may erode or compress over time, causing the bed to tilt. Actionable fix: Check for gaps or shifts in adjacent structures and reinforce with landscape fabric or gravel.
Pro tip: 🎯 For long-term stability, consider adding a geotextile fabric beneath your soil layer to prevent erosion and settling.
Fixing Uneven Flower Beds
Now that you understand the common causes behind uneven flower beds—whether it’s natural soil erosion, poor initial grading, or seasonal shifts—it’s time to roll up your sleeves and get to work. The good news?
Most issues can be resolved with the right tools, a little elbow grease, and a strategic approach. Below, we’ll break down practical solutions for each cause, along with prevention tips to keep your flower bed smooth and level for years to come.
---
If your flower bed has a gradual or steep slope, the first step is to gradually reduce the incline to create a stable planting surface. Here’s how:
#### 🌱 Step 1: Mark Your Level Line Use a garden level (or a long board with a bubble level) to determine the highest and lowest points of your flower bed.
Drive stakes at these points and stretch a string line between them to visualize your target level. This will be your guide for digging and filling.
#### 🏗️ Step 2: Remove Excess Soil or Add Fill - For high spots: Dig out soil in small sections (about 6–12 inches deep) and remove it.
Avoid over-digging, as this can create new low spots. - For low spots: Fill with a mix of topsoil and compost (aim for a 60/40 ratio).
Tamp down lightly with a plate compactor or the back of a shovel to prevent settling. - Pro Tip: 💡 If your slope is severe, consider terracing—creating small, flat steps with retaining walls or logs to prevent erosion while adding visual interest.
#### 💧 Step 3: Compact and Stabilize After leveling, moisten the soil slightly and compact it using a hand tamper or rented plate compactor. This prevents future settling. For extra stability, lay down a landscape fabric before adding mulch or plants to discourage weeds and retain moisture.
#### 🌿 Prevention Tips: - Mulch regularly (2–3 inches of organic mulch) to reduce erosion from rain. - Plant ground covers like creeping thyme or clover to hold soil in place naturally. - Avoid heavy foot traffic on newly leveled areas until soil stabilizes (about 1–2 weeks).
---
If your flower bed was installed with an uneven base (common in DIY projects), you’ll need to regrade the entire area for a smooth finish.
#### 🔍 Step 1: Assess the Problem Areas Walk the bed and identify dips, mounds, or uneven edges. Use a string line again to spot inconsistencies.
#### 🛠️ Step 2: Dig and Relevel - For mounds: Scoop out soil in layers, no deeper than 4–6 inches at a time. Replace with a soil-compost blend and compact. - For dips: Fill with amended soil (topsoil + compost) and tamp firmly.
Avoid over-filling, as this can cause future sinking. - For edges: Use a shovel or spade to create a clean, straight border. Add edging material (plastic, metal, or stone) to maintain shape.
#### 🌱 Step 3: Test for Stability After leveling, water the area lightly and let it settle for 24 hours. Re-check for low spots and adjust if needed.
#### 🔄 Prevention Tips: - Use a laser level for large projects to ensure precision. - Work in small sections (4’x4’ grids) to avoid fatigue and maintain accuracy. - Add a 2–3% slope away from your house to prevent water pooling near foundations.
---
If water pooling or runoff is causing unevenness, improving drainage is key.
#### 🚰 Step 1: Improve Drainage - For pooling water: Dig a shallow French drain (a trench filled with gravel) along the lowest edge of the bed to redirect water. - For excessive runoff: Create a berm (a raised mound of soil) around the perimeter to slow water flow.
#### 🪴 Step 2: Amend Soil for Better Absorption Mix sand or perlite into heavy clay soil (up to 20%) to improve drainage. For sandy soil, add peat moss or coconut coir to retain moisture.
#### 🌿 Prevention Tips: - Plant drought-tolerant flowers in low-lying areas to reduce water stress. - Install a swale (a shallow, curved ditch) to capture and absorb rainwater naturally. - Avoid compacting soil after heavy rain—wait until it’s dry to work.
---
Over time, foot traffic, machinery, or heavy mulch can cause soil to compact and sink.
#### 🔄 Step 1: Aerate the Soil Use a garden fork or aerator to poke holes 6–8 inches deep across the bed. This helps loosen compacted soil and encourages root growth.
#### 🌱 Step 2: Add Organic Matter Top-dress with 2–3 inches of compost and lightly rake it in. This improves soil structure and prevents future compaction.
#### 👟 Prevention Tips: - Use stepping stones or boards when working in the bed to reduce foot traffic. - Avoid heavy equipment (like lawn mowers) on newly planted areas. - Mulch lightly (1–2 inches) to prevent soil from baking hard in the sun.
---
| Tool | Purpose | Budget-Friendly Alternative | |------------------------|--------------------------------------|--------------------------------------| | Garden level | Check for true flatness | DIY board + bubble level | | Shovel/spade | Dig and move soil | Rent a trenching tool for large jobs | | Plate compactor | Settle soil after filling | Heavy board or rented compactor | | String line + stakes | Mark level lines | Mason line or painter’s line | | Wheelbarrow | Transport soil | Buckets or tarp drag | | Landscape fabric | Suppress weeds | Cardboard (biodegradable) |
--- Final Thought: 🎯 A perfectly leveled flower bed isn’t just about looks—it’s about healthy plants, less maintenance, and a professional finish. Take your time, work in stages, and don’t hesitate to ask for help with heavy lifting.
With these fixes, your flower bed will be the envy of the neighborhood in no time!
Frequently asked questions
What's the best time of year to level a flower bed?
Spring or early fall are ideal times to level your flower bed. The soil is workable but not too dry, and you avoid extreme heat or freezing temperatures. Avoid leveling during peak summer when soil is parched or winter when it's frozen.
Can I use a laser level for a small flower bed?
For small beds (under 4'x4'), a laser level isn't necessary. A simple 4-foot carpenter's level or even a long board with a bubble level works perfectly. Laser levels shine for larger projects where precision across long distances matters.
How do I fix a flower bed that keeps sinking after leveling?
If your bed sinks repeatedly, you likely need better soil composition. Mix in 2-3 inches of compost and 1 inch of sand to improve drainage and stability. For severe cases, consider adding a geotextile fabric beneath your soil layer to prevent future settling.
Should I level my flower bed before or after planting?
Always level before planting. This gives the soil time to settle naturally, prevents root damage from uneven surfaces, and allows you to properly amend the soil. Planting in an unlevel bed creates uneven growth patterns and drainage issues.
What's the cheapest way to create a level surface for a small flower bed?
For budget-friendly leveling, use a long board as a straightedge and a bubble level to spot high/low areas. Fill low spots with a mix of topsoil and compost (50/50 ratio) and scrape off high spots with a shovel. No need for expensive tools!