
How To
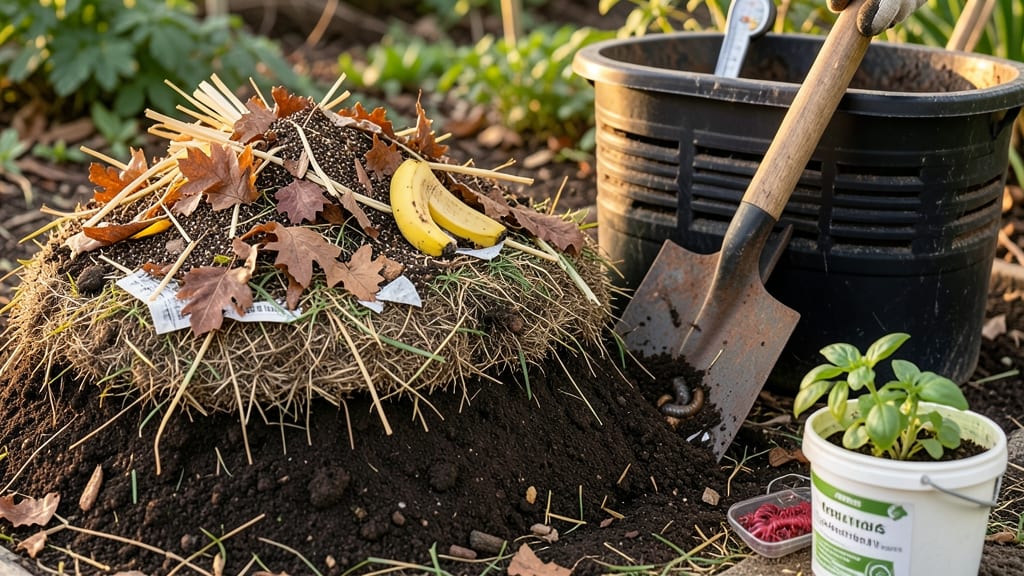
Your soil feels like dry sandpaper, but it doesn’t have to. 🌱 Increasing organic matter transforms that lifeless dirt into a thriving ecosystem where plants grow with ease. I’ve turned my own compacted clay into a garden that holds moisture, feeds roots, and produces harvests year after year—without synthetic shortcuts.
The secret isn’t one magic ingredient but layers of organic material working together. We’re talking kitchen scraps, yard waste, leaves, and even worm castings—all breaking down to create rich, crumbly soil.
Unlike store-bought amendments, this method builds fertility over time, improving drainage and microbial activity while reducing the need for fertilizers.
By the end, your garden will retain water like a sponge, resist compaction, and support stronger root systems. The best part? You’ll see results in just a few months—healthier plants, fewer weeds, and soil that smells like a forest floor instead of dust. Let’s get your soil working for you.
This approach works for vegetable gardens, flower beds, and even houseplants. Whether you’re dealing with heavy clay or sandy soil, the same principles apply—just adjust the materials to what’s available in your area. Ready to dig in?
📚 In This Guide
- What you need
- Instructions
- Tips and common mistakes
- Wrapping up and next steps
What you need
- ● Browns (Carbon-Rich Materials): Dry leaves – 1-2 bags (10-15 gallons each)
- ○ Straw or hay – 2-3 bales (optional: weed-free)
- ● Shredded newspaper or cardboard – 5-10 sheets (avoid glossy paper)
- ● Wood chips or sawdust – 1-2 buckets (untreated wood only)
- ● Greens (Nitrogen-Rich Materials): Fresh grass clippings – 2-3 buckets (avoid herbicide-treated)
- ● Vegetable/fruit scraps – 1-2 gallons (per batch)
- ● Coffee grounds – 1 cup (per week, if available)
- ● Fresh manure (cow, horse, or chicken) – 1-2 shovels (well-aged or composted)
- ● Tools & Setup: Compost bin or pile area – 3’x3’x3’ minimum (or DIY with wire mesh)
- ● Garden fork or pitchfork – 1 (for turning layers)
- ● Shovel – 1 (for mixing and adjusting layers)
- ● Watering can or hose – 1 (to maintain moisture)
- ● Gloves – 1 pair (to protect your hands)
- ● Compost thermometer – 1 (to monitor heat and decomposition)
- ● Worm castings – 1-2 cups (speeds up nutrient breakdown)
- ● Biochar or activated charcoal – 1 handful (improves aeration and microbes)
- ● Epsom salt (magnesium sulfate) – 1 tbsp (boosts plant health)
- ● Compost accelerator (e.g., microbial inoculant) – 1 packet (cuts decomposition time)
Step-by-Step instructions for layered composting to boost soil organic matter
Here's my go-to method for building rich, fertile soil using materials you likely already have.
🌱 Step 1: Choose Your Compost Site and Prepare the Base
Select a 4x4-foot area in partial shade—this prevents overheating while still allowing decomposition. Clear any grass or weeds first, then spread down a 6-inch layer of coarse wood chips or straw. This creates airflow at the bottom and prevents compaction. I like to use untreated hardwood chips because they break down slowly and add long-term structure.
If your soil is already compacted, add a 4-inch layer of sand mixed with wood chips instead. The sand helps break up clay while the wood chips add carbon. Press down lightly with your foot—just enough to settle the layer, but don't compact it. This base ensures your pile stays aerated and drains properly, which prevents foul odors and speeds up decomposition.
🌿 Step 2: Build the Layered Structure
Start with a 4-inch layer of brown materials—think dry leaves, straw, shredded newspaper, or cardboard (no glossy paper). These are your carbon-rich "browns." Then add a 2-inch layer of green materials like grass clippings, vegetable scraps, or coffee grounds. The greens provide nitrogen, while the browns add structure. Alternate these layers until you've used all your materials, finishing with a 2-inch brown layer on top.
Keep each layer no thicker than 4 inches—thicker layers slow decomposition and can trap too much moisture. I like to chop larger materials like corn stalks or branches into 2-inch pieces before adding them. This increases surface area, so microbes can break everything down faster. Water each layer lightly as you go—it should feel like a damp sponge, not dripping wet.
💧 Step 3: Maintain Moisture and Turn Regularly
Check the pile's moisture every 3-5 days. It should feel like a wrung-out sponge—if it's dry, sprinkle water until it's evenly damp. If it's soggy, add more brown materials to absorb excess moisture. A properly balanced pile heats up to 120-140°F within 2-3 weeks, which kills weeds and pathogens while speeding up decomposition.
Use a garden fork or compost aerator to turn the pile every 2-3 weeks. This adds oxygen, which microbes need to work efficiently. When turning, break up any large clumps and mix the outer edges into the center. You'll see the pile shrink as it decomposes—once it's half its original size (usually 4-6 months), it's ready to use. If it still looks chunky, give it another month or two.
☀️ Step 4: Incorporate Finished Compost Into Garden Beds
Spread a 1-inch layer of finished compost over your garden beds and lightly rake it in. For new plantings, mix 25% compost into the top 6 inches of soil. This improves drainage, holds moisture, and feeds soil microbes. I like to top-dress existing plants with compost too—just sprinkle it around the base and water it in. The worms and microbes will work it into the soil naturally over time.
For container gardens, blend 50% compost with 50% potting mix before planting. This gives roots immediate access to nutrients while improving water retention. Avoid using fresh, unfinished compost—it can burn plants due to high ammonia levels. Instead, wait until the pile cools down and smells earthy (like a forest floor) before using it.
Tips & tricks for building the perfect compost pile
These simple strategies will help you create nutrient-rich compost that transforms your garden soil.
Layering Like a Pro: In Step 2, I can't stress enough how important those exact layer measurements are. The 4-inch browns to 2-inch greens ratio is key—this balance prevents odors and speeds up decomposition. If you're short on browns, shredded paper or cardboard works perfectly, but avoid glossy or colored paper. For greens, avoid meat or dairy scraps, which attract pests and create foul smells.
Moisture Management: That "wrung-out sponge" moisture level in Step 3 is everything. Too dry and microbes slow down; too wet and you'll end up with a smelly, anaerobic mess. I like to keep a spray bottle nearby and mist layers as I build the pile. If you notice the pile smelling sour, it's time to add more browns to absorb excess moisture and restore balance.
Temperature Check: The 120-140°F range mentioned in Step 3 is your sweet spot for active decomposition. Use a compost thermometer to monitor—if it's below 120°F, your pile needs more nitrogen (greens) or warmth. If it's above 160°F, add more browns and turn more frequently to cool it down. This temperature range also pasteurizes the pile, killing weed seeds and pathogens.
Equipment Substitutes: Don't have a garden fork? A sturdy shovel or even your hands work in a pinch for turning in Step 3. For compacted soil in Step 1, a garden rake can help break up the ground before adding your sand-wood chip mix. The key is to maintain that aeration—whatever tool you use, just make sure you're mixing the outer edges into the center every 2-3 weeks.
Pro Tips for Increase Organic Matter In Soil
- These simple strategies will help you create nutrient-rich compost that transforms your garden soil.
- Layering Like a Pro: In Step 2, I can't stress enough how important those exact layer measurements are. The 4-inch br...
- Moisture Management: That "wrung-out sponge" moisture level in Step 3 is everything. Too dry and microbes slow down; ...
Frequently asked questions
Got questions about boosting your soil’s organic matter?
You’re not alone! Here are some of the most common queries—and straightforward answers—to help you get started with confidence.
How long does it take to see improvements in soil after adding organic matter?
Patience is key! While some plants may show immediate benefits (like better moisture retention), significant soil structure improvements can take 3 to 6 months. For deep transformations, like enhanced microbial activity, plan for 1 to 2 years of consistent additions. Think of it as a slow-cooked stew—great things take time!
Can I add organic matter to my soil year-round, or are there better times?
Organic matter can be added anytime, but timing matters for efficiency. In spring, work compost into the top 6 inches before planting. In fall, add a thick layer (4–6 inches) to decompose over winter. Avoid heavy additions right before freezing or during drought—soil microbes need moisture and warmth to work their magic!
What are some budget-friendly alternatives to expensive compost?
You don’t need to break the bank! Try these free/cheap options:
- Kitchen scraps: Fruit/veggie peels, coffee grounds, eggshells (crushed).
- Yard waste: Grass clippings (fresh in small amounts), leaves, and straw.
- Manure: Well-aged horse, cow, or chicken manure (avoid fresh—it burns plants!).
- Plant residues: Save dried leaves, spent plants, or even shredded newspaper (carbon-rich).
Will adding organic matter attract pests like ants or rodents?
Not if you do it right! Pests are drawn to fresh, unbalanced organic matter (e.g., meat scraps or dairy). Stick to plant-based materials and bury or cover additions with a 4-inch layer of soil. Avoid piling organic matter near your home’s foundation or in dense clusters. A well-maintained compost pile or spread-out layers are far less inviting to critters.
How do I know if my soil already has enough organic matter?
Test it with these simple checks:
- Squeeze test: Grab a handful of moist soil—if it crumbles easily, it’s likely healthy (3–5% organic matter). If it sticks together like clay, it’s deficient.
- Worm activity: Healthy soil teems with worms. Dig a small hole—if you see none, it’s a sign to add more food for them!
- Dark color: Dark brown/black soil = rich in organic matter. Pale or grayish soil needs a boost.
Wrapping up and next steps
Increasing organic matter in your soil is a rewarding journey that boosts plant health and yields—and you’ve got all the tools to succeed! 🌱 Whether you’re layering compost, adding green manures, or using kitchen scraps, every small effort compounds into richer, more fertile soil over time.
Start with one method, observe changes, and let your garden thrive with each season.
Ready to dive deeper? Pick one technique from this guide and give it a try this weekend! Your future harvests—and the earth—will thank you.