
Pruning
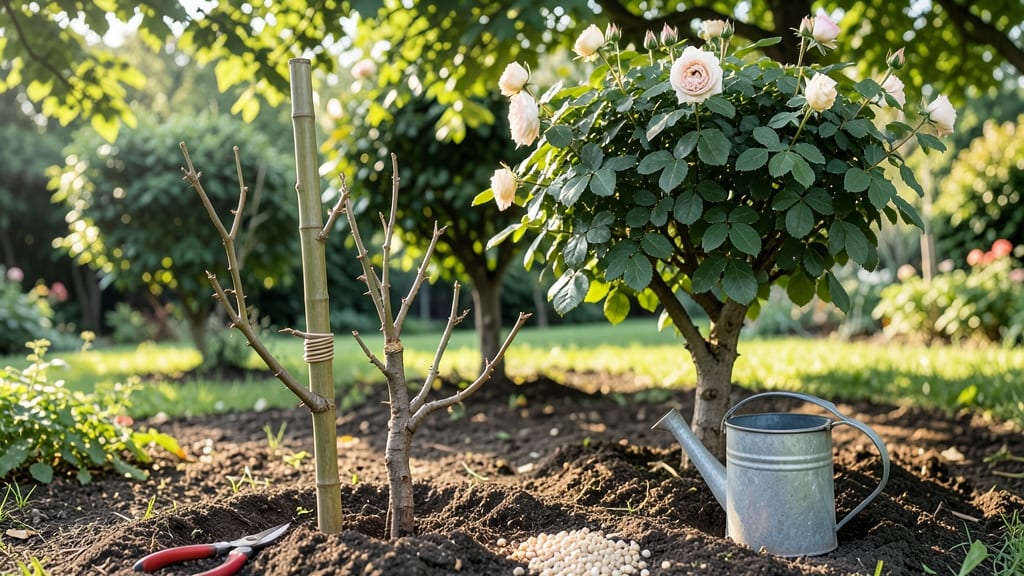
Transforming a rose bush into a tree adds drama to any garden. ✨ I’ve turned leggy roses into stunning specimens with a single grafting technique—no fancy tools or years of experience needed. The secret lies in cleft grafting, where you join a rose cane to a sturdy rootstock.
You’ll need a sharp grafting knife, grafting tape, and a healthy rose bush with strong canes. Most gardeners skip this, but the results—year-round blooms on a tree-like form—are worth the effort. Once grafted, your rose tree needs consistent watering and shade for a few weeks.
Prune lightly to encourage branching, and soon you’ll have a showstopper that blooms like a bush but stands like a tree. The best part? Minimal pruning after establishment. Works for any rose variety and thrives in full sun. Here’s how to make it happen without the usual headaches!
📚 In This Guide
- What you need
- Instructions
- Tips and common mistakes
- Wrapping up and next steps
What you need
- ● Rose bush: Choose a climbing rose (e.g., 'New Dawn,' 'Blaze,' or 'Zephirine Drouhin') or a standard rose bush with flexible canes. Ensure it’s healthy, disease-free, and at least 2-3 years old.
- ○ Strong, sturdy trellis or fence: A 6-10 ft tall structure (wood, metal, or PVC) with horizontal supports for training canes. Optional: Use an A-frame trellis for a classic rose tree shape.
- ● Pruning tools: Bypass pruners (for clean cuts)
- ● Loppers (for thicker canes, ¼-inch diameter or larger)
- ● Hand saw (for stubborn branches)
- ● Garden twine or soft ties: 100+ ft of jute or plastic-coated twine (avoid wire, which can damage canes).
- ● Supporting stakes: 4-6 wooden or metal stakes (1-2 ft long) for securing the base.
- ● Balanced fertilizer: 10-10-10 or 5-10-10 NPK ratio (follow label instructions for application).
- ● Mulch: 2-3 inches of organic mulch (e.g., shredded bark or compost) to retain moisture and suppress weeds.
- ● Rose food or bloom booster: Products like Fish emulsion or rose-specific fertilizer for extra vibrancy.
- ● Copper or sulfur spray: For preventative fungal control (especially in humid climates).
- ● Decorative paint or stain: To enhance your trellis or add a whimsical touch!
- ● Grafting tools (if grafting): Only needed if creating a multi-graft rose tree (e.g., combining different rose varieties).
- ● Sunlight: A spot with at least 6-8 hours of direct sun daily—roses are sun-worshippers!
- ● Well-draining soil: Amend clay soil with compost or sand to improve drainage.
- ● Patience: Training a rose tree takes 1-2 growing seasons for full bloom potential.
- ● Weather timing: Start pruning in late winter or early spring (before new growth begins).
Step-by-Step instructions for crafting a rose tree
Here's how to create a stunning rose tree with layered blooms—no fancy grafting required.
🌿 Step 1: Select and Prepare Your Base Rose Bush
Start with a healthy, mature rose bush that's at least 3 years old and shows strong growth. Look for one with multiple sturdy canes—these will become your "branches." I like to choose a climbing variety like 'New Dawn' or 'Blaze' because they naturally produce long, flexible canes that bend beautifully.
In early spring, before new growth begins, prune the bush back by one-third to encourage vigorous new shoots. Remove any dead, diseased, or crossing canes. This step ensures your rose tree has strong, healthy stems to work with. Water deeply after pruning to help the plant recover.
🪴 Step 2: Train Canes Into a Tree-Like Structure
Select 3-5 of the strongest, longest canes from your rose bush. These will form the main trunk and branches of your rose tree. Use soft garden twine or flexible plant ties to gently weave these canes together at the base, creating a single sturdy trunk. Secure them loosely—you want flexibility, not tight restraint.
For the branches, choose 2-3 additional canes and bend them upward at a 45-degree angle, securing them to a small wooden stake or trellis. Space these branches evenly around the trunk, about 6-12 inches apart. This mimics the natural shape of a tree, giving your rose tree its iconic silhouette. Water lightly after positioning to help the canes settle.
☀️ Step 3: Provide Support and Encourage Growth
Install a 4-6 foot tall wooden post or sturdy stake next to your rose tree to act as the main support. Tie the combined trunk securely to this post at the base, using soft ties that won’t damage the canes as they thicken. For the branches, use small wooden slats or wire mesh to create a gentle arch, guiding them upward in a natural, tree-like shape.
Mulch the base of your rose tree with 2-3 inches of organic mulch (like shredded bark) to retain moisture and suppress weeds. Keep the mulch 6 inches away from the trunk to prevent rot. Water deeply once a week, ensuring the soil stays moist but not soggy. You’ll see new growth within 4-6 weeks—this is your signal that the rose tree is establishing itself.
✂️ Step 4: Prune and Shape for Year-Round Blooms
Throughout the growing season, prune your rose tree to maintain its shape and encourage continuous blooming. In late spring, after the first flush of flowers, cut back one-third of the oldest canes to stimulate new growth. This keeps your rose tree productive and prevents overcrowding. Remove any suckers (shoots growing from the base) to direct energy upward.
In early fall, give your rose tree a light pruning to clean up any dead or weak growth. Avoid heavy pruning at this time—you want to leave the canes intact for winter protection. Apply a 2-3 inch layer of mulch around the base to insulate the roots during cold months. With proper care, your rose tree will reward you with season-long blooms and a stunning, low-maintenance focal point in your garden.
Tips & tricks for crafting a beautiful rose tree
Transforming a rose bush into a tree-like masterpiece takes patience and precision—here's how to avoid common pitfalls and achieve that perfect silhouette.
Selecting the Right Canes: When choosing your 3-5 main canes in Step 2, look for ones that are at least 1/4 inch thick and free of knots or bends. Thinner canes may not support the weight of blooms, while thicker ones provide the structural strength you need. I've found that canes with a slight curve naturally create more interesting branch shapes when trained upward.
Tying Techniques: The way you secure your canes makes all the difference. Use soft garden twine or plant ties that can stretch slightly as the canes thicken—never use wire or anything that might cut into the bark. In Step 2, I like to make a loose figure-eight pattern around the canes and the support structure, leaving room for growth. Recheck and loosen ties every 4-6 weeks during the growing season to prevent girdling.
Support System Secrets: For Step 3, don't just use a single stake—create a mini trellis system. Install your 4-6 foot post and add horizontal slats at 12-inch intervals to create gentle curves in your branches. This mimics natural tree growth patterns and helps distribute weight evenly. You can even bend branches slightly downward at the tips to encourage upward growth in new shoots.
Pruning Precision: When you cut back one-third of the oldest canes in late spring (Step 4), make clean cuts just above an outward-facing bud. This encourages new growth in the right direction. I always prune on a dry day when the plant is dormant—this reduces stress and minimizes disease risk. For winter protection, wrap the entire structure loosely with burlap or frost cloth, leaving space for airflow.
Pro Tips for Make A Rose Tree
- Transforming a rose bush into a tree-like masterpiece takes patience and precision—here's how to avoid common pitfall...
- Selecting the Right Canes: When choosing your 3-5 main canes in Step 2, look for ones that are at least 1/4 inch thic...
- Tying Techniques: The way you secure your canes makes all the difference. Use soft garden twine or plant ties that ca...
Frequently asked questions
Got questions about crafting your own rose tree? You’re not alone! Here are answers to the most common concerns—from timing to troubleshooting—to help you grow a stunning, low-maintenance centerpiece.
What’s the best time of year to start a rose tree?
Spring is ideal for planting or grafting roses onto your tree base (like a Citrus or Hawthorn), when temperatures are mild and growth is active. If you’re using store-bought rose trees, plant them in early spring or fall to avoid extreme heat or frost. Pro tip: Avoid winter—cold stress can hinder root establishment!
Can I use any rose bush for a rose tree, or do I need special varieties?
Most climbing or rambling roses work well, but polyantha or hybrid tea roses thrive best on trees. Avoid shrub roses—they’re too bushy. Look for grafted rose trees (pre-made) or choose disease-resistant varieties like ‘Knock Out’ or ‘New Dawn’ for easier care.
Why aren’t my roses blooming? Troubleshooting tips?
Lack of blooms often stems from over-pruning, poor sunlight (6+ hours daily), or nutrient deficiencies. Check for black spot (fungus) or aphids, which drain energy. Feed with rose-specific fertilizer in spring and trim dead blooms to encourage new growth. Bonus: A light winter prune can boost spring flowers!
Do I need to prune my rose tree differently than a regular rose bush?
Yes! Focus on shaping the tree’s structure while keeping the rose canes flexible. Prune in late winter/early spring to remove crossing branches and thin out crowded canes. Avoid heavy pruning—rose trees bloom on new wood, so leave at least 3–4 buds per stem. Tip: Sterilize tools with rubbing alcohol to prevent disease spread.
Are rose trees hard to grow in cold climates?
Rose trees can survive cold, but choose hardy varieties (like ‘Dr. Huey’ or ‘Blaze’) and plant in well-draining soil with winter mulch (4–6 inches). In zones 5–7, protect young trees with burlap wraps or frost cloth. Warning: Avoid planting in low spots where frost puddles!
What’s the easiest alternative if I don’t want to graft?
Buy a pre-made rose tree from nurseries (search for “rose espalier” or “rose standards”). These come grafted and trained, saving time! Alternatively, train a climbing rose up a trellis or fence for a similar vertical look—just stake it firmly and prune annually.
Wrapping up and next steps
Creating your own rose tree is a rewarding journey that brings beauty and elegance to your garden with minimal effort! By following these steps—selecting the right roses, mastering the grafting technique, and providing consistent care—you’ll enjoy year-round blooms that turn heads and lift spirits. 🌹
Now that you’re armed with knowledge, roll up your sleeves and start grafting! If you’re eager for more gardening inspiration, explore advanced pruning techniques or dive into seasonal rose care tips to keep your tree thriving. Happy gardening—your rose tree awaits! 🌱✨