
Flowers
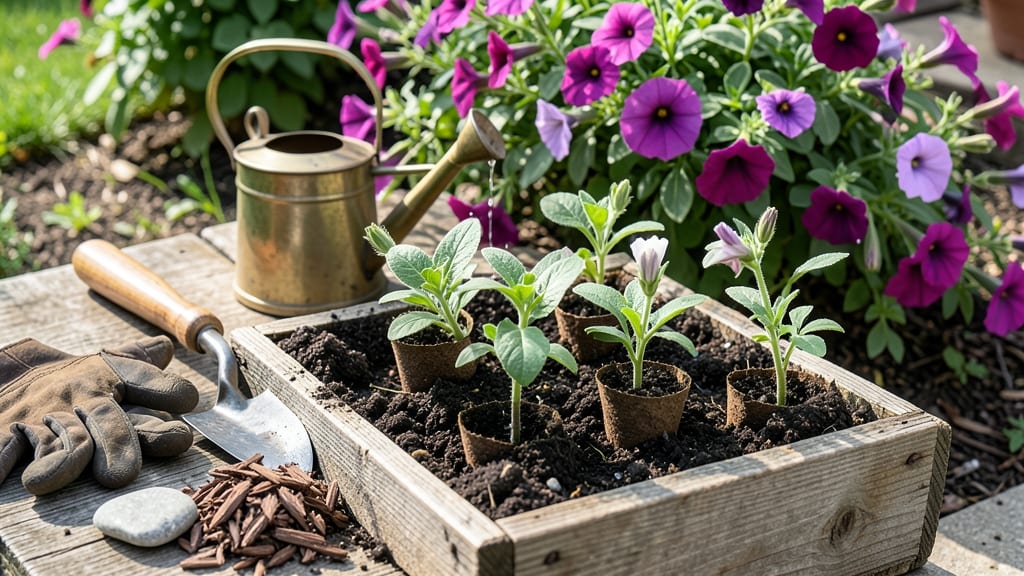
This flower box project turns bare walls into lush vertical gardens. 🌿 I’ve filled mine with trailing petunias and snapdragons—my balcony now looks like a cottage garden, even though my space is tiny. The best part? You can use wooden crates, fabric pockets, or even repurposed gutters.
No fancy tools needed—just a drill, some screws, and a little creativity. I started with a simple pine box and now have three different styles hanging from my railing. By summer, you’ll have spilling blooms that attract bees and butterflies.
The key is choosing plants that thrive in the same light conditions—trailing varieties like nasturtiums or ivy add drama without overwhelming the space. Works for renters, rooftops, or small yards. Let’s get those boxes filled with color!
📚 In This Guide
- What you need
- Instructions
- Tips and common mistakes
- Wrapping up and next steps
What you need
- ● Flower Box (Container): Wooden box (untreated cedar, redwood, or pine—4–6 inches deep) OR
- ● Plastic, ceramic, or metal box (ensure drainage holes are present or drilled)
- ● Drainage Layer: Small gravel, pebbles, or broken pottery (1–2 inches deep)
- ● Or, landscape fabric (to prevent soil from clogging drainage)
- ● Potting Soil: Lightweight, well-draining mix (e.g., 50% potting soil + 50% perlite or compost)
- ● Approx. 2–3 cubic feet per box (depending on size)
- ● Plants: Trailing plants (e.g., petunias, fuchsias, ivy) OR
- ● Compact plants (e.g., geraniums, pansies, herbs like thyme or oregano)
- ● 3–5 plants per 12-inch box (spaced evenly)
- ● Tools: Drill + 1/4-inch drill bit (for drainage holes, if needed)
- ● Screwdriver (if assembling a wooden box)
- ● Measuring tape
- ○ Gloves (optional but highly recommended!)
- ● Waterproof liner (for wooden boxes to extend lifespan)
- ● Decorative paint or stain (for wooden boxes—use non-toxic, outdoor-safe products)
- ● Hanging hardware (if mounting to a wall or fence)
- ● Slow-release fertilizer (mix into soil for longer-lasting blooms)
- ● Mulch (e.g., bark chips) to retain moisture and suppress weeds
Step-by-step instructions for building stunning flower boxes
Here’s how I transform simple materials into vibrant vertical gardens that bring color to any space.
🪴 Step 1: Select and Prepare Your Flower Box Frame
Choose a sturdy wooden box with a depth of at least 6-8 inches—deeper boxes hold more soil and support larger plants. I prefer cedar or redwood because they resist rot and last years without treatment. Sand all edges and corners to prevent splinters, then apply a non-toxic wood sealant to protect against moisture. Let it dry completely before adding soil.
Drill drainage holes along the bottom edge using a 1/4-inch bit, spacing them 4-6 inches apart. These holes prevent waterlogging, which rots roots faster than you’d think. Test your box by tilting it—water should drain freely without pooling. If your box lacks built-in feet, attach L-brackets to the underside to create a gap for airflow.
🌱 Step 2: Layer Soil and Amendments for Drainage
Start with a 2-inch layer of coarse gravel or perlite at the bottom—this ensures excess water drains away from roots. Next, add 2 inches of high-quality potting mix mixed with compost (about 1 part compost to 3 parts soil). I swear by this ratio because it balances moisture retention with aeration. Avoid garden soil—it compacts and suffocates roots.
For flower boxes, I divide the remaining space into three layers: the top third gets moisture-loving annuals like impatiens or lobelia, the middle holds medium-drainage perennials like ferns or heuchera, and the bottom supports drought-tolerant succulents or sedum. This vertical zoning mimics natural soil layers and prevents water stress.
☀️ Step 3: Plant Strategically for Year-Round Interest
Start with thrillers (tall plants like snapdragons or salvia) at the back, then add fillers (mid-height plants like dusty miller or coleus) in the middle, and finish with spillers (trailing plants like sweet potato vine or petunias) at the edges. Space plants based on their mature width—crowding leads to competition, and you’ll end up with leggy, weak growth.
Water deeply after planting until moisture runs freely from the drainage holes. I like to use a slow-release fertilizer mixed into the soil at this stage—it feeds roots steadily without burning tender new growth. Place your box in partial shade to full sun, depending on your plants’ needs. Most annuals thrive in 6+ hours of sunlight, while some perennials tolerate morning sun with afternoon shade.
💧 Step 4: Water and Maintain for Long-Lasting Beauty
Check moisture daily during the first week—flower boxes dry out twice as fast as in-ground gardens. Water until 1 inch of soil feels damp (about 1-2 cups per box, depending on size). After establishment, water every 2-3 days in hot weather, adjusting for rain. I use a self-watering spike in the center of larger boxes to keep roots consistently hydrated without overwatering.
Feed plants every 4-6 weeks with a balanced liquid fertilizer (10-10-10 ratio works well). Deadhead spent blooms regularly to encourage continuous flowering—this simple step keeps your box looking fresh for months. In late fall, remove annuals, refresh the soil with new compost, and store the box in a sheltered spot until spring.
✂️ Step 5: Extend the Season with Creative Additions
Add moss or ivy to soften the edges of your box and retain moisture. I also tuck in ornamental grasses like fountain grass or blue fescue—they add texture and movement without stealing sunlight from flowers. For winter interest, plant evergreen shrubs like heather or boxwood in the fall, or add holly berries for a festive touch.
Rotate your boxes seasonally to keep plants healthy. For example, swap summer annuals with pansies or violas in fall for cooler weather. This rotation prevents soil depletion and gives you a fresh display without replanting. With these steps, your flower boxes will stay vibrant, pest-free, and full of life all year.
Tips & tricks for perfect vertical flower boxes
Common pitfalls—and how to sidestep every one—when building your own vertical garden masterpiece.
Material Selection: Cedar or redwood may be ideal for longevity, but if you're working with a budget, pre-treated pine works too—just be sure to seal it thoroughly. Avoid pressure-treated wood containing chromated copper arsenate (CCA), as it's toxic to plants. For a rustic look, consider reclaimed wood, but always sand it down completely to remove any old finishes or contaminants.
Drainage System: Those 1/4-inch drainage holes are non-negotiable, but here's what I learned the hard way: space them 4-6 inches apart along the bottom edge, and add a second row 1 inch up the side if your box is deeper than 8 inches. This prevents water from pooling at the very bottom while still allowing excess to escape. I also recommend testing your box's drainage by filling it with water and tilting it—if water pools for more than 30 seconds, add more holes.
Soil Layering: The 2-inch gravel/perlite layer at the bottom is your secret weapon against root rot, but don't skimp on the quality of your potting mix. I've found that mixing in orchid bark (about 1 part bark to 3 parts soil) improves aeration even further for succulents in the bottom layer. For the 1 part compost to 3 parts soil ratio, use worm castings instead of regular compost—they're gentler on tender roots and packed with nutrients.
Plant Placement: When arranging your thrillers, fillers, and spillers, think about mature heights and growth habits. For example, sweet potato vine (a popular spiller) can grow 10 feet in a season, so plant it at the very edges where it can cascade freely. I also recommend planting taller perennials like heuchera in the middle layer—they'll establish roots quickly and provide structure for annuals planted around them. This layered approach creates a natural progression that's both beautiful and functional.
Pro Tips for Make Flower Boxes
- Common pitfalls—and how to sidestep every one—when building your own vertical garden masterpiece.
- Material Selection: Cedar or redwood may be ideal for longevity, but if you're working with a budget, pre-treated pin...
- Drainage System: Those 1/4-inch drainage holes are non-negotiable, but here's what I learned the hard way: space them...
Frequently asked questions
Got questions about crafting your own flower boxes? You’re not alone! Here are answers to the most common ones to help you get started with confidence.
What’s the best time of year to plant flower boxes?
For most climates, spring (after the last frost) or early fall are ideal. Spring gives flowers time to establish roots before summer heat, while fall planting allows roots to grow before winter dormancy. Avoid planting in extreme heat or cold—your greens will thank you!
How often should I water my flower box?
Watering depends on your climate, but a good rule is to check soil moisture daily during hot weather. If the top inch feels dry, water thoroughly until it drains from the bottom. Mulch helps retain moisture—just avoid piling it directly against stems to prevent rot.
Can I use a regular wooden box, or do I need special materials?
You can repurpose many materials, like wooden crates, plastic troughs, or even hanging baskets! Just ensure they have drainage holes (drill them if needed) and are sturdy enough to hold soil and plants. For longevity, treat wood with a non-toxic sealant to protect against weather.
What if my flower box plants look wilted or unhealthy?
Wilting often signals underwatering, overwatering, or poor drainage. Check soil moisture, trim dead leaves, and ensure airflow. If pests (like aphids) are the culprit, spray with soapy water or neem oil. Rotate plants occasionally to promote even growth!
How can I make my flower box look more decorative?
Add charm with painted edges, moss lining, or hanging solar lights. Mix textures with terracotta pots tucked into the box or metallic accents. For a cohesive look, stick to a color palette (e.g., pastels or bold jewel tones) and layer plants by height—tall in back, cascading in front!
Still stumped? Drop your question in the comments—we’re happy to help your flower box bloom with ease!
Wrapping up and next steps
Creating your own flower boxes is a rewarding way to bring greenery and beauty to small spaces—whether it’s a balcony, patio, or windowsill! 🌸 With the right materials, a little creativity, and the steps outlined above, you’ll have a thriving vertical garden in no time. Now that you’re ready to plant, why not share your newfound skills? Snap a photo of your blooming flower box and tag us—we’d love to see your green thumb in action!
Next up:
- Experiment with seasonal flowers for year-round color.
- Try edible herbs in a mini box for a functional twist!
- Gift a DIY flower box to a friend—it’s a heartfelt (and green!) present.