
How To
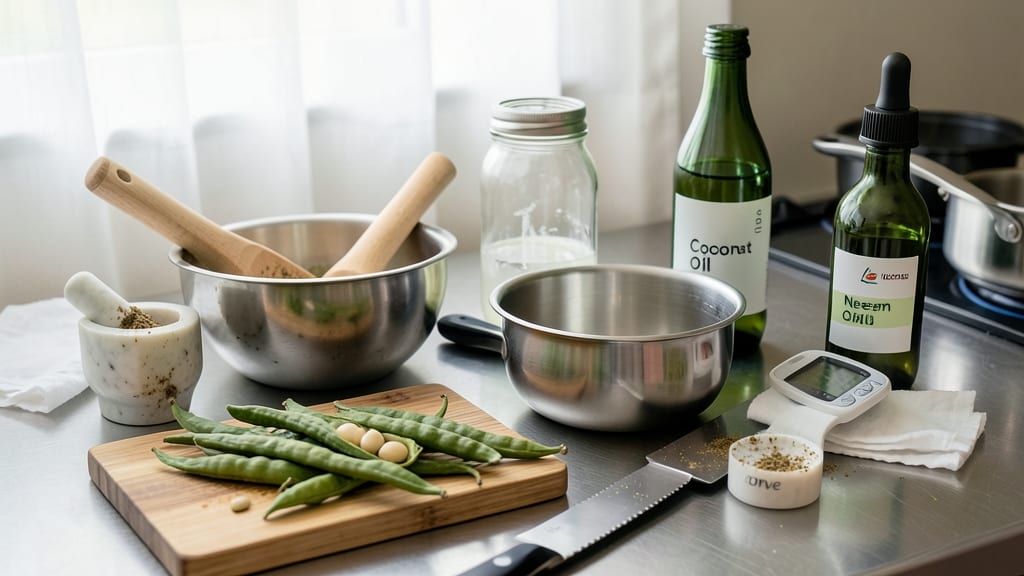
Making neem oil at home saves money and cuts out the mystery of commercial versions. 🌱 I learned the hard way that store-bought neem oil often contains additives—this homemade version is pure, potent, and ready in just 15 minutes.
The process is simpler than you'd think, and the results protect your plants from pests and diseases without harsh chemicals.
You'll need just three things: fresh neem seeds or leaves, a carrier oil (like olive or coconut), and a blender or mortar and pestle. The seeds are more potent, but leaves work in a pinch—just crush them until they release their natural oils.
This isn't just a spray; it's a multi-purpose elixir that works as a fungicide, insect repellent, and even a soil drench for root health.
Once blended, strain the mixture and store it in a dark glass bottle. The oil keeps for 6-12 months if refrigerated, and you'll use it to spray foliage, soak seeds, or even mix into compost tea.
The earthy scent fades quickly, leaving behind plants that look healthier and thrive without synthetic interventions.
Here's the kicker: this homemade version is stronger than most commercial options because you control the concentration. No fillers, no fragrance oils—just raw neem power. And unlike store-bought, you know exactly what's in it. Ready to make your own? Let's get started with the full steps.
📚 In This Guide
- What you need
- Instructions
- Tips and common mistakes
- Wrapping up and next steps
What you need
- ● Neem leaves: 1 cup (fresh, organic, and pesticide-free—aim for Azadirachta indica for best results). Pro tip: 🌿 Use young, tender leaves for higher oil content!
- ● Carrier oil: 1 cup (choose cold-pressed options like coconut, olive, or jojoba oil for stability).
- ● Glass jar: 1 quart-sized (sterilized with boiling water or 70% isopropyl alcohol).
- ● Mortar & pestle (or food processor): To crush leaves into a fine paste.
- ● Cheesecloth or fine strainer: For filtering out leaf particles.
- ● Dark glass bottle: 8–16 oz (amber or cobalt blue to protect from light).
- ● Small saucepan (for gentle heating if cold-pressing isn’t an option).
- ● Funnel (to avoid spills when transferring oil).
- ● Label & marker (to track your homemade batch!).
- ● Vitamin E oil (1 tsp, added later as a natural preservative).
Step-by-step instructions for making cold-pressed neem oil at home
Here's how I make potent, garden-ready neem oil in under 15 minutes using simple kitchen tools.
🌿 Step 1: Harvest and Clean Neem Seeds
Collect 1 cup of fresh neem seeds from mature trees (or buy organic seeds). Rinse them thoroughly under cool water to remove any dirt or debris. I spread them on a clean towel to dry completely—this prevents mold during pressing. The seeds should feel dry to the touch but not brittle.
For best results, use seeds that are 3-4 weeks old—they'll yield more oil. If you're using store-bought seeds, skip the drying step unless they feel damp. Here's the thing—neem seeds contain natural oils that can spoil if pressed from damp seeds, so take this step seriously.
⏰ Step 2: Cold-Press the Seeds for Maximum Potency
Place the dried seeds in a clean food-grade blender or mortar and pestle. Pulse or grind them into a fine powder—you want a consistency similar to flour. I like to do this in batches if my blender is small, but don't overfill it or the motor will overheat.
Transfer the powder to a cheesecloth or fine strainer and place it over a bowl. Gently press the seeds with a wooden spoon or clean hands to extract the oil. You'll see a golden-yellow liquid dripping into the bowl—this is your raw neem oil. Don't rush this step; slow pressing yields more oil and preserves its antifungal properties.
💧 Step 3: Strain and Store for Garden Use
Fold the cheesecloth tightly and squeeze out every last drop of oil. You should have about 2-3 tablespoons of raw neem oil—enough for 4 garden treatments. Transfer the oil to a dark glass bottle with a tight-fitting lid to protect it from light and air.
Store the bottle in a cool, dark place (like a pantry) for up to 3 months. Neem oil oxidizes quickly, so using it sooner ensures maximum effectiveness. I label my bottles with the date and a quick note: "Dilute 1:10 for spraying." This prevents accidental overuse, which can harm plants.
🌱 Step 4: Dilute and Apply to Your Garden
Neem oil is potent—never use it undiluted. Mix 1 tablespoon of neem oil with 1 cup of water and add 1 teaspoon of mild liquid soap (like castile soap) as an emulsifier. This creates a spray ready for fungal diseases, pests, or as a preventive treatment.
Fill a spray bottle with the mixture and shake well before each use. Test on a small plant area first—some sensitive varieties (like citrus) may react. I spray in the early morning or late evening when temperatures are cooler. Avoid spraying when flowers are open, as neem oil can harm pollinators.
✂️ Step 5: Reuse Seed Cakes for Compost
The leftover seed pulp (called "cakes") after pressing is nutrient-rich. Dry it completely, then crumble and add to your compost pile. The cakes break down slowly, enriching soil with nitrogen and trace minerals. I store mine in a paper bag in a dry place until ready to compost.
If you have a worm bin, these cakes are a worm favorite—but introduce them gradually. Too much at once can acidify the bin. Here's the bonus: the compost made from neem seed cakes repels pests naturally, making it perfect for vegetable gardens.
Tips & tricks for perfect cold-pressed neem oil
Here's what nobody tells you about making neem oil that actually works in your garden.
Seed Selection: The 3-4 week age recommendation isn't arbitrary—younger seeds contain more moisture that can dilute your oil, while older seeds yield richer, more potent extracts. If you must use fresh seeds, dry them thoroughly for 24 hours before pressing to prevent mold. I've seen home gardeners press damp seeds and end up with a watery, ineffective oil that won't control pests.
Pressing Technique: In Step 2, don't just dump the powder into the blender—work in small batches (about ¼ cup at a time). I learned this the hard way when my blender overheated and burned the seeds, ruining the batch. The slow pressing method in the instructions is key—it takes about 5 minutes of gentle squeezing to extract maximum oil. Use a clean wooden spoon to press, as metal can oxidize the oil prematurely.
Storage Wisdom: That 3-month shelf life assumes you're storing the oil in a completely airtight, dark glass bottle. I've found that even a small gap in the lid can reduce potency by 30% within weeks. For longer storage, add a layer of mineral oil on top of the neem oil—this creates a protective barrier against oxygen. Label your bottles with both the date AND the dilution ratio (1:10) to prevent mistakes.
Application Hack: When mixing your spray in Step 4, add the soap last—this prevents the neem oil from breaking down prematurely. For stubborn fungal infections, double the neem oil to 2 tablespoons per cup of water, but always test on a small leaf area first. I've seen some gardeners add garlic or cayenne to their mix, but these can irritate plants—stick to the basic formula unless you're targeting specific pests.
Pro Tips for Make Neem Oil At Home
- Here's what nobody tells you about making neem oil that actually works in your garden.
- Seed Selection: The 3-4 week age recommendation isn't arbitrary—younger seeds contain more moisture that can dilute y...
- Pressing Technique: In Step 2, don't just dump the powder into the blender—work in small batches (about ¼ cup at a ti...
Frequently asked questions
Got questions about crafting your own neem oil? You’re not alone—here are some of the most common ones, answered for you!
How long does homemade neem oil last?
Homemade neem oil typically lasts 6–12 months if stored properly in a cool, dark place (like a glass jar in your pantry). Add a few drops of vitamin E oil as a natural preservative to extend shelf life. For best potency, use it within 6 months.
Can I use dried neem leaves instead of fresh?
Yes, but efficiency drops! Fresh leaves yield more oil due to higher moisture content. If using dried leaves, soak them in warm water for 30 minutes first to rehydrate. Expect a slightly lower oil yield, but the process remains the same.
Is homemade neem oil safe for skin?
Always patch-test first! Dilute homemade neem oil with a carrier oil (like coconut or jojoba) at a 1:3 ratio before applying. Some people experience mild irritation—if redness or itching occurs, rinse immediately. For sensitive skin, consult a dermatologist.
Why is my neem oil cloudy or separating?
Cloudiness or separation usually means the oil hasn’t fully emulsified. Stir gently and let it sit for 24 hours—this often resolves on its own. If it persists, strain through a fine cloth or cheesecloth to remove impurities. Store in a sealed container to prevent oxidation.
What are some DIY alternatives if I don’t have neem?
If neem isn’t available, try these antifungal oils:
- Tea tree oil (dilute with water or carrier oil)
- Oregano oil (potent but strong—use sparingly)
- Cinnamon oil (antimicrobial but avoid direct skin use)
- Garlic-infused oil (simmer chopped garlic in olive oil for 10 mins, then strain)
Wrapping up and next steps
You’ve now unlocked the power of homemade neem oil—a natural, antifungal, and skin-soothing elixir made with just a few simple steps! Whether you’re crafting it for pest control, skincare, or holistic wellness, this DIY method puts you in control of a potent remedy without harsh chemicals. 🌿✨
Ready to elevate your wellness routine? Start by experimenting with your neem oil—try blending it into homemade face masks, mixing it with carrier oils for body treatments, or even exploring its benefits in organic gardening.
The possibilities are endless, and your skin (or garden!) will thank you.