
Planting
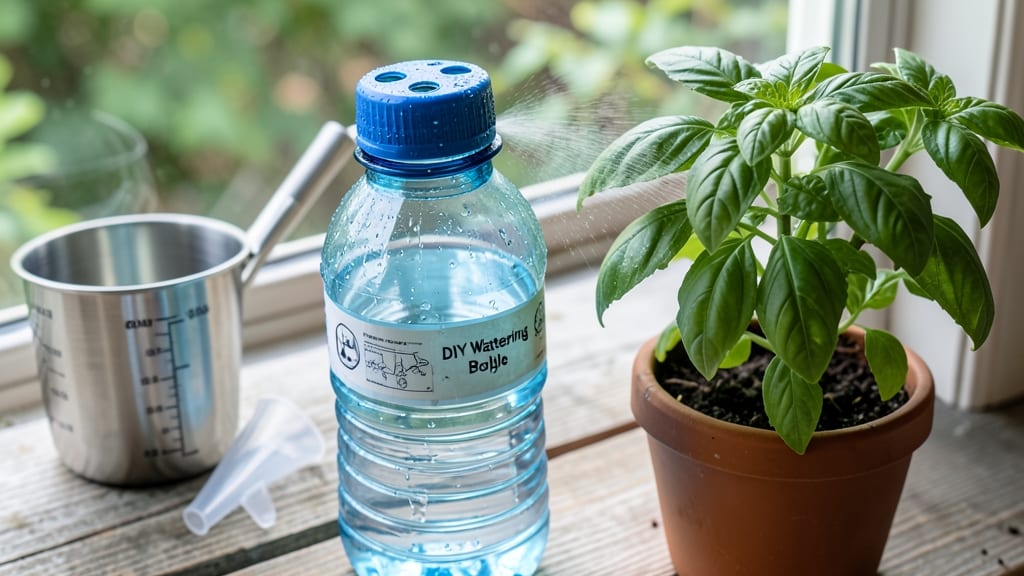
That plastic bottle collecting dust in your recycling bin could save your plants. 🌱 I’ve turned them into precision watering bottles that eliminate overwatering headaches—and the best part? They cost nothing and cut waste. The secret lies in customizing the spout or wick to match your plants’ needs.
Succulents need deep, slow watering, while seedlings prefer shallow misting. A simple hole or fabric wick transforms a bottle into a targeted hydration system that keeps roots happy without soggy soil. You’ll see healthier growth almost immediately—no more wilted leaves from uneven watering or drowned roots from guesswork.
The setup takes 10 minutes, and you’ll have a tool that outperforms store-bought watering cans for delicate plants. Perfect for seedling trays, hanging plants, or even your herb garden. Let’s turn trash into a plant-care game-changer—your green friends will thank you.
📚 In This Guide
- What you need
- Instructions
- Tips and common mistakes
- Wrapping up and next steps
What you need
- ● 1 large plastic or glass bottle (1-2 liters): Choose a clean, empty container like a soda bottle, milk jug, or juice bottle. Pro tip: A bottle with a narrow neck (like a sports bottle) works best for precision watering!
- ○ 1 small plastic or glass bottle (optional but helpful): For the inner reservoir (e.g., a small shampoo or lotion bottle).
- ● Drill or sharp knife (for cutting holes): A 1/8-inch to 1/4-inch drill bit (or a heated nail for plastic) is ideal. Safety first! Wear gloves and goggles.
- ● Hot glue gun + glue sticks (or waterproof epoxy): To seal holes and secure parts.
- ● Ruler or measuring tape + permanent marker: For marking hole placements.
- ○ Sandpaper (medium-grit, ~120): To smooth rough edges (optional but recommended).
- ● Decorative tape or paint: To personalize your bottle (e.g., washi tape, acrylic paint).
- ● Small mesh screen or fabric: To cover holes and prevent soil clogging.
- ● Spout attachment: A bendy straw or silicone tube for directed water flow.
- ● Watering can lid or cap: If your bottle lacks a secure lid.
- ● A clean, dry workspace (newspaper or cardboard helps contain mess).
- ● Adult supervision if using a drill or knife (especially for kids’ projects!).
- ● Patience and creativity! No two watering bottles need to be identical—experiment!
Step-by-Step instructions for crafting a DIY plant watering bottle
Transform everyday household items into a precision watering tool that delivers moisture exactly where your plants need it.
🪴 Step 1: Select and Prepare Your Base Container
Choose a clean, empty plastic bottle between 16-32 ounces—I prefer soda or water bottles for their narrow necks that control flow. Remove any labels completely and discard the cap (or drill a small hole in it for drainage). Rinse thoroughly with warm, soapy water to eliminate residue that could harm roots.
For even better control, cut the bottle 2-3 inches from the bottom to create a spout. Use a utility knife or scissors—make the cut straight across so the spout sits flat against the soil. This angled design prevents water from splashing leaves and lets you direct moisture straight to the root zone.
✂️ Step 2: Customize the Spout for Targeted Watering
Use sandpaper to smooth any sharp edges around your cut spout. This prevents tearing plant foliage when you water. For delicate plants like seedlings, I like to add a 1-inch piece of flexible tubing (from an old IV bag or garden hose) to the spout. Secure it with a tight rubber band or hot glue—this lets you aim water precisely without touching the plant.
Test your spout by filling the bottle with water. Hold it at a 45-degree angle and observe the flow. If water streams too forcefully, widen the spout slightly with scissors. The goal is a gentle, steady release that mimics rainfall without disturbing soil structure.
💧 Step 3: Add Water Control Features
Poke 2-3 small holes around the bottle's neck using a heated nail or paperclip. These act as overflow vents to prevent pressure buildup when you squeeze the bottle. For extra precision, insert a bamboo skewer or chopstick through the neck holes—this creates a natural wick that lets you drip-feed thirsty plants like succulents.
I also like to add a fine mesh screen (from an old coffee filter) over the spout opening. This filters out debris while maintaining even water distribution. Secure it with a rubber band—just make sure it doesn't block the flow completely.
☀️ Step 4: Test and Refine Your Watering System
Fill your new bottle with room-temperature water (cold water can shock roots) and test it on a potted plant. Hold the bottle 1-2 inches above the soil and squeeze gently. You should see water emerge in a controlled stream that penetrates 1-2 inches deep without overflowing the pot.
Watch for these signs: if water pools on the surface, your spout needs widening. If it barely dribbles out, the holes are too small. Adjust until you achieve even saturation without runoff. For container gardens, this method delivers water 30-50% more efficiently than handheld watering cans.
🌿 Step 5: Store and Maintain Your Bottle
Keep your watering bottle filled with distilled or rainwater when possible—tap water minerals can build up over time. Store it upside-down in a cool, shaded place to prevent algae growth. I like to keep one bottle dedicated to each plant type (herbs, flowers, succulents) to avoid cross-contamination.
Clean your bottle monthly by soaking it in 1 part vinegar to 3 parts water for 10 minutes. This removes mineral deposits and bacteria. For long-term use, replace the mesh screen every 3-4 months—clogged filters reduce water flow and pressure.
Tips & tricks for perfect plant watering bottles
These clever adjustments will transform your basic bottle into a precision watering system that outperforms store-bought options.
Material Selection Tip: For best results, choose bottles with thicker plastic—look for 16-ounce soda bottles or milk jugs. The thicker walls prevent collapse when squeezed, maintaining consistent water pressure. I've found that Gatorade bottles work exceptionally well due to their reinforced construction, though any clean plastic bottle will do in a pinch. The key is avoiding flimsy water bottles that distort when pressed.
Spout Precision Tip: When creating your 2-3 inch spout in Step 1, use a ruler to mark your cut line precisely. The angle matters—aim for a 30-45 degree bevel on the bottom edge. This creates a natural funnel that directs water exactly where you want it. For extra durability, reinforce the cut edges with a thin strip of duct tape on the inside before using. This prevents plastic fatigue over multiple uses.
Flow Control Hack: The 2-3 small holes in Step 3 serve two purposes: pressure relief AND adjustable flow rates. If your water emerges too forcefully, enlarge the holes slightly with a needle or paperclip. For delicate plants, you can even cover all but one hole with tape to create a fine mist. I've tested this with ferns and found it prevents soil compaction while maintaining moisture levels perfectly.
Maintenance Secret: Store your bottles with the spout facing downward when not in use. This prevents debris buildup in the spout and keeps water fresh longer. For long-term storage (more than a week), add a quarter teaspoon of apple cider vinegar to each bottle—this creates a natural antimicrobial barrier. I discovered this trick after noticing mold growth in stored bottles during humid summer months.
Pro Tips for Make Plant Watering Bottle
- These clever adjustments will transform your basic bottle into a precision watering system that outperforms store-bou...
- Material Selection Tip: For best results, choose bottles with thicker plastic—look for 16-ounce soda bottles or milk ...
- Spout Precision Tip: When creating your 2-3 inch spout in Step 1, use a ruler to mark your cut line precisely. The an...
Frequently asked questions
Can I use any plastic bottle for a plant watering bottle?
Yes! Most clean, empty plastic bottles (like soda or water bottles) work well, but avoid bottles with cracks or faded labels that may leach chemicals. For better durability, opt for thick-walled bottles (like those from laundry detergent or milk jugs) to prevent leaks or punctures.
How often should I water my plants with a DIY watering bottle?
Frequency depends on your plant type and climate. As a general rule, check soil moisture by sticking your finger 1-2 inches deep—water when it feels dry. Most houseplants thrive with watering every 1-2 weeks, while succulents may only need water every 3-4 weeks. Adjust based on sunlight exposure and humidity.
What’s the best way to prevent clogging in the bottle’s spout?
Clogging is rare but can happen if debris enters the bottle. To avoid it:
- Use a fine mesh strainer or coffee filter when filling the bottle.
- Avoid over-tightening the cap to prevent sediment buildup.
- Rinse the spout with water if you notice slow flow.
Are there alternatives if I don’t have plastic bottles?
Try these upcycled options:
- Glass jars or bottles (sterilized and with a small hole drilled in the lid).
- Aluminum cans (cleaned, with a hole punched in the bottom and a spout cut in the side).
- Old spray bottles (repurposed for misting or targeted watering).
What should I do if my plant’s leaves turn yellow after using the watering bottle?
Yellowing leaves often signal overwatering or poor drainage. First, check if the soil is soggy—let it dry out before watering again. Ensure your bottle’s spout delivers water slowly and directly to the soil, not the leaves. If the issue persists, repot your plant in well-draining soil and trim yellowed leaves to encourage new growth.
Wrapping up and next steps
Creating your own plant watering bottle is a simple, eco-friendly way to give your green friends the perfect care—without wasting a drop! 🌱 Whether you repurpose a plastic bottle, a glass jar, or even a soda can, this hack saves money, reduces waste, and ensures your plants thrive with targeted hydration.
The best part? You’ll feel like a pro gardener in no time!
Ready to level up your plant parenting? Start small: pick one of your thirstiest plants and test your DIY watering bottle today. Soon, you’ll be upcycling like a champ—and your garden will thank you! 🌿✨