
Vegetables
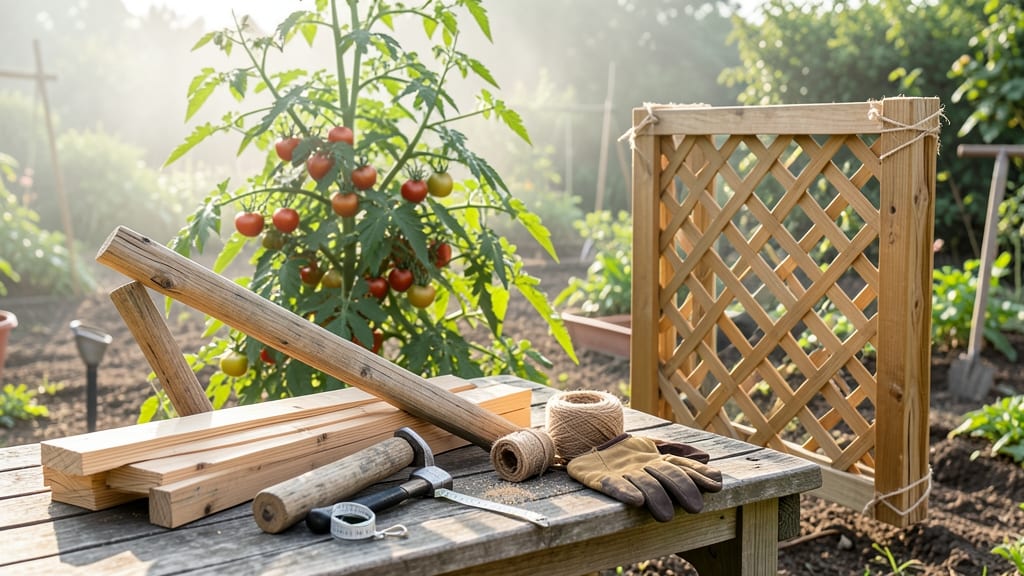
My first tomato cage collapsed under a 10-pound vine—game over for that season. 🌱 That failure led me to design these sturdy wood cages that hold up to 30+ pounds of fruit without bending. No more flimsy wire or plastic that sags by July.
The secret isn’t fancy tools—just cedar or pine boards, a saw, and basic hardware. Cedar resists rot, while pine keeps costs low. You’ll build a 4-foot square frame with lattice panels for airflow, strong enough for heirloom varieties like 'Brandywine' that grow like small trees.
By the time your tomatoes need support, you’ll have reusable cages that last years. Add wire mesh to the bottom to deter squirrels, or paint them to match your garden decor. The payoff? No more tomato sprawl, no more broken cages, just neat rows of productive plants.
Works for containers, raised beds, or in-ground gardens. Let’s get building—your vines will thank you.
📚 In This Guide
- What you need
- Instructions
- Tips and common mistakes
- Wrapping up and next steps
What you need
- ● Wood: 4–6 2x2-inch or 2x4-inch lumber pieces (8–10 ft long total)
- ○ Optional: Cedar or redwood (resists rot better than pine)
- ● Fasteners: Galvanized or stainless steel screws (1.5–2 inches long, ~20–30 screws)
- ● Alternative: Heavy-duty staples or zip ties (for a no-drill option)
- ● Tools: Measuring tape
- ● Pencil or marker
- ● Saw (hand saw, circular saw, or miter saw)
- ● Drill or screw gun
- ● Safety glasses & gloves (always prioritize safety!)
- ● Wood glue (for extra reinforcement)
- ● Sandpaper (120–150 grit, to smooth rough edges)
- ● Non-toxic wood sealant (to extend lifespan)
- ● Pre-cut stakes or rebar (for added stability)
Step-by-Step instructions for building sturdy wood tomato cages
Here's my go-to method for creating cages that won't collapse under heavy tomato vines.
🪴 Step 1: Gather Materials and Cut Wood to Size
You'll need 4 pieces of 1x1-inch lumber, each 6 feet long—this makes four standard cages. Cut each piece into 8 equal sections of 9 inches each (you'll need 32 total pieces). I use a miter saw for clean cuts, but a handsaw works fine if you take your time. Mark measurements clearly on the lumber before cutting to avoid mistakes.
For extra durability, I treat the wood with a non-toxic outdoor sealant. This prevents rot and makes the cages last multiple seasons. Let the wood dry completely before assembly—about 2-3 hours in warm, dry conditions. The sealed wood will feel slightly tacky to the touch when ready.
✂️ Step 2: Assemble the Cage Frame
Start by creating the base of the cage. Take 4 of the 9-inch pieces and arrange them in a square, leaving a 4-inch gap between each end. Secure the corners with 2-inch deck screws, driving them in at a 45-degree angle for maximum stability. This forms your bottom ring—your cage's foundation.
Next, add the vertical supports. Place 4 additional 9-inch pieces upright at each corner, flush with the ends of the base. Secure them with 1.5-inch screws through the base into the vertical pieces. You'll now have a square frame with four vertical posts. This is where most people rush and end up with wobbly cages—take your time aligning everything perfectly.
🌿 Step 3: Build the Cage Structure
Now create the top ring by repeating the base assembly process. Use 4 more 9-inch pieces to form a square, leaving the same 4-inch gap between ends. Attach this top ring to your vertical posts using 2-inch screws, positioning it 3 feet above the base. This gives your tomatoes plenty of vertical space to grow without toppling over.
For the diagonal supports, cut 4 additional 9-inch pieces in half to create 8-inch lengths. Place these diagonally between opposite corners of the top and bottom rings. Secure with 1.5-inch screws at both ends. These cross braces prevent the cage from twisting under the weight of heavy vines. You'll notice the structure feels rock-solid once all braces are in place.
🔧 Step 4: Add Horizontal Rungs for Vine Support
Cut 16 more 9-inch pieces in half to create 4.5-inch lengths. These will be your horizontal rungs. Space them evenly around the cage, attaching them horizontally between the vertical posts at 6-inch intervals vertically. Use 1-inch screws to secure each rung, making sure they're level with one another. You'll need four rows of rungs total—two rows between the top and middle, and two between the middle and bottom.
For extra support, I add a final horizontal ring about 1 foot above the base. This creates a sturdy lower platform that prevents the cage from bending at the bottom when laden with fruit. The rungs should feel firm when pressed—no wobbling allowed. If you notice any instability, add an additional diagonal brace between the vertical posts.
☀️ Step 5: Finish and Position Your Cages
Give your cages one final coat of sealant to protect against weather and pests. I prefer a clear, water-based polyurethane that dries quickly. Let it cure for 24 hours before use. The finished cages should feel smooth to the touch with no rough edges that could damage plant stems.
Position your cages in the garden after transplanting your tomato seedlings. Drive them 6 inches deep into the soil at a slight angle (about 10 degrees) for better stability. This angle helps prevent wind from knocking the cages over. You'll know they're properly anchored when they don't rock even with a gentle push.
Tips & tricks for building sturdy wood tomato cages
Building your own tomato cages saves money and gives you customizable support for your plants. Here's how to make them last through multiple growing seasons.
Precision Cutting: When cutting your 6-foot lumber into 9-inch pieces, I recommend using a straightedge to mark your cuts before making them. This ensures every piece is identical, which is crucial for maintaining the square shape of your cages. A miter saw gives the cleanest cuts, but if you're using a handsaw, clamp the wood securely to prevent shifting during cutting. The 4-inch gaps between pieces in Step 2 are critical—measure twice to avoid uneven spacing that could weaken the structure.
Screw Placement Strategy: In Step 2, when attaching the vertical supports, I drive my screws through the base into the vertical pieces at a slight upward angle. This creates a stronger connection that resists pulling out when the cage bears weight. For the diagonal braces in Step 3, I pre-drill holes slightly smaller than my screws to prevent wood splitting—especially important with the 1.5-inch screws. This small precaution makes a big difference in long-term stability.
Sealant Application: The 2-3 hour drying time for your sealant might feel long, but rushing this step leads to sticky surfaces that attract dirt and pests. I apply two thin coats rather than one thick one, letting each dry completely before adding the next. This creates a durable, even finish that protects against moisture while keeping the wood breathable. The tacky feeling you should get is actually a good sign—it means the sealant is properly bonding to the wood fibers.
Rung Alignment: In Step 4, maintaining level rungs is easier than you might think. I use a level tool to check each rung as I install it, but even without one, you can eyeball it by holding a straight piece of wood across the rungs. The 6-inch vertical spacing between rows creates perfect handholds for your tomato vines to climb. If you notice any wobble after assembly, add an extra diagonal brace between the vertical posts—this is my go-to fix for any instability.
Pro Tips for Make Wood Tomato Cages
- Building your own tomato cages saves money and gives you customizable support for your plants.
- Precision Cutting: When cutting your 6-foot lumber into 9-inch pieces, I recommend using a straightedge to mark your cuts before making them.
- Screw Placement Strategy: In Step 2, when attaching the vertical supports, I drive my screws through the base into the vertical pieces at a slight upward angle.
Frequently asked questions
Got questions about building your own wood tomato cages? You’re not alone! Here are answers to the most common queries to help you create sturdy supports with confidence.
How tall should my wood tomato cages be?
For most tomato varieties, aim for 5 to 6 feet tall. Determinate (bush) tomatoes need 4–5 feet, while indeterminate (vining) types thrive with 6+ feet of support. Extra height prevents sprawling and makes harvesting easier!
Can I use untreated wood for tomato cages?
Untreated wood can leach chemicals into the soil, harming plants. Opt for cedar, redwood, or pressure-treated pine labeled "ACQ" (arsenic-free). Seal with non-toxic wood stain or paint to extend lifespan and protect against rot.
When is the best time to assemble tomato cages?
Assemble cages 1–2 weeks before transplanting seedlings (typically late spring). Early setup lets roots establish before vines need support. If using potted tomatoes, cages can go in at planting time for immediate stability.
What if my cages wobble or collapse under tomato weight?
Wobbling often means the base isn’t wide or deep enough. Bury the bottom 6–12 inches or anchor with stakes. For extra reinforcement, add horizontal cross-braces mid-cage. Heavy pruning also reduces strain!
Are there alternatives to wood cages for tomatoes?
Yes! Try metal cages, bamboo teepees, or repurposed wire fencing. For a zero-waste option, use old pallets or PVC pipes (cut into sections and lashed together). Each has pros—wood offers durability and a rustic look!
Wrapping up and next steps
Building your own wood tomato cages is a rewarding project that saves money and ensures your plants get the sturdy support they need for a bountiful harvest! 🌱 With just a few basic materials and some creativity, you can create durable, custom-sized cages that outperform store-bought options.
Whether you're a seasoned gardener or a beginner, this DIY approach empowers you to take control of your garden’s success.
Now that you’re ready to build, grab your tools and start crafting—your tomatoes will thank you with juicy, vine-ripened goodness! For even more garden inspiration, check out our guide on maximizing vertical space in small gardens next.