
Vegetables
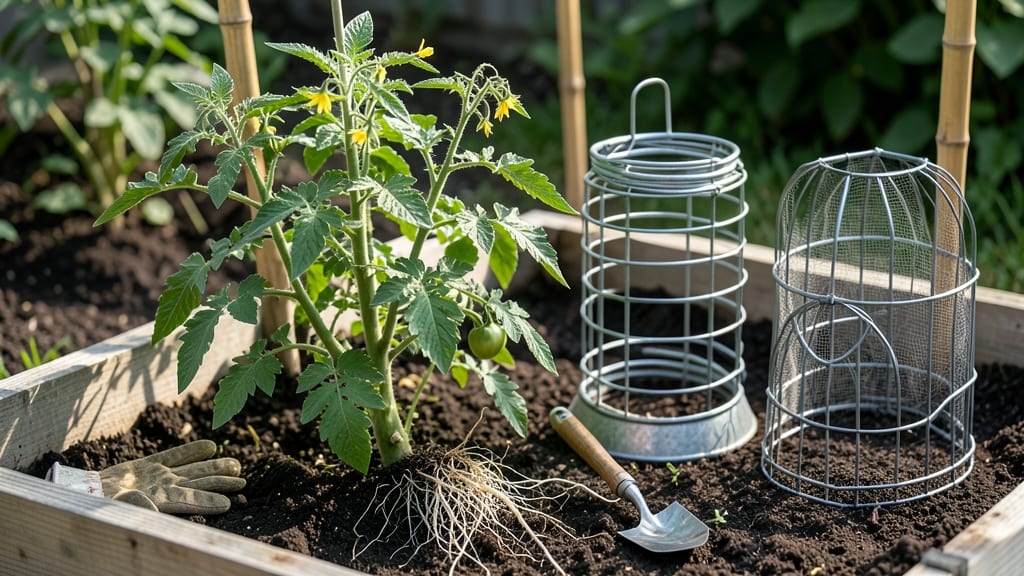
Tomato cages transform floppy vines into sturdy, productive plants—if you place them right. 🌱 I’ve seen cages topple over from overcrowding or planted too shallow, turning a simple support into a frustrating mess.
The secret lies in matching cage size to plant needs, spacing for airflow, and burying them deep enough to stay upright. Start with the right cage for your tomato variety: 5-foot cages work for bush types, while indeterminate vines need 6-7 feet of support.
Plant cages 6-12 inches from the stem (never touching it) and bury half their height in the soil for stability. This prevents leaning and gives roots room to anchor. Proper placement means thicker stems, more flowers, and heavier fruit—no more tomatoes dragging in the dirt.
You’ll also avoid common pitfalls like cages collapsing under ripe tomatoes or plants growing into tangled webs. A little prep now saves hours of frustration later. Works for raised beds, containers, or in-ground gardens. Here’s exactly how to do it without second-guessing your setup.
📚 In This Guide
- What you need
- Instructions
- Tips and common mistakes
- Wrapping up and next steps
What you need
- ● Tomato cages: 1–4 cages, depending on the number of tomato plants (standard size: 4–6 feet tall, 18–24 inches in diameter). Opt for heavy-duty metal or galvanized steel for extra stability.
- ● Tomato plants: Seedlings or young plants (1–2 per cage, spaced 18–24 inches apart). Choose indeterminate varieties (like Roma or Cherry) for best results with cages.
- ● Garden soil or potting mix: A well-draining blend enriched with compost (1–2 bags, depending on pot size). Aim for at least 10–12 inches of depth per plant.
- ● Containers or in-ground space: Containers: 5-gallon pots or larger (1–2 per plant, with drainage holes).
- ● In-ground: A sunny spot with loose, fertile soil (amend with compost if needed).
- ○ Stakes or ties (optional but helpful): Wooden or bamboo stakes (5–6 feet tall) + soft plant ties or twine (for extra support if cages bend).
- ● Garden gloves: 1 pair (to protect your hands from thorns and dirt).
- ● Trowel or shovel: For digging holes or mixing soil.
- ● Watering can or hose: With a gentle spray nozzle to avoid disturbing roots.
- ○ Pruning shears (optional): For trimming excess foliage or removing suckers later.
- ● Choose a location with 6–8 hours of sunlight daily and protection from strong winds.
- ● Wait until after the last frost date in your area (or start seedlings indoors 6–8 weeks early).
- ● Test soil pH (aim for 6.0–6.8); amend with lime or sulfur if needed.
Tips & tricks for sturdy tomato cage support
Here's what I've learned after years of growing tomatoes—these tricks make all the difference between a flimsy setup and a garden that produces bushels of fruit.
Cage Material Matters: The 16-18 gauge galvanized wire specification isn't arbitrary—it's the sweet spot between flexibility and strength. I've seen plastic cages snap under 5-pound tomatoes, while heavy-duty metal cages with 4-6 stakes handle 10-pound monsters without blinking. For windy areas, consider adding a fifth stake at a 45-degree angle for extra diagonal support. The wider 6-8 inch openings also make pruning and harvesting a breeze compared to tighter designs.
Timing is Everything: Installing cages at planting time (Step 2) prevents root disturbance later, but I've learned the hard way that this only works if you position them perfectly. Use a small shovel to create a shallow trench around the base before pressing the cage in—this gives you better leverage without damaging roots. For indeterminate varieties, the wooden stake technique creates a central anchor point that prevents the entire cage from spreading outward as the vine grows.
Tying Technique: The soft plant ties or old T-shirt strips in Step 3 are game-changers compared to wire or plastic ties. I cut my T-shirt strips to about 8 inches long and tie them in a loose bow that can be easily adjusted. The key is to tie loosely at first—tighten only when you see the vine has grown another 6-8 inches. This prevents constriction that can strangle the stem as it thickens. I adjust these ties every 2-3 weeks throughout the season to accommodate growth.
Maintenance Secret: The stability check after first fruit set (Step 4) is where most people fail. I've seen cages that looked perfect at planting time collapse under fruit weight because they weren't properly anchored. Drive additional stakes at 45-degree angles and secure with twist ties—this creates a triangular support system that's far more stable than vertical stakes alone. And don't forget to prune those lower leaves that touch the soil—they're not just unsightly, they're disease magnets that drain energy from your fruit production.
Pro Tips for Place Tomato Cages
- Here's what I've learned after years of growing tomatoes—these tricks make all the difference between a flimsy setup and a garden that produces bushels of fruit.
- Cage Material Matters: The 16-18 gauge galvanized wire specification isn't arbitrary—it's the sweet spot between flexibility and strength.
- Timing is Everything: Installing cages at planting time (Step 2) prevents root disturbance later, but I've learned the hard way that this only works if you position them perfectly.
Frequently asked questions
Got questions about tomato cages? You’re not alone! Here are answers to the most common concerns—from timing to troubleshooting—to help you grow like a pro.
When is the best time to install tomato cages?
Install tomato cages before transplanting seedlings into the ground or containers. This gives roots time to establish and prevents uprooting later. If using them with mature plants, do it gently to avoid damaging stems—just press the cage into the soil beside the plant and guide vines through the openings.
How deep should tomato cages be placed in the soil?
Sink cages at least 6–8 inches deep to ensure stability. The more buried, the less likely they’ll topple in wind or as the plant grows. For heavy vines (like beefsteak tomatoes), add stakes inside the cage or tie vines to a trellis for extra support.
Can I reuse tomato cages from year to year?
Clean cages with a bleach solution (1 part bleach to 9 parts water) to kill pests and diseases. Rinse thoroughly and store in a dry place. Just check for rust or weak spots—replace if they’re unsafe. Pro tip: Add a layer of cardboard at the base to deter burrowing pests like cutworms!
What if my tomato cages collapse or aren’t sturdy enough?
Collapsing cages often mean they’re too small or weak for your tomato variety. Upgrade to heavier-duty cages (6–8 feet tall) or combine them with bamboo stakes or wire mesh for extra support. For indeterminate tomatoes, consider a tomato trellis instead.
Are there alternatives to traditional tomato cages?
Yes! Try these space-saving options:
- Bamboo stakes or wooden dowels: Tie vines to stakes as they grow (great for small spaces).
- Wire tomato trellises: Sturdy and reusable—ideal for heavy varieties.
- Fabric plant supports: Wrap around plants for a natural look (best for determinate tomatoes).
- DIY cages: Bend wire fencing or chicken wire into a cylinder and bury it.
Wrapping up and next steps
Placing tomato cages correctly is your secret weapon for bushier, healthier, and more productive plants! 🌱 With the right materials, timing, and technique, you’ll give your tomatoes the support they need to thrive—without the hassle.
Whether you’re a first-time gardener or a seasoned pro, every step you take strengthens your harvest potential.
Ready to level up your garden game? Start by prepping your soil, then choose the perfect cage and plant with confidence. Once your tomatoes are growing strong, secure the cage early and prune regularly to keep them on track.
Your future self (and your taste buds!) will thank you.
Now, grab those gloves and get planting—your juicy, vine-ripened tomatoes are waiting! 🍅✨